Database Access with Twingate
Securely access your private and protected databases with Twingate.
Database Access Guides
Welcome to the world of database connectivity with Twingate! These guides will help you to configure Twingate to securely access your databases, whether they are hosted in the cloud or on‑premises. By using Twingate, you ensure that only authorized users and services can connect to your databases, providing a secure, hassle‑free experience with minimal configuration.
Use the menu below to jump to the guide that best fits your database access needs. If you’re unsure where to start, the General Setup for Database Access section will get you oriented.
- General Setup for Database Access
- Database Services
- Client Access Examples
- Troubleshooting Database Connections
General Setup for Database Access
Before we dive into the particulars of each service, let’s lay some groundwork. If you haven’t already defined a Remote Network or deployed a Connector, start there. Picture the Remote Network as the private venue where your Resources live, and the Connector as the discreet, outbound-only host who slips your guests an exclusive invite—no public doors, no knocking, just secure, invite-only access.
Private Access or Self‑hosted Database:
When your database runs in the same private network or VPC as your Twingate Connector, you should avoid exposing any public IP addresses. Instead, allow access from the Connector’s private IP address:
- Create a Resource in Twingate for your database endpoint. This could be a private IP address (
10.0.1.15) or an internal DNS name (db.internal.example.com). - Identify the Connector’s Private IP address: In the Connectors page you’ll see the private IP address assigned to your Connector inside your Remote Network. Jot this down - it’s the only address your database needs to know.
- Configure Firewall/Security Group Rules on your database host or VPC to permit connections from the Connector’s private IP address on the appropriate port. Keeping traffic inside your network minimizes exposure and maximizes performance.
Public Access or SaaS Database:
Some managed database services (e.g. MongoDB Atlas, AWS RDS/Aurora public endpoints, Azure SQL Database, Cloud SQL, Redis Cloud, Snowflake) can only be reached via the public internet. In these situations you’ll use the Connector’s public egress IP address, because the service can’t see your private network. Where providers support private connectivity (e.g. AWS VPC endpoints or PrivateLink), use the private IP address instead.
- Create a Resource in Twingate for your database and management endpoints (e.g.
cloud.mongodb.comorrds.amazonaws.com). This tells Twingate where to send your traffic. - Find the Connector’s Public IP Address: On the Connectors page you’ll see the public IP address your Connector uses when it reaches out to the internet. This is the address your SaaS database will recognize.
- Configure IP Access Lists (or network policies) on your database service by adding the Connector’s public IP address. This might involve updating firewall rules, IP access lists, or network policies depending on the service.
Database Services
These guides walk you through securing connections to specific database services. For other databases, follow the general (Public or Private) steps above to create a Twingate Resource and add the Connector’s IP address to your database’s allow list.
AWS Database Access Guide
Follow the steps in the AWS Database Access Guide to secure your AWS database connections using Twingate, including how to configure security groups and test your connection.
GCP Database Access Guide
Follow the steps in the GCP Database Access Guide to secure your GCP database connections using Twingate, including how to configure authorized networks or use the Cloud SQL Auth Proxy.
Azure Database Access Guide
Follow the steps in the Azure Database Access Guide to secure your Azure database connections using Twingate, including how to configure firewall rules and test your connection.
Oracle Database Access Guide
Follow the steps in the Oracle Database Access Guide to use Twingate for secure Oracle Database connections. You’ll see how to allow the Connector’s IP address in firewall or sqlnet.ora configuration, restrict access to specific listeners, and test connectivity with SQL Plus or SQL Developer.
MongoDB Access Guide
Follow the steps in the MongoDB Access Guide to configure Twingate for secure access to MongoDB & MongoDB Atlas, including how to set up IP Access Lists, connect using mongosh, and troubleshoot common issues.
Redis Access Guide
Follow the steps in the Redis Access Guide to securely connect to Redis instances, whether self-hosted or managed on Redis Cloud using Twingate. You’ll learn how to allow the Connector’s IP address in Redis’ configuration or firewall, set up authentication, and verify access with the redis-cli.
Snowflake Access Guide
Follow the steps in the Snowflake Access Guide to configure Twingate for secure access to Snowflake. The guide covers creating network rules and policies that include your Connector’s public IP address, configuring access for specific roles, and verifying connectivity via the Snowflake web UI or CLI.
Client Access Examples
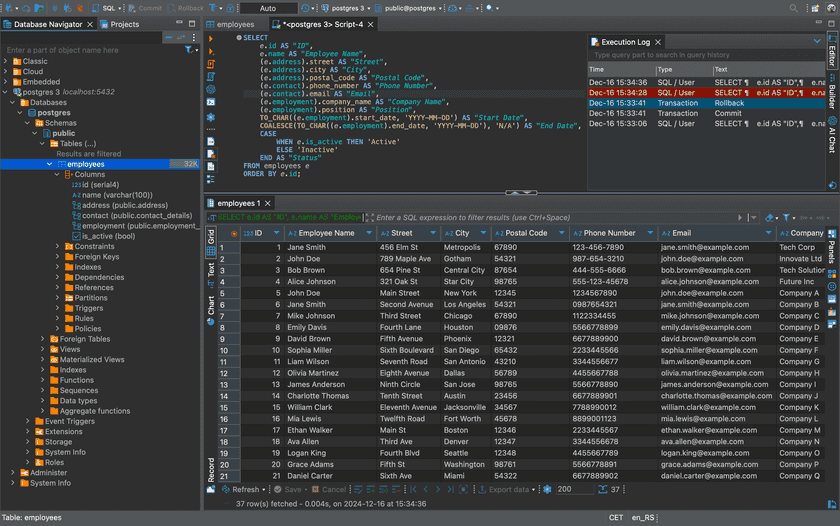
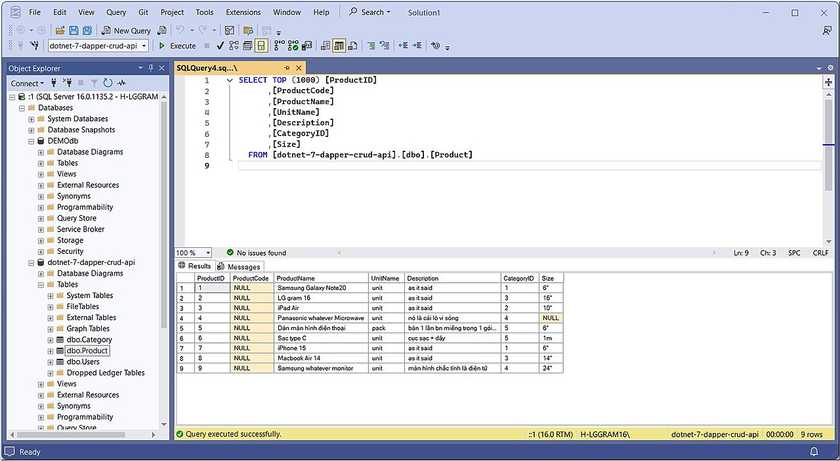
If you prefer using a graphical interface for querying and managing your databases, you can connect to your database using a client like DBeaver or Microsoft SQL Server Management Studio (SSMS).
Using DBeaver for Database Access

DBeaver is a flexible, open‑source database management tool that supports various databases (e.g. MySQL, PostgreSQL, MongoDB). Here’s how to connect to your database using DBeaver:
-
Download and Install DBeaver:
- Visit DBeaver’s official website to download the version for your operating system.
-
Configure the Connection:
- Ensure that your Twingate Connector is active, and that you have a Resource defined to route traffic securely through Twingate.
- Confirm the Twingate Client is active and that you can see the database Resource in your Client’s Resources list.
-
Add a New Database Connection:
- Open DBeaver, click on Database → New Database Connection.
- Choose the appropriate database type (e.g. MySQL for AWS RDS, MongoDB for MongoDB Atlas, etc.).
- Enter your database connection details: hostname (e.g.
your-db-instance.rds.amazonaws.com), username, and password.
-
Test the Connection:
- Click Test Connection to ensure that the connection is successful. Once verified, click Finish to save the connection.
-
Query and Manage Your Database:
- After connecting, you can query and manage your database via DBeaver’s interface.
Using Microsoft SQL Server Management Studio (SSMS) for SQL Server Databases

SSMS is commonly used for managing Microsoft SQL Server instances. Here’s how to connect using SSMS:
-
Download and Install SSMS:
- Go to Microsoft’s website to download the tool.
-
Configure the Connection:
- Ensure that your Twingate Connector is active, and that you have a Resource defined to route traffic securely through Twingate.
- Confirm the Twingate Client is active and that you can see the database Resource in your Client’s Resources list.
-
Add a New Connection in SSMS:
- Open SSMS, click on Connect → Database Engine.
- Enter the Server Name (e.g.
your-db-instance.rds.amazonaws.comfor AWS RDS SQL Server). - Choose the appropriate Authentication Method and enter the credentials.
-
Test the Connection:
- Click Connect to establish the connection to the database through Twingate.
-
Query and Manage Your Database:
- Once connected, you can perform database management tasks such as querying, configuring security, and running administrative tasks within SSMS.
Troubleshooting Database Connections
If you’re having trouble connecting to your database via Twingate, check the following common issues:
-
Connection Refused: Ensure that your database’s IP access list includes the Connector’s IP addresses (use the private IP address for databases in your private network and the public IP address for SaaS services).
-
Slow Connections: Check the health of your Connectors and make sure there are no firewall rules blocking access to the database.
-
Timeouts: Verify your Connectors are online, reachable, and properly configured.
-
Twingate Recent Activity: In the Admin Console, open Recent Activity for the Resource to see what’s happening:
-
DNS Failed: The Client sent traffic to the Connector, but the Connector couldn’t resolve the hostname. Ensure the DNS hosted zone is tied to the VPC, the DNS server is defined as a Twingate Resource (if self-hosting), or there’s a valid route from the Connector to the DNS server.
-
Connection Failed: The Client captured the traffic, sent it to the Connector, and the Connector tried but couldn’t reach the destination. Check that a route exists between the Connector and database, IP allow lists are correct, and firewall/security group rules allow the port on both ends.
-
No Activity: The Client didn’t send traffic to the Connector. Make sure the Client is running, you have access to the Resource, and no other VPN is hijacking the connection.
-
For more troubleshooting tips, refer to the Twingate Troubleshooting Guide.
Further Help
Twingate ensures that only authorized, secure traffic reaches your databases. Whether it’s MongoDB, RDS, MySQL, or any other service, Twingate makes protecting those connections simpler and stronger. Use Connector private IP addresses whenever possible to keep traffic inside your private network, and switch to public IP addresses only when the service requires it.
Need help or tackling something complex? Our team is here to assist, and our Reddit community is always ready to share tips and solutions.
Related Resources
Last updated 2 months ago