Snowflake Access with Twingate
Secure network access to Snowflake using Twingate
Snowflake’s cloud-native data platform is accessible via HTTPS using fully qualified account URLs (e.g. myorg-myaccount.snowflakecomputing.com). By default, Snowflake accepts connections from any IP address. To lock down access, you can create network policies that specify allowed IP addresses or private endpoint identifiers.
Twingate makes it easy to route Snowflake traffic (both Snowsight UI and database queries) through secure Connectors and enforce network policies without managing static allowlists manually.
Understanding Snowflake network policies
Network policies control which IP addresses or private network identifiers may access your Snowflake account. The Snowflake network policy contains one or more network rules. Each rule defines allowed or blocked lists of IP addresses or private endpoint identifiers (such as AWS VPC endpoint IDs or Azure private link IDs). When you add a network rule to the allowed list of a policy, only those identifiers may connect; all others are implicitly blocked.
Prerequisites
- Remote Network & Connector – Set up a Remote Network in Twingate and deploy at least one Connector.
- Place Connectors in a secure egress location.
- Note each Connector’s public IP address (Twingate Admin Console → Remote Network → Connectors → Public IP).
- Snowflake account – Admin privileges are required to create and apply network policies.
Tip: Use PrivateLink for Private Connectivity
If you are deploying in AWS, Azure, or GCP, Snowflake supports PrivateLink (AWS/Azure) and Private Service Connect (GCP) for fully private connections.
With these features enabled:
- Your Connector connects to a private endpoint inside your VPC/VNet.
- All traffic stays on the cloud provider’s internal network fabric — never traversing the public internet.
- No need to allowlist Connector public IP addresses in Snowflake network policies — access is automatically scoped to your private network.
See Snowflake’s docs on Configuring Private Connectivity for provider-specific setup steps.
Snowflake: Securing Database/Warehouse Access
Snowflake query access (via JDBC, ODBC, SnowSQL, or APIs) is also controlled by network policies. By scoping a network policy, you can lock access down Twingate Connector Public IP addresses.
Step 1 – Locate the Network Rules Interface
You can manage network policies either:
-
Via SQL (see commands in Snowflake’s SQL Reference).
-
In the Snowsight UI
- Log in with a user that has the ACCOUNTADMIN or SECURITYADMIN role.
- Go to Admin → Security → Network Rules.
- Click + Network Rule to create or update a policy.

Network Rules 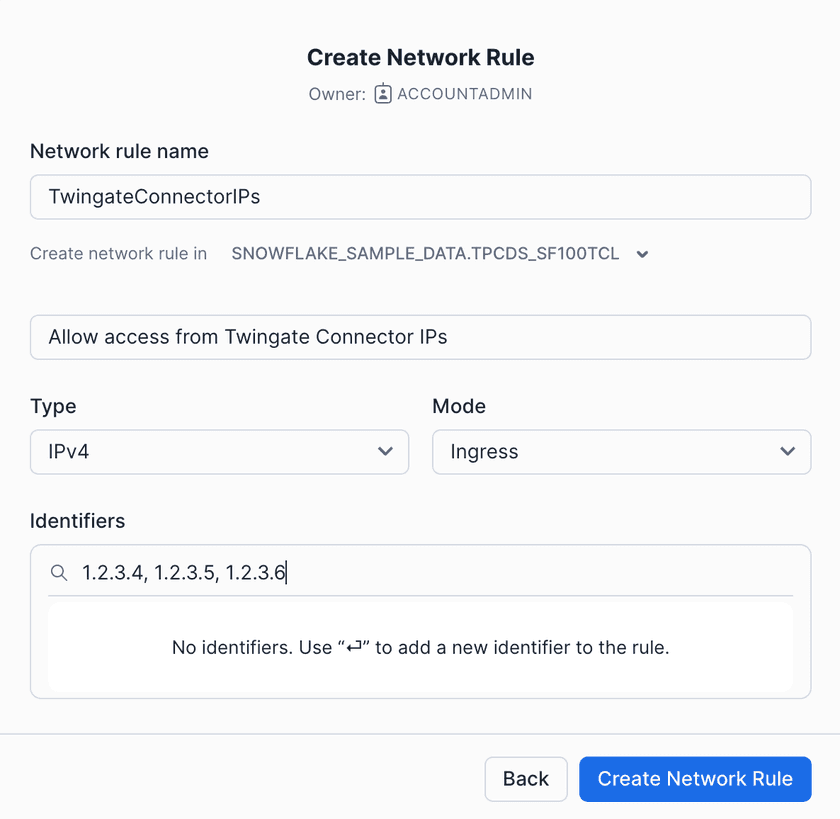
Create a Network Rule scoped to Twingate Connector IP addresses 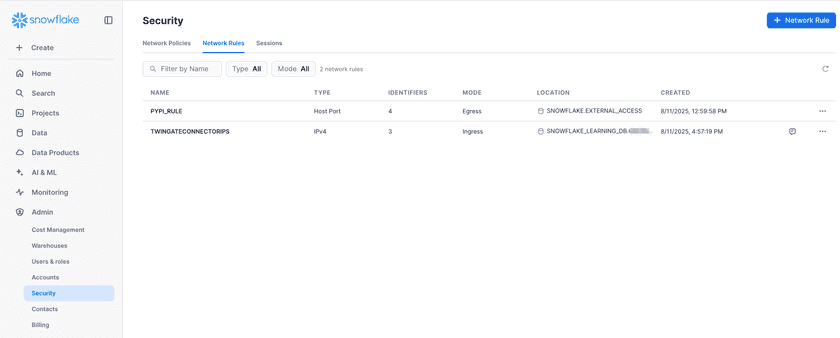
Added Twingate Connector Network Rule


Step 2 – Create a Twingate Resource for Query Access
- In the Twingate Admin Console, create a Resource for your Snowflake account URL (e.g.
*.snowflakecomputing.com, ormyorg-myaccount.snowflakecomputing.com). - Set Port to
443(HTTPS).

Step 3 – Connect via Twingate
Ensure the Twingate Client is connected — queries will only succeed if traffic comes from authorized Connector IP addresses. Configure a Snowflake Connection for the Snowflake CLI.
-
Add connection to
config.tomlorsnow connection add:# config.toml[connections.myconn]account = "myaccount"user = "jondoe"role = "accountadmin" -
Export your connection-scoped password as an environment variable
export SNOWFLAKE_CONNECTIONS_MYCONN_PASSWORD='abc123' -
List available connections
snow connection list# +---------------------------------------------------------------------------------------------------------+# | connection_name | parameters | is_default |# |-----------------+--------------------------------------------------------------------------+------------|# | myconn | {'account': 'abc123', 'user': 'demo', 'password': '****', 'role': | True |# | | 'accountadmin'} | |# +---------------------------------------------------------------------------------------------------------+ -
Set default connection
snow connection set-default myconn# Default connection set to: myconn -
Test API access over Twingate
snow sql -q "select current_user();"# Twingate Connected:# select current_user();# +----------------+# | CURRENT_USER() |# |----------------|# | DEMO |# +----------------+# Twingate Disconnected:# ╭─ Error ─────────────────────────────────────────────────────────────────────────────────────────────────╮# │ Invalid connection configuration. 250001 (08001): None: Failed to connect to DB: │# │ xzb85297.snowflakecomputing.com:443. Incoming request with IP/Token 3.132.125.217 is not allowed to │# │ access Snowflake. Contact your account administrator. For more information about this error, go to │# │ https://community.snowflake.com/s/ip-xxxxxxxxxxxx-is-not-allowed-to-access. │# ╰─────────────────────────────────────────────────────────────────────────────────────────────────────────╯
Snowflake: Securing Snowsight (Admin Console)
Restricting access to Snowsight (the Snowflake web UI) is as important as securing query and API access. By default, Snowsight is reachable from any IP address. Snowflake uses the same network policy framework for Snowsight as for warehouse connections.
Step 1 – Locate the Network Policies Interface
You can manage network policies either:
-
Via SQL (see commands in Snowflake’s SQL Reference).
-
In the Snowsight UI
- Log in with a user that has the ACCOUNTADMIN or SECURITYADMIN role.
- Go to Admin → Security → Network Policies.
- Click + Network Policy to create or update a policy.
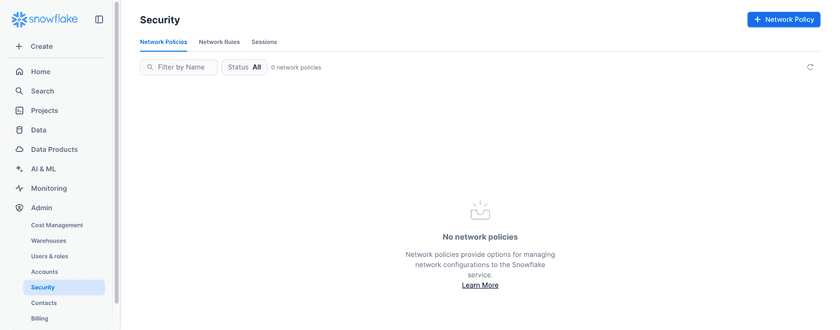
Network Policies 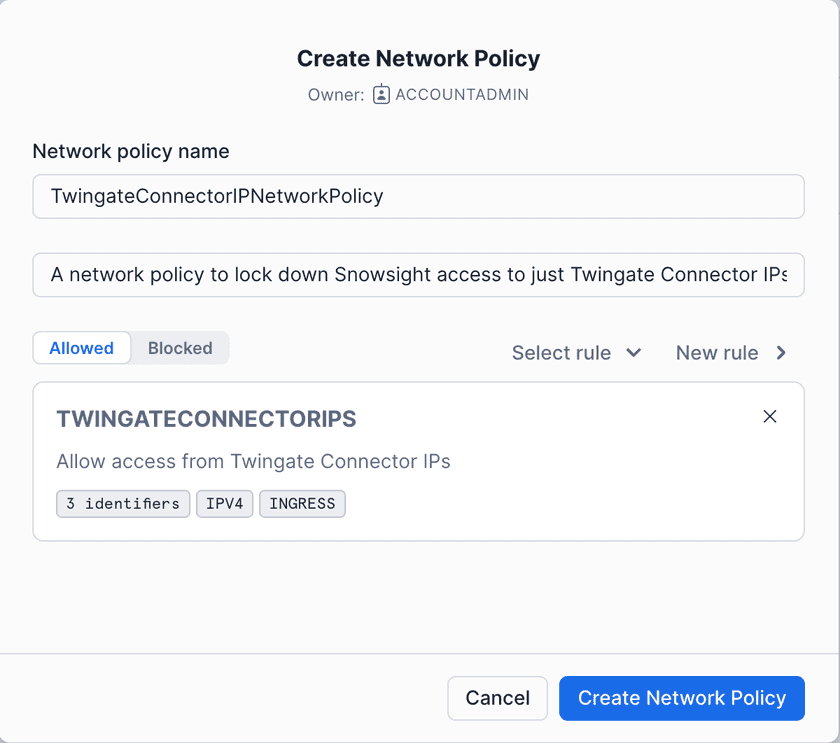
Create a Network Policy scoped to Twingate Connector IP addresses 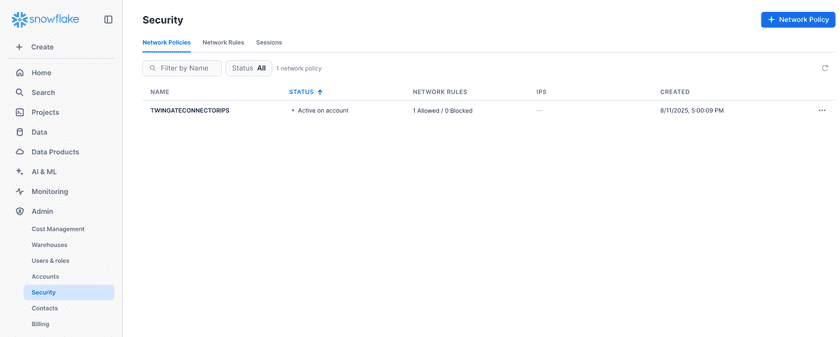
Added Twingate Connector Network Policy (not active yet) 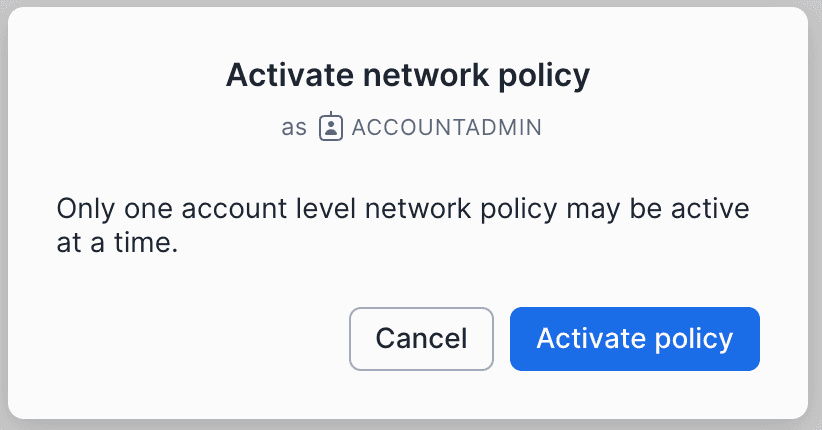
Activate Twingate Connector Network Policy


Step 2 – Create Twingate Resources for Snowsight
- In the Twingate Admin Console, create a Resource for your Snowsight account URL (e.g.
*.snowflake.com, orapps-api.c1.us-west-2.aws.app.snowflake.com). - Set Port to
443(HTTPS). - Use the same Remote Network as your warehouse resources for consistency.

Step 3 – Connect via Twingate
- Run the Twingate Client and connect. Ensure the Twingate Client is connected — queries will only succeed if traffic comes from authorized Connector IP addresses.
- Visit https://app.snowflake.com or your regional Snowsight URL.
- The UI should only load when traffic comes from an authorized Connector IP address.

Tip: Use SSO for additional control
If your organization uses SSO, combine SaaS App Gating with network policy restrictions for identity-based enforcement.
Troubleshooting Database Connections
If you’re having trouble connecting to your database via Twingate, check the following common issues:
-
Access denied: Confirm that your Connector’s IP addresses are included in the network rule and that the policy is applied to the account. Check for typos in the IP CIDR notation.
-
Incorrect account URL: Use the full account identifier shown in the Snowflake UI (e.g.
myorg-myaccount); missing segments can cause connection failures. -
Multiple network policies: Snowflake evaluates the most restrictive applicable policy. If you assign a user‑level policy that is more restrictive than the account‑level policy, ensure that the Connector IPs are included in both.
-
Slow Connections: Check the health of your Connectors and make sure there are no firewall rules blocking access to the database.
-
Timeouts: Verify your Connectors are online, reachable, and properly configured.
-
Twingate Recent Activity: In the Admin Console, open Recent Activity for the Resource to see what’s happening:
-
DNS Failed: The Client sent traffic to the Connector, but the Connector couldn’t resolve the hostname. Ensure the DNS hosted zone is tied to the VPC, the DNS server is defined as a Twingate Resource (if self-hosting), or there’s a valid route from the Connector to the DNS server.
-
Connection Failed: The Client captured the traffic, sent it to the Connector, and the Connector tried but couldn’t reach the destination. Check that a route exists between the Connector and database, IP allow lists are correct, and firewall/security group rules allow the port on both ends.
-
No Activity: The Client didn’t send traffic to the Connector. Make sure the Client is running, you have access to the Resource, and no other VPN is hijacking the connection.
-
For more troubleshooting tips, refer to the Twingate Troubleshooting Guide.
Related Resources
- MongoDB Access Guide Secure access to MongoDB Atlas and self‑hosted MongoDB.
- Redis Access Guide Secure access to Redis Cloud and self‑hosted Redis.
- SaaS App Gating Guide Gate access to SaaS applications with identity-based controls.
- Connector Best Practices Learn best practices for deploying and managing Twingate Connectors.
- Security Policies Guide Understand and implement security policies with Twingate.
Last updated 2 months ago