Entra ID (formerly Azure AD) Configuration
Business & Enterprise only
Note that our Entra ID (formerly Azure AD) integration is limited to the Business and Enterprise product plans. See our pricing page for more information.
Background
Setting up Entra ID integration with Twingate will enable both OpenID Connect user authentication and user and group sync with Entra ID. There are two steps to set up this integration:
- Enable the Entra ID integration in Twingate and sign in to your Entra ID tenant.
- Configure the Twingate application in the Microsoft Entra ID Gallery and enable SCIM for user and group sync.
Twingate configuration
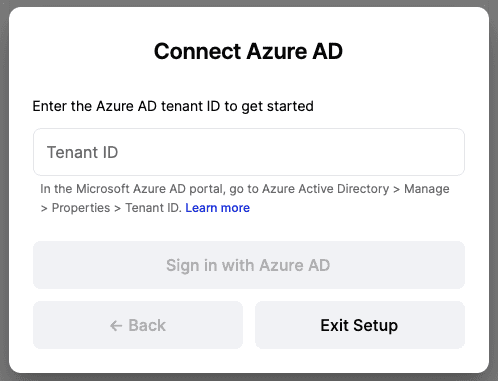
Before proceeding with the Twingate Entra ID gallery app configuration, you need to sign in with Entra ID in the Twingate Admin Console. You can do this from Settings > Identity Provider > Entra ID.

To retrieve the Entra ID tenant ID:
- Open the Azure portal at https://portal.azure.com.
- Navigate to Entra ID from the left side menu.
- Copy the
Tenant IDfrom the Tenant information box. - Paste the
Tenant IDinto Twingate as shown above, and click “Sign in with Entra ID”.
Once you have entered the Azure tenant ID and have verified that you can sign in, continue with the steps below.
Microsoft Entra ID Gallery application
Once you have completed the initial step of signing into Entra ID, above, you can proceed with setting up the official Twingate gallery application. Detailed instructions are available in Microsoft’s Entra ID documentation.
To complete the Entra ID configuration, please follow the instructions below on Microsoft’s website:
→ Twingate Entra ID Gallery app instructions
The guide above will cover:
- Adding the Twingate Entra ID Gallery app to your Entra ID instance
- Determining which users and groups should be synced to Twingate
Assignment Required setting within Entra ID
In Entra ID, the Assignment Required setting is set to No by default. This allows any user that is part of the Entra ID domain to log into Twingate even if they have not been assigned to the enterprise application. This will create a user within Twingate at time of login that is not managed by Entra ID. As a result, we highly recommend changing the Assignment Required setting to Yes so that Twingate access is restricted to only users that have been assigned to the enterprise application.
Entra ID accounts without email addresses
Entra ID allows configuring accounts without an email address. Our Help Center, which we use to provide you with technical support services, requires accounts to have an email address to access support. Twingate signs in users to the Help Center using their synced email address.
Consequently, accounts that need access to support are required to have an email address. If an Entra ID account does not have an email address, it will not be able to login to the Help Center. Adding an email address to a user by setting the “Email” property for their account will sync the email address with Twingate and enable that user to access the Help Center.
Last updated 4 months ago