How to Deploy a Connector on Azure
Overview
There are several options available for deploying Connectors in Azure depending on your particular environment and needs. In most cases, you can use the Connector deployment page in the Admin Console to configure and deploy your Connector.
Check your subnet configuration
The subnet in which you deploy a Connector requires outbound Internet access, both to download the Connector container image and to connect to Twingate. Check our Best Practices for Connectors guide for more information.
Peer-to-peer connections help you to provide a better experience for your users and to stay within the Fair Use Policy for bandwidth consumption. Learn how to support peer-to-peer connections.
Azure Virtual Machine Deployment
If you are deploying a custom virtual machine, you can follow the general Linux Connector deployment instructions for full details.
In summary:
- Docker-based deployment is compatible with any 64-bit Linux distribution that Docker supports.
- The Connector
systemdservice is currently supported on Ubuntu, Fedora, Debian, and CentOS.
Please see our Connector Best Practices overview for general recommendations as well as hardware recommendations for Azure.
Azure Container Instance Deployment
We recommend using Azure’s Container Instance service to deploy Connectors. The Admin Console Connector provisioning workflow includes an Azure CLI deployment command that makes Connectors very easy to deploy.
Prerequisites
You will need the following information in order to deploy a Connector as a Container Instance on Azure:
- Resource group name The Resource group that the Connector Container Instance will be deployed within
- Virtual network name The name of the Virtual network within the Resource group
- Subnet name The name of the subnet within the Virtual network
- DNS server(s) (optional) By default, the Container instance will use the default configured name resolution within your Virtual network. However please note that if you are using custom DNS servers for your VNet then these will not be recognized by the Container Instance service automatically. In this situation we recommend using the “Custom DNS” option when deploying your Connector and specifying your DNS servers manually
- Docker Hub account (optional, highly recommended)
Due to Docker Hub rate limiting, deploying the Connector via an Azure Container Instance may lead to a
RegistryErrorResponseerror. Using a Docker Hub account will bypass this rate limit. See below for instructions on specifying your Docker Hub account when running the deployment command.
Subnet selection for Container Instances
In most cases, Azure requires that Container Instances be deployed into their own subnet. We therefore recommend that you create a new subnet within an existing virtual network to ensure that Container Instance deployment will succeed.
If this is the first time that you have deployed a Container Instance in your Azure environment, you may also need to register the service in Azure. You can do this with the following command:
az provider register --namespace Microsoft.ContainerInstanceTwingate Connector Azure Container Instance Deployment
- Log in to your Twingate Admin Console, click on Remote Networks then on the Remote Network on which you want to deploy a Connector. From there, scroll down and click on the Add Connector button on the left-hand side of the screen
- Click on the new Connector that was created. On the deployment page click the Azure option at the top of the screen
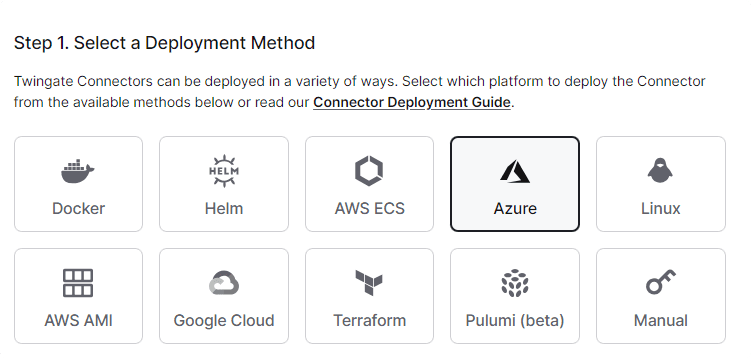
Choosing the Azure Option - Scroll down to step 2 and click the button to generate tokens. It will have you re-authenticate and then bring you back to this page
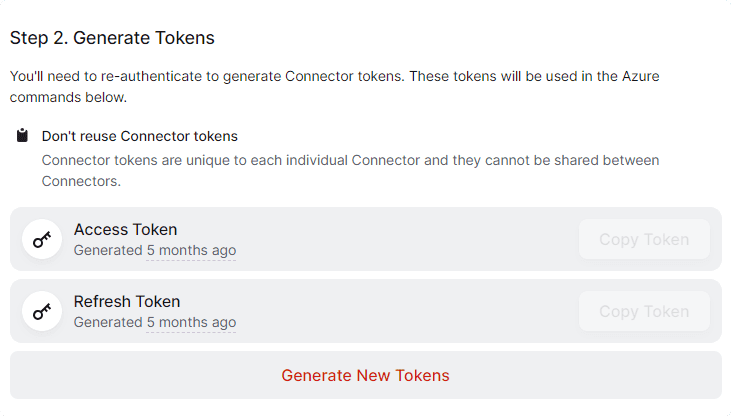
Generate Tokens - Scroll down to step 3 and fill out the required information about your Azure environment, as well as enable and configure the optional features
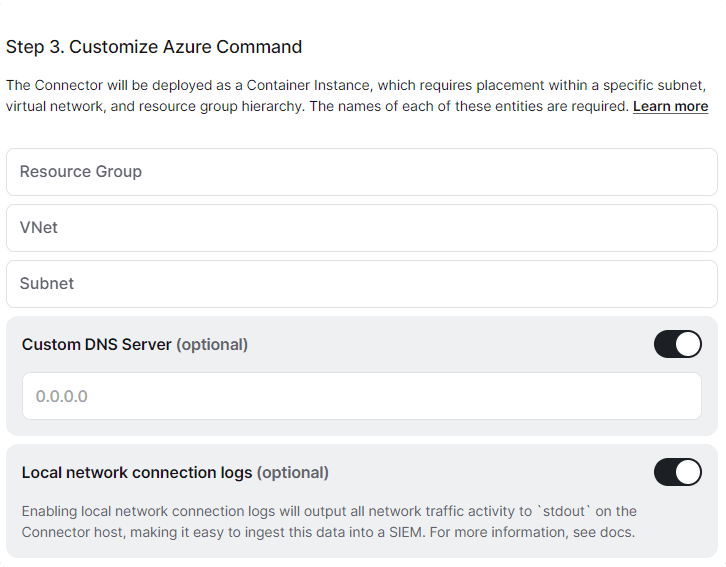
Fill out the Azure Container Configuration - Scroll down to step 4 and copy the completed command and run it in the Azure Cloud CLI
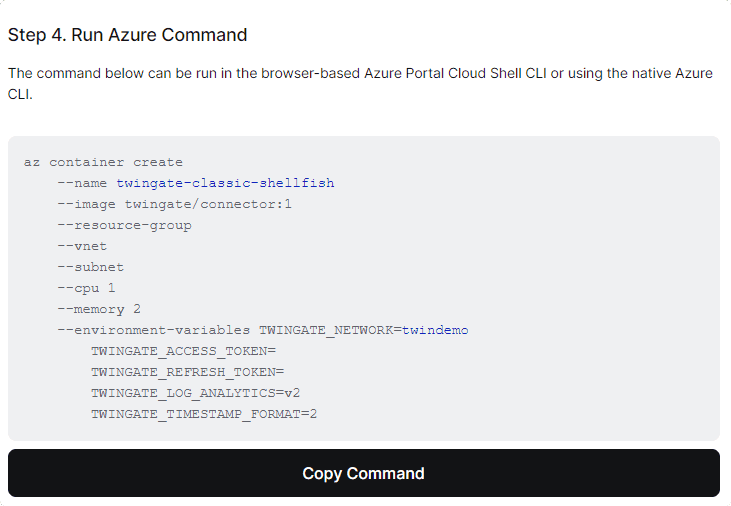
Completed Deploy Command


Docker Hub rate limiting
Docker Hub rate limiting can lead to the Azure Container Service throwing a RegistryErrorResponse error. When deploying a Connector using Azure Container Instances, we recommend using using a Docker Hub account to bypass the default rate limits. To use your Docker Hub account, add the following parameters to the deployment command:
--registry-username "Docker Hub username" --registry-password "Docker Hub password" --registry-login-server index.docker.ioAs an alternative to using a password, you may pass in a personal access token. If you sign into Docker Hub using SSO, e.g. Google or Github, you must pass in a PAT instead of a password.
Azure Kubernetes Service (AKS) Deployment
Connectors can also be deployed on an AKS cluster using the official Twingate Helm chart. If you intend use Twingate for K8s, you may also want to look at our Kubernetes Best Practices Guide.
Infrastructure as Code Deployment
Deployment automation is available using Terraform, Pulumi, or the Twingate API.
Don't re-use Connector tokens
Because tokens are specific to each running Connector, we recommend creating separate task definitions for each Connector instance you plan to run.
Updating the Connector
Updating Connectors running as a systemd service in a custom Azure VM can be done manually by using the Linux package manager, or automatically by setting up a scheduled task to check for updates. We recommend staggering updates across multiple Connectors to avoid downtime. For more details check our Systemd Connector Update Guide.
Connectors that are running in an Azure container can be upgraded through the Azure CLI. For more details check our Azure Connector Update Guide.
Last updated 1 month ago