MongoDB Access with Twingate
Securely connect to MongoDB Atlas and self‑hosted MongoDB using Twingate
MongoDB Access with Twingate
MongoDB can be deployed as a fully managed MongoDB Atlas cluster or as a self‑hosted instance. Twingate allows you to route traffic securely to either deployment while enforcing network access controls.
- MongoDB Atlas: Securing Databases
- MongoDB Atlas: Securing Admins
- Self-hosted MongoDB: Securing Databases
Prerequisites
- Remote Network & Connector – Create a Remote Network in Twingate and deploy one or more Connectors:
- Place Connectors inside the same network as the database (for self-hosted) or in a secure egress location (for Atlas).
- Use the private IP address of Connectors for firewall rules whenever possible.
- Use the public IP address only when required by the service (e.g. Atlas IP Access List).
- MongoDB cluster or instance – Either a MongoDB Atlas project and cluster, or a self‑hosted MongoDB server.
Tip: Use PrivateLink for Private Connectivity
If you are deploying in AWS, Azure, or GCP, MongoDB Atlas supports PrivateLink (AWS/Azure) and Private Service Connect (GCP) for fully private connections.
With these features enabled:
- Your Connector connects to a private endpoint inside your VPC/VNet.
- All traffic stays on the cloud provider’s internal network fabric — never traversing the public internet.
- No need to allowlist Connector public IP addresses in the Atlas IP Access List — access is automatically restricted to your private network.
See MongoDB’s docs on Private Endpoint Connections for setup steps.
MongoDB Atlas: Securing Databases
MongoDB Atlas restricts incoming connections to IP addresses defined in its IP Access List.
Step 1 – Create a Twingate Resource

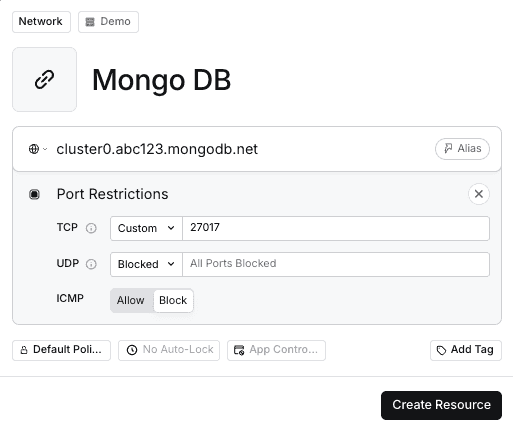
- In the Twingate Admin Console, create a Resource for your MongoDB Atlas cluster host (e.g.
cluster0.abc123.mongodb.net). Atlas uses TLS on port27017by default for direct connections. If using the SRV connection string, specify port27017. See MongoDB’s reference to default ports. - Note the public IP addresses of your Connector(s).
Step 2 – Add Connector IP Addresses to the IP Access List

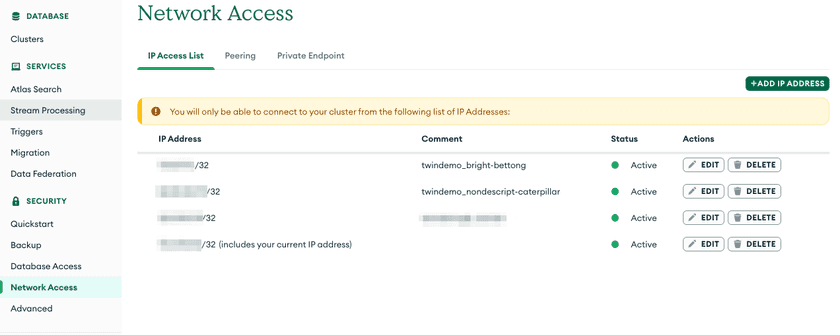
- Log in to the MongoDB Atlas console and open Network Access.
- Click Add IP Address and enter the public IP address of your Connector. Repeat for each Connector. This adds the address to the IP Access List and allows Atlas to accept connections from it.
- Save the changes. Connections from other IP addresses will be blocked.
Step 3 – Connect to your database

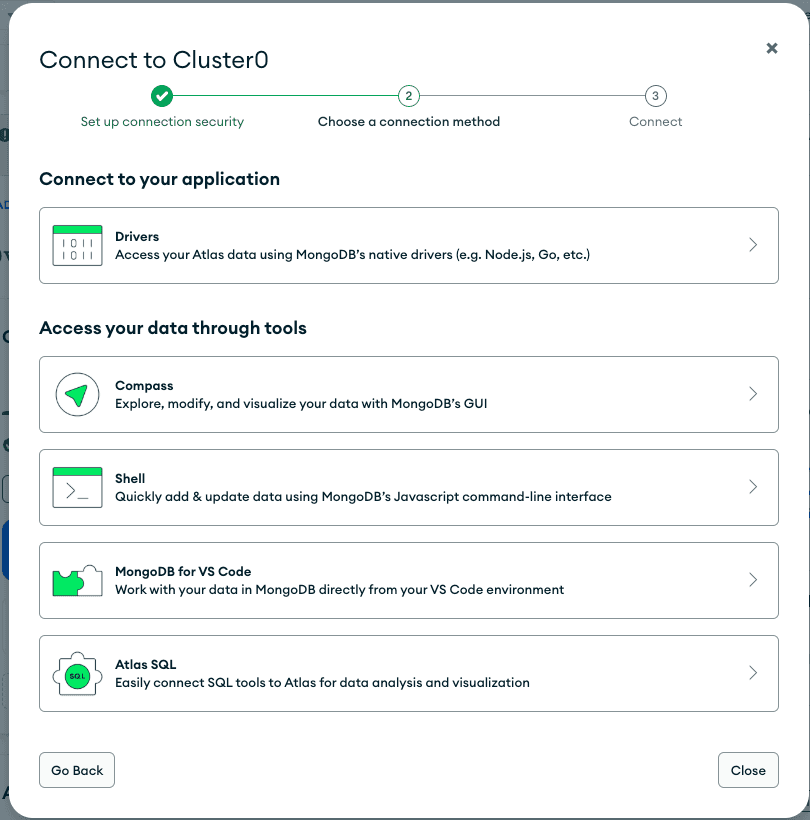
Use mongosh or another MongoDB client with the Twingate Client running. Example:
mongosh "mongodb+srv://cluster0.abc123.mongodb.net/mydatabase" --username <username> --password <password>For direct (mongodb://) URIs, include --port 27017.
MongoDB Atlas: Securing Admin Access
Restricting access to the Atlas Admin Console (cloud.mongodb.com) is as important as securing the databases themselves. By default, the console is accessible from any IP address. MongoDB can enable IP Access Lists for the Atlas UI at the organization level, these are separate from database project IP allow lists.
Step 1 – Request IP Access Lists for the Atlas UI
- In the MongoDB Atlas console, go to Organization → Settings.
- If you don’t see IP Access List for the Atlas UI, contact MongoDB Support to enable it.
Step 2 – Create a Twingate Resource for the Atlas UI
-
In the Twingate Admin Console, create a Resource for:
cloud.mongodb.comPort:
443(HTTPS) -
Use the same Remote Network that contains your database-access Connectors.
-
Note the public IP address(es) of those Connectors (Admin Console → Remote Network → Connectors → Public IP).
Step 3 – Add Connector IP Addresses to the Atlas UI IP Access List
- In Organization → Settings → IP Access List, add each Connector public IP address.
- Save changes — only these IP addresses will be able to load the Atlas UI.
Step 4 – Verify Access via Twingate
- Run the Twingate Client and connect.
- Access https://cloud.mongodb.com. The UI should load only when traffic originates from the authorized Connector IP addresses.
Tip: You can also secure behind SSO
If your organization uses SSO, you can also enforce access via SaaS App Gating for additional identity-based control.
Self‑hosted MongoDB: Securing Databases
For on‑premises or self‑hosted MongoDB instances, you control the server and network:
- Create a Twingate Resource with the host set to your MongoDB server’s IP address or DNS name and port
27017. - Restrict inbound traffic on the server’s firewall to only allow connections from the Connector’s private IP address. Alternatively, configure
net.bindIpin yourmongod.confto listen only on interfaces accessible via Twingate. Use the public IP only when the Connector must reach the server via the internet. - Connect using
mongoshthrough Twingate.
Troubleshooting Database Connections
If you’re having trouble connecting to your database via Twingate, check the following common issues:
-
Connection refused: Ensure that the Connector’s IP addresses are present in the Atlas IP Access List. For self‑hosted deployments, verify firewall rules and that
bindIpincludes the correct interfaces. -
Authentication error: Check your MongoDB credentials and database name. Atlas clusters require TLS - ensure your MongoDB client is configured accordingly.
-
Slow Connections: Check the health of your Connectors and make sure there are no firewall rules blocking access to the database.
-
Timeouts: Verify your Connectors are online, reachable, and properly configured.
-
Twingate Recent Activity: In the Admin Console, open Recent Activity for the Resource to see what’s happening:
-
DNS Failed: The Client sent traffic to the Connector, but the Connector couldn’t resolve the hostname. Ensure the DNS hosted zone is tied to the VPC, the DNS server is defined as a Twingate Resource (if self-hosting), or there’s a valid route from the Connector to the DNS server.
-
Connection Failed: The Client captured the traffic, sent it to the Connector, and the Connector tried but couldn’t reach the destination. Check that a route exists between the Connector and database, IP allow lists are correct, and firewall/security group rules allow the port on both ends.
-
No Activity: The Client didn’t send traffic to the Connector. Make sure the Client is running, you have access to the Resource, and no other VPN is hijacking the connection.
-
For more troubleshooting tips, refer to the Twingate Troubleshooting Guide.
Related Resources
Last updated 2 months ago