Getting Started with CasaOS and Twingate
This guide explains how to set up Twingate to securely access your CasaOS environment using the open source CasaOS App Store. By integrating Twingate with CasaOS, you can ensure that your private resources remain protected while enabling seamless remote access.
Prerequisites
Before you begin, ensure you have the following:
- A running instance of CasaOS.
- A Twingate account with access to the Admin Console.
Installation Steps
1. Generate Docker Compose Configuration
Start by generating new Access and Refresh tokens for a Connector. Follow these steps:
- Log in to the Twingate Admin Console.
- Navigate to Remote Networks.
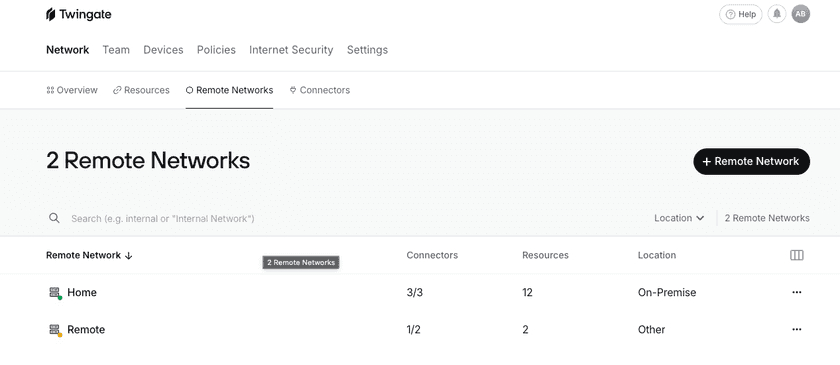
Remote Networks Screen - Select the Remote Network you want to add a Connector to.
- Add a Connector or select one that hasn’t been deployed yet.
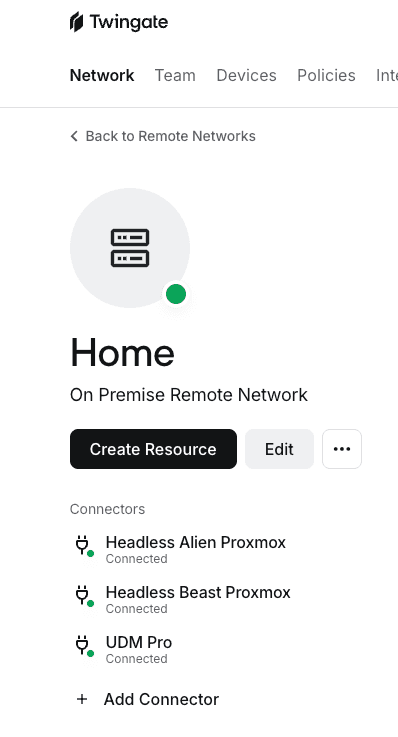
Selected Network Screen - Select Homelab
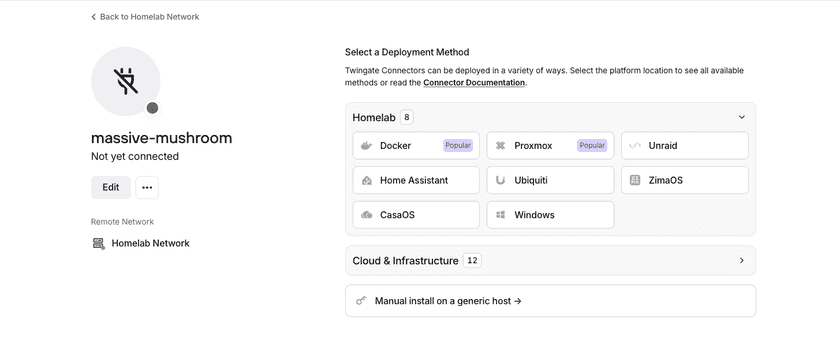
Selected Connector - Select the CasaOS option.
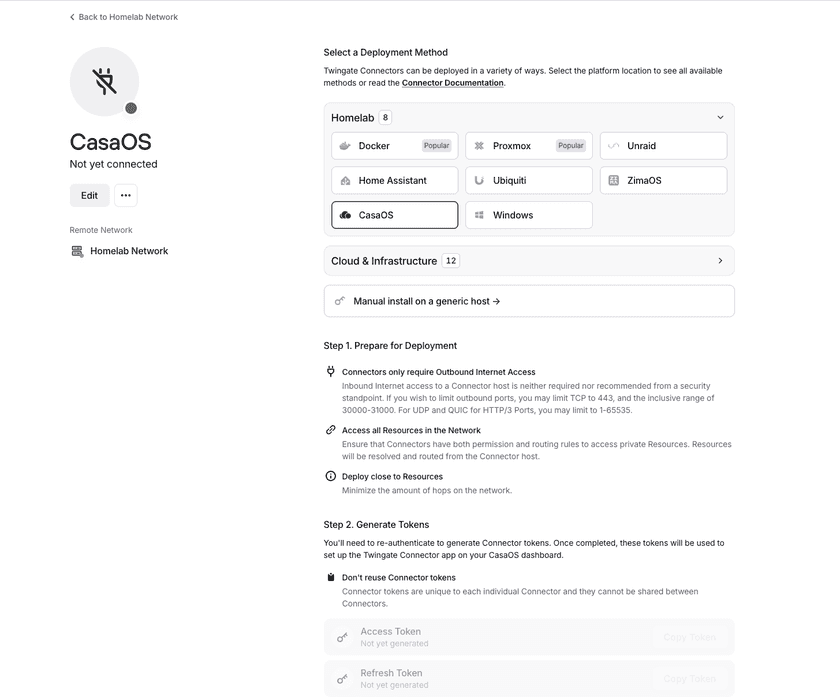
CasaOS Option - Scroll down to Step 2 and click Generate Tokens.
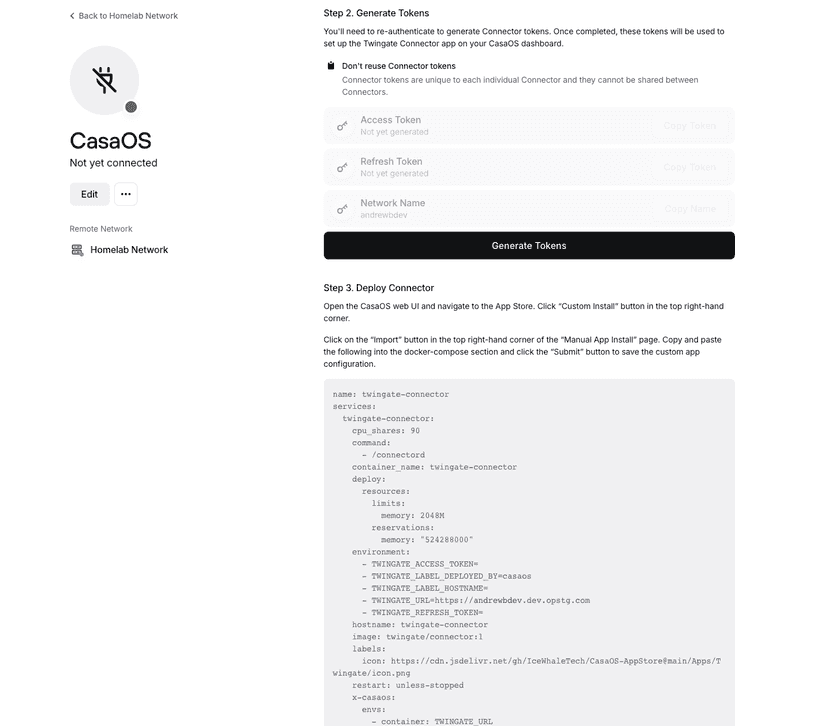
Step 2 of Connector Setup - Authenticate when prompted to complete token generation.
- Copy the Docker Compose configuration displayed. This includes your Network name, Access token, and Refresh token, and you will use it in the next step.
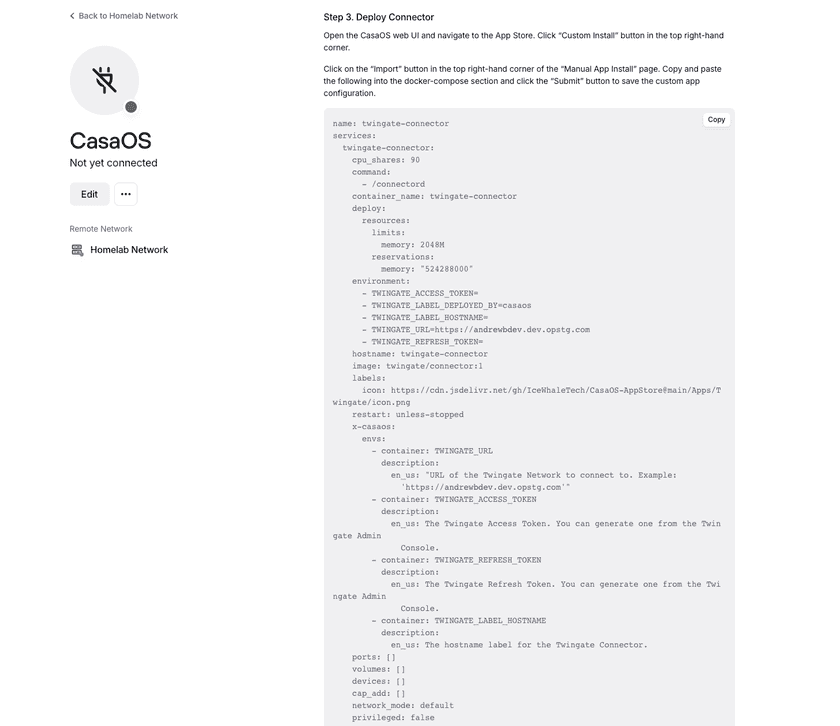
Step 3 of Connector Setup


Important
Make sure you do not reuse token sets. It is important that each Connector has its own unique token set.
2. Deploy the Connector using a custom App Store installation
- Open the CasaOS web UI.
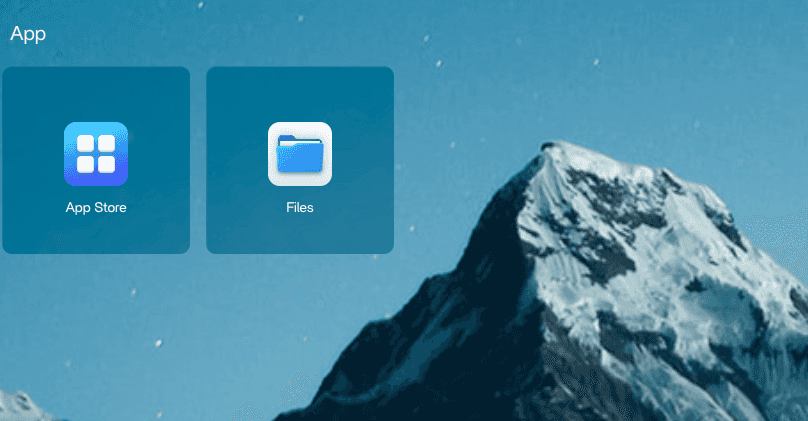
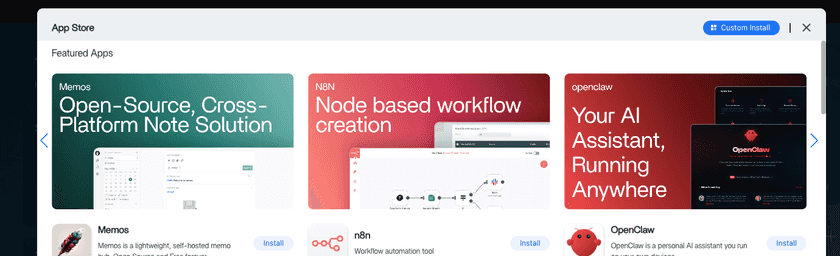
CasaOS Web UI - Navigate to the App Store.
- Click on the “Custom Install” button in the top right hand corner.
CasaOS App Store - Click on the “Import” button in the top right hand corner of the “Manual App Install” page.
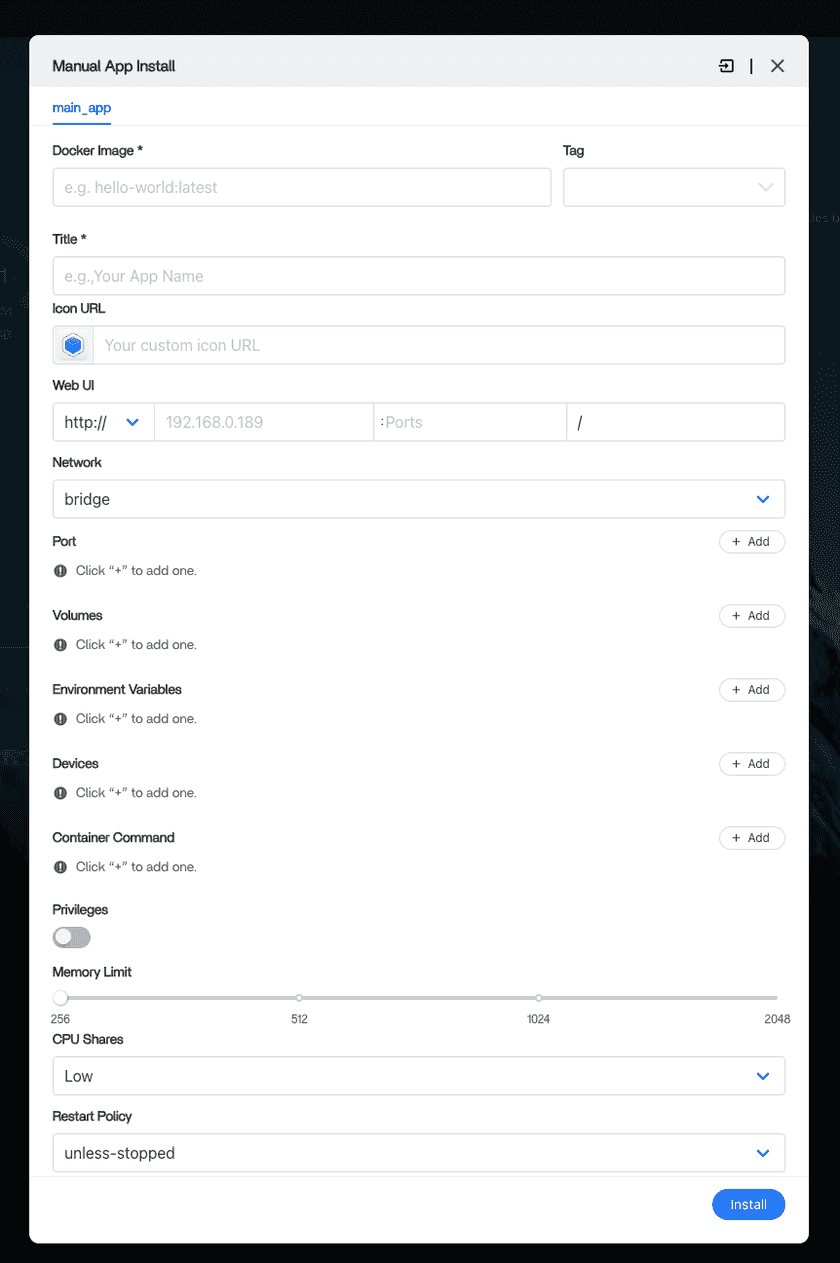
Manual App Install Screen - Paste the Docker Compose configuration you copied from the previous step into the text area.
- Click the “Submit” button to save the custom app configuration.
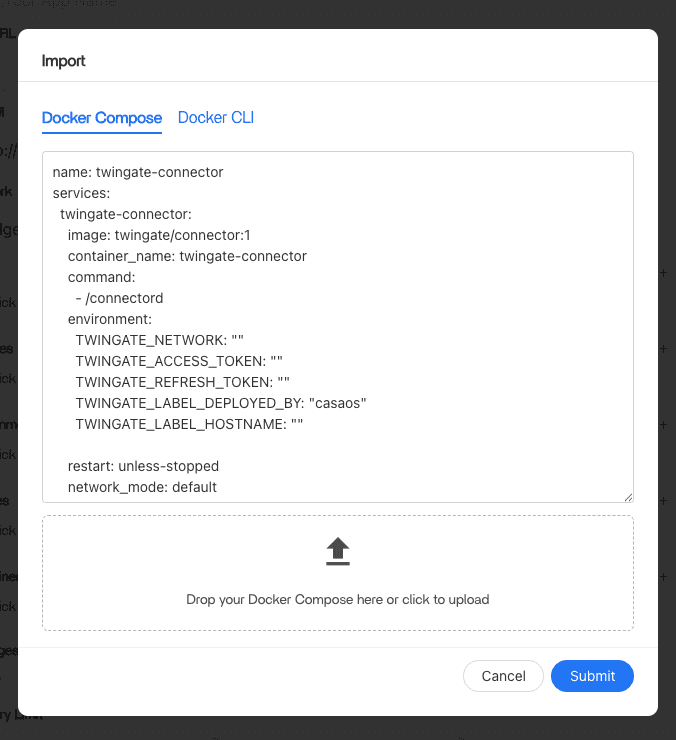
Configuration Import Screen - Dismiss the pop up by clicking the “Ok” button.
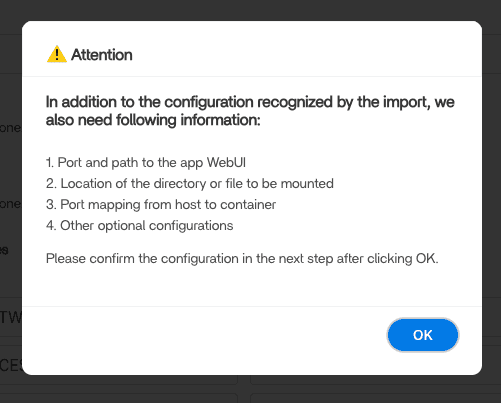
Config Warning Popup - Click the “Install” button to deploy the Twingate Connector on your CasaOS instance.

Installing Popup 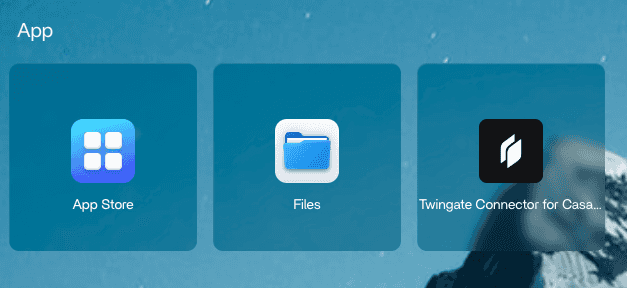
Post Install


3. Verify Installation
- Navigate back to the Admin Console.
- Navigate to Remote Networks.
- Select the Remote Network you added your new Connector to.
- Select the new Connector.
- Verify that the Controller and Relay statuses are
Connected.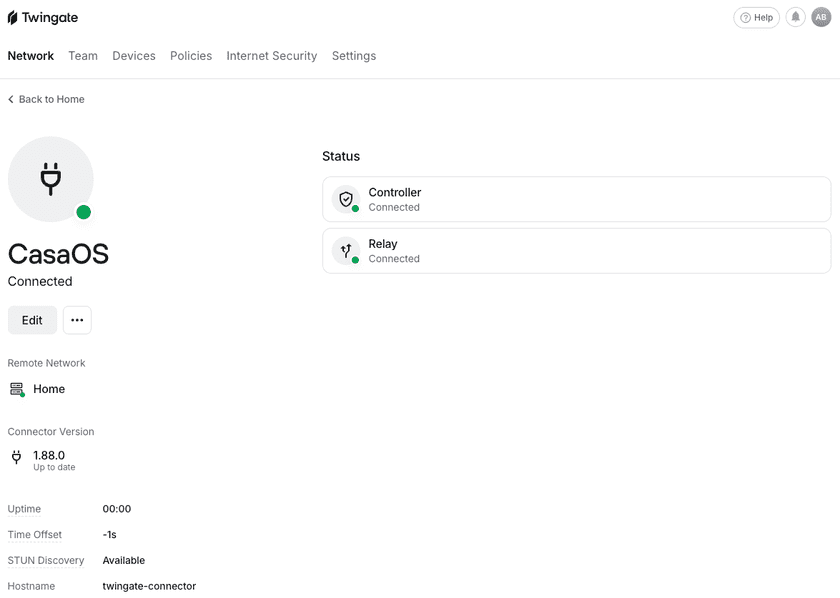
Fully Setup Connector

4. Access Your CasaOS Dashboard Remotely
- Navigate to the Twingate Admin Console.
- Click on Resources in the top sub menu.
- Click the ”+ Resource” button in the top right corner.
- Select the Remote Network you just installed your Connector on.
- Give the resource a name (e.g., “CasaOS Dashboard”).
- Add the dashboard’s private IP address. This will be the same address used to access the dashboard locally. It is typically in the format
192.168.x.x. - Assign access to one of your groups by selecting one in the list and clicking “Grant Access”.
- Now anyone in that selected group will have access to the CasaOS dashboard when connected to Twingate. To access the dashboard, simply connect to Twingate and navigate to the dashboard’s IP address. You should see the CasaOS dashboard load as if you were accessing it locally!
Troubleshooting
Common Issues
- Token Errors: Ensure the Access and Refresh tokens are correctly entered.
- Connectivity Problems: Verify that you can access the CasaOS web interface locally and the Twingate Connector app is running.
For more general troubleshooting information, refer to the troubleshooting docs.
Feedback
If you run into any issues or have a suggestion, reach out on our subreddit.
Next Steps
Once Twingate is configured, you can explore additional resources to enhance your setup:
- Setting Up Additional Resources: Learn how to configure Twingate Resources to gain access to private applications and services.
Additional Resources
- Home Assistant Setup Guide: Learn how to integrate Twingate with Home Assistant.
- Unraid Helper Script Guide: Learn how to integrate Twingate with Unraid with the official Community App.
- ZimaOS Setup Guide: Learn how to integrate Twingate with ZimaOS.
Last updated 7 days ago