Getting Started with Home Assistant and Twingate
Secure access to your smart home from anywhere in the world.
Overview
This guide explains how to set up the Twingate add-on for Home Assistant to securely access your smart home devices from anywhere. By integrating Twingate with Home Assistant, you can ensure that your private resources remain protected while enabling seamless remote access.
Prerequisites
Before you begin, ensure you have the following:
- A running instance of Home Assistant OS.
- A Twingate account with access to the Admin Console.
- Basic familiarity with Home Assistant’s configuration options.
Important
This add-on will only work on Home Assistant OS. Home Assistant containers currently do not have support for add-ons.
Installation Steps
1. Add the Twingate Repository
To install the Twingate add-on, you first need to add the Twingate repository to your Home Assistant instance. Click the button below to open the repository dialog with the URL pre-filled:
The first screen will look like this:
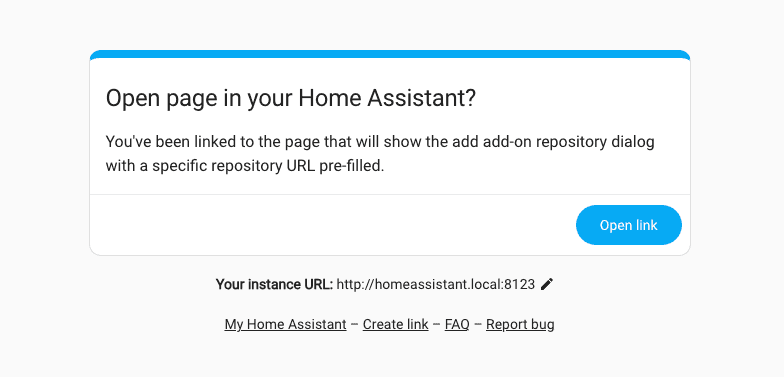
Click Open Link to bring up the repository manager screen.
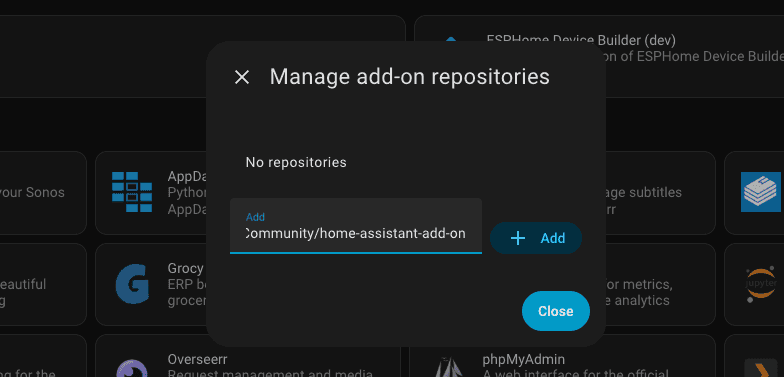
Click Add to add the repository to your Home Assistant instance’s list of third party repositories. If you are looking for the source of this repository, it can be found on our Community GitHub page.

After adding the repository, close the repository manager. Then, manually check for updates in the Add-on Store to ensure the latest version of the Twingate add-on is available. This can be done by clicking the ellipses in the top right hand corner and clicking Check for updates. Sometimes refreshing the page is also necessary. You can search for the Twingate Connector using the search box or look towards the bottom of the app store for the Twingate Connector add-on repository section.

2. Install the Twingate Add-on
- Navigate to the Add-on Store in Home Assistant.
- Search for “Twingate” and click on the store entry that appears under the Twingate Connector add-on repository section.
This will bring up the add-on page.
Click the Install button to add the add-on to your Home Assistant instance.

Install Twingate - Wait for the installation to complete.

Successfully Installed
3. Generate Access and Refresh Tokens
To configure the Twingate add-on, you need to generate new Access and Refresh tokens. Follow these steps:
- Log in to the Twingate Admin Console.
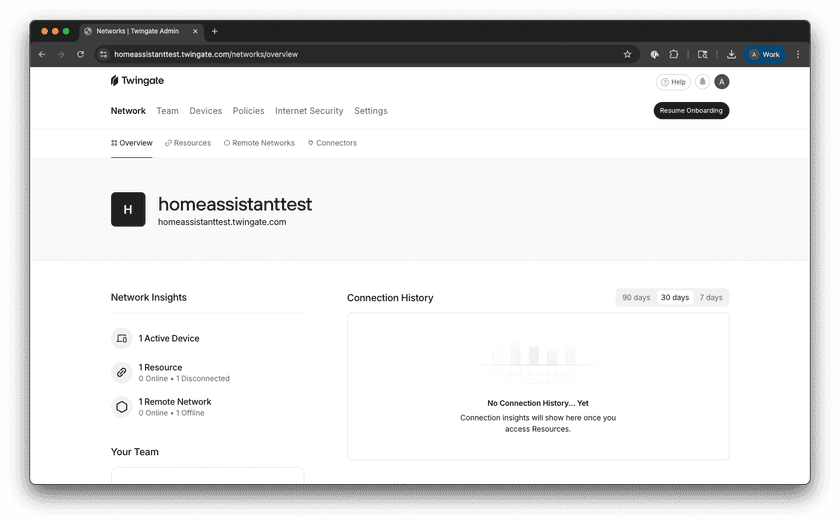
Twingate Admin Console - Navigate to Remote Networks.
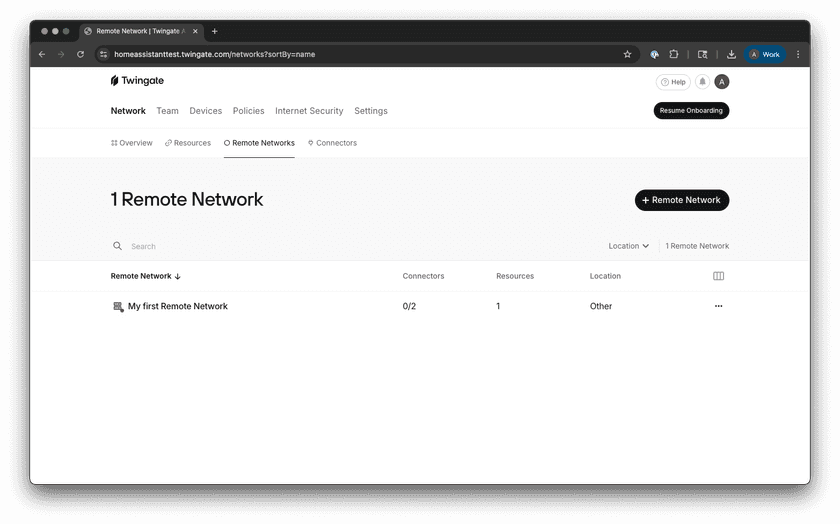
Remote Networks Screen - Select the Remote Network you want to add a Connector to.

Selected Network Screen - Add a Connector or select one that hasn’t been deployed yet.
- Select the Manual option.
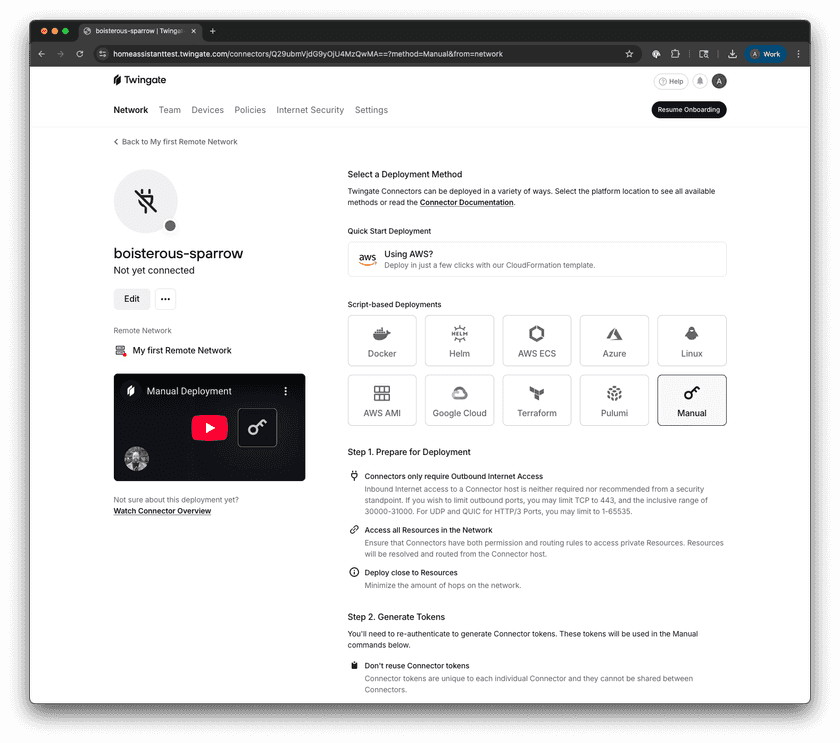
Selected Connector - Scroll down to Step 2 and click Generate Tokens.
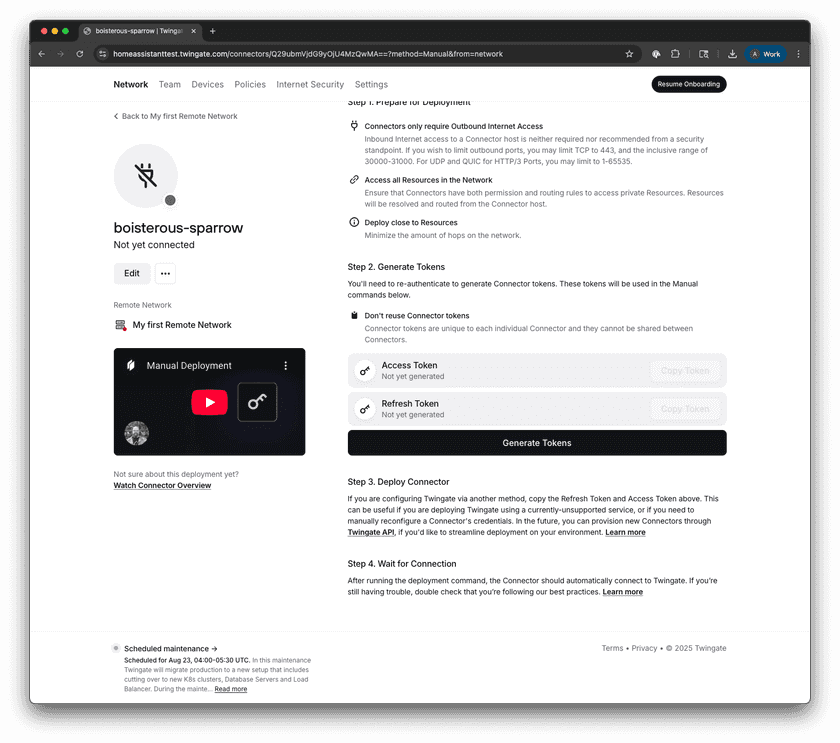
Step 2 of Connector Setup - Authenticate when prompted to complete token generation.
- Copy the Access Token and Refresh Token displayed. These will be used in the next step.
Important
Make sure you do not reuse token sets. It is important that each Connector has its own unique token set.
4. Configure the Add-on
- Navigate to the Configuration tab of the Twingate add-on.

Configuration - Enter the following details:
- Network: Your Twingate Remote Network domain (e.g., network.twingate.com).
- Access Token: Paste the Access Token generated in the Admin Console.
- Refresh Token: Paste the Refresh Token generated in the Admin Console.
- Navigate back to the Info tab of the Twingate add-on.
5. Start the Add-on
- Click Start to start the Twingate add-on. This launches a Docker container in the background that handles installing the Twingate Connector and gets it connected to your Remote Network.

Start - Verify that the add-on is running without errors in the Logs tab.

Verify
6. Verify Installation
- Navigate back to the Twingate Admin Console.
- Navigate to Remote Networks.
- Select the Remote Network you added your new Connector to.
- Select the new Connector.
- Verify that the Controller and Relay statuses are
connected.
Fully Setup Connector
Troubleshooting
Common Issues
- Token Errors: Ensure the Access and Refresh tokens are correctly entered.
- Connectivity Problems: Verify that you can access the Home Assistant web interface locally and the Twingate Connector add-on is running.
If issues persist, take a look at the troubleshooting docs
Next Steps
Once the Twingate add-on is configured, you can explore additional resources to enhance your setup:
- Proxmox Helper Script Guide: Learn how to integrate Twingate with Proxmox using the open source Helper Script Repository.
- Unraid Helper Script Guide: Learn how to integrate Twingate with Unraid with the official Community App.
- Setting Up Resources: Learn how to configure Twingate resources to gain access to private applications and services.
Feedback
If you run into any issues or have suggestion, feel free to open an issue on the Add-ons GitHub page.
Last updated 4 months ago