Deploying Twingate Connector on Ubiquiti Gateways
Secure access to your Ubiquiti environment from anywhere in the world.
This guide walks you through deploying a Twingate Connector on a Ubiquiti Gateway (UDM Pro, UDM SE, UXG-Pro, UXG-Max, and similar devices). The setup script creates a lightweight systemd-nspawn container on the Gateway, installs the Connector inside it, and configures it to start automatically on boot.
The container is stored on the Gateway’s persistent /data partition, so it survives firmware upgrades.
Prerequisites
Before you begin, ensure you have the following:
- A Ubiquiti Gateway (UDM Pro, UDM SE, UXG-Pro, UXG-Max, or similar) running UniFi OS 3.x or later.
- SSH access to the Gateway as root.
- A Twingate account with access to the Admin Console.
- Internet connectivity on the Gateway.
Installation Steps
1. Generate Connector Access and Refresh Tokens
Start by generating new Access and Refresh tokens for a Connector. Follow these steps:
- Log in to the Twingate Admin Console.
- Navigate to Remote Networks.
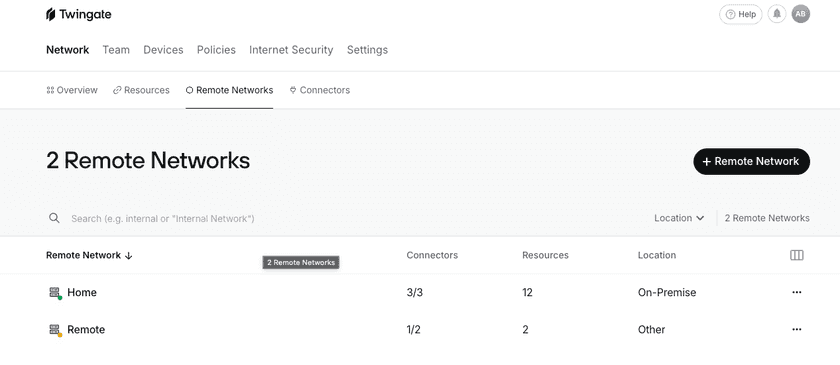
Remote Networks Screen - Select the Remote Network you want to add a Connector to.
- Add a Connector or select one that hasn’t been deployed yet.
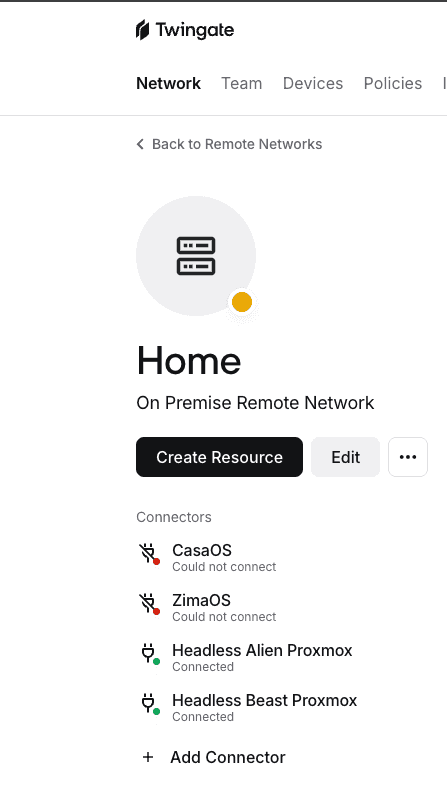
Selected Network Screen - Select Homelab
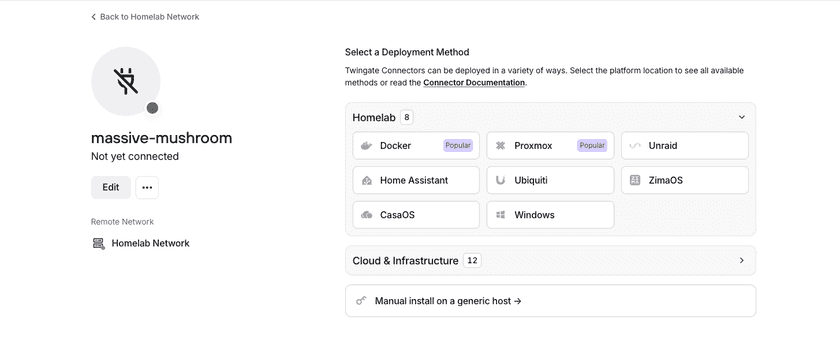
Selected Connector - Select the Ubiquiti option.
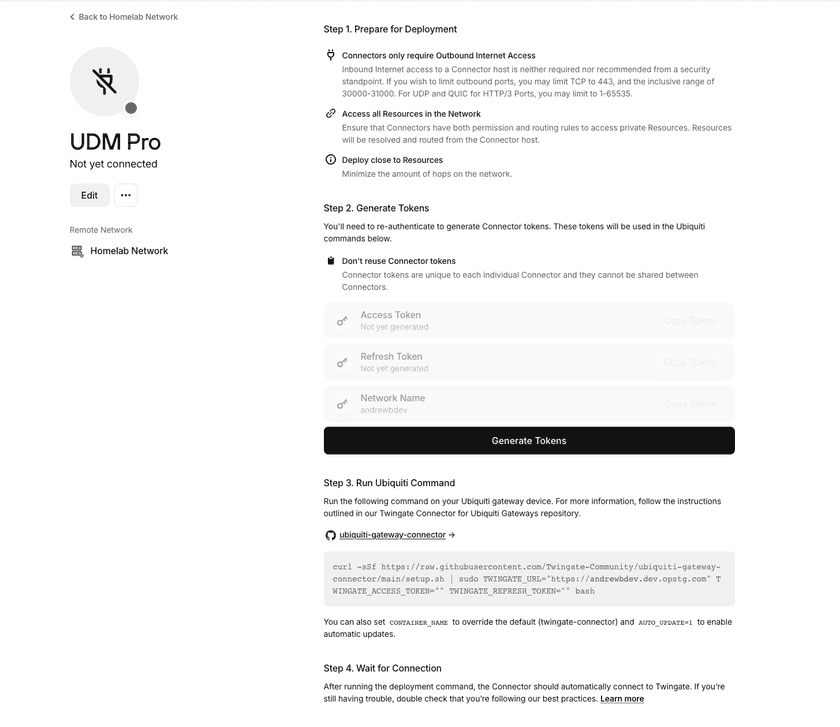
All Connector Options - Scroll down to Step 2 and click Generate Tokens.
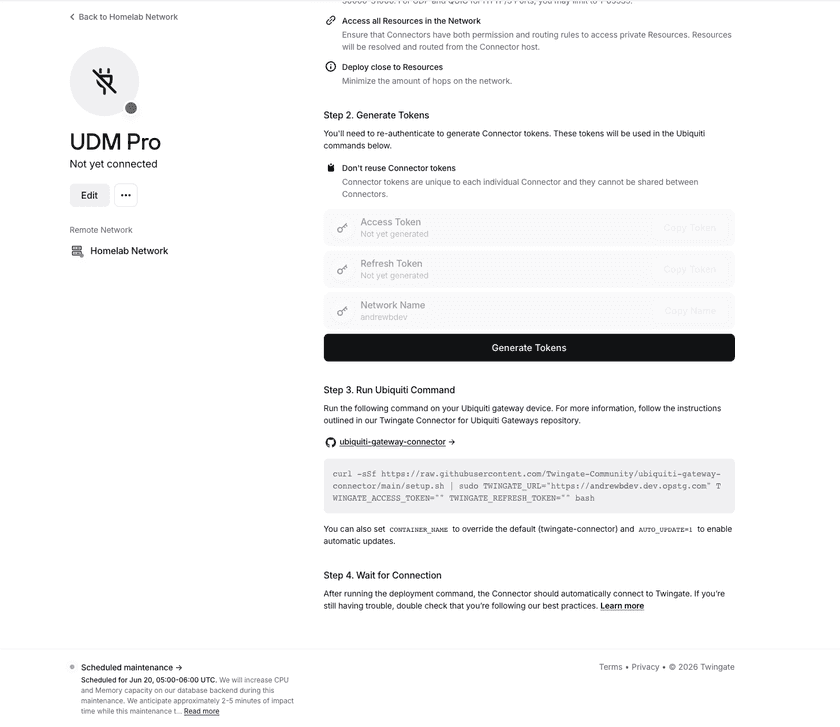
Step 2 of Connector Setup - Authenticate when prompted to complete token generation.
- Copy the bash command displayed. This command includes your Network name, Access token, and Refresh token, and you will use it in the next step.


Important
Make sure you do not reuse token sets. Each Connector needs its own unique token set.
2. Deploy the Connector
SSH into your Ubiquiti Gateway and run the command you copied in the previous step.
The script will bootstrap a Debian container, install the Twingate Connector inside it, and configure it to start on boot.
The initial container setup (debootstrap) takes approximately 5-10 minutes on Gateway hardware. This is normal.
3. Verify Installation
- Navigate back to the Admin Console.
- Navigate to Remote Networks.
- Select the Remote Network you added your new Connector to.
- Select the new Connector.
- Verify that the Controller and Relay statuses are
connected.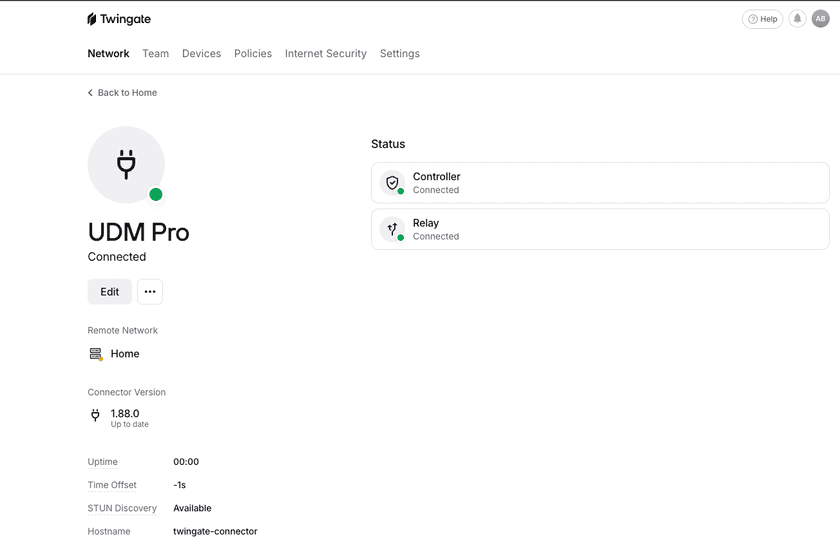
Successful Connector Connection

4. Access Your Ubiquiti Gateway Remotely
Now that your Connector is running, add the Gateway’s web UI as a Twingate Resource so you can access it from anywhere.
- Navigate to the Twingate Admin Console.
- Click on Resources in the top sub menu.
- Click the + Resource button in the top right corner.
- Select the Remote Network you installed your Connector on.
- Give the Resource a name (e.g., “Ubiquiti Gateway”).
- Add the Gateway’s private IP address. This is the same address you use to access the UniFi dashboard locally, typically in the format
192.168.x.x. - Assign access to one of your Groups by selecting one in the list and clicking Grant Access.
- Connect to Twingate and navigate to the Gateway’s IP address in your browser. You should see the UniFi dashboard load as if you were on your local network.
Container Management
Use the following commands over SSH to manage the Connector container. If you set a custom CONTAINER_NAME during setup, replace twingate-connector with that name.
| Command | Description |
|---|---|
machinectl status twingate-connector | View container status |
machinectl stop twingate-connector | Stop the container |
machinectl start twingate-connector | Start the container |
machinectl disable twingate-connector | Disable auto-start on boot |
To open a shell inside the container:
nsenter -t $(machinectl show twingate-connector -p Leader --value) \ -m -u -i -n -p -- /bin/bashUninstall
To completely remove the Connector and its container, run the uninstall script that is available in the GitHub repository.
sudo ./uninstall.shTroubleshooting
Token Errors
Verify that the Network name, Access Token, and Refresh Token were entered correctly. Tokens are single-use per Connector — if you need to redeploy, generate a new set in the Admin Console.
Container Fails to Start
Check the container status and logs:
machinectl status twingate-connectorjournalctl -M twingate-connector -xe --no-pagerConnector Not Connecting
- Verify DNS resolution inside the container:
nsenter -t $(machinectl show twingate-connector -p Leader --value) -m -u -i -n -p -- curl -s https://binaries.twingate.com
- Check Connector logs:
nsenter -t $(machinectl show twingate-connector -p Leader --value) -m -u -i -n -p -- journalctl -u twingate-connector -n 50 --no-pager
Container Missing After Firmware Upgrade
The container data in /data/custom/machines/ persists across firmware upgrades. However, the symlink at /var/lib/machines/ and the nspawn config at /etc/systemd/nspawn/ may need to be recreated. Re-running the setup script will detect the existing container directory and handle this.
Bootstrap Takes a Long Time
This is normal on Gateway hardware. Expect approximately 5-10 minutes depending on your internet connection and device model.
If issues persist, take a look at the general troubleshooting docs.
Feedback
If you run into any issues or have a suggestion, open an issue on the GitHub repository or reach out on our subreddit.
Next Steps
Once Twingate is configured, you can explore additional resources to enhance your setup:
- Setting Up Additional Resources: Configure Twingate Resources to access private applications and services.
Additional Resources
- Proxmox Setup Guide: Deploy a Connector on your Proxmox VE server.
- Home Assistant Setup Guide: Integrate Twingate with Home Assistant.
- Unraid Setup Guide: Deploy a Connector on Unraid with the official Community App.
Last updated 12 days ago