How to Deploy a Connector on Synology NAS (DSM 6.x)
Deploy a Twingate Connector on Synology NAS running DSM 6.x or earlier for secure remote network access
Synology NAS devices, despite their name (“network attached storage”) aren’t only for adding shared storage on a network. Synology NAS devices are actually servers that can provide a variety of different services beyond file sharing - and this includes hosting a Twingate Connector!
Installing a Twingate Connector on a Synology NAS allows you to make the Synology, and any other device on the same network (e.g. computers, webcams, network-connected printers), remotely accessible in a manner that’s more secure and easy than other options, like setting up a VPN server or port forwarding on a router.
Synology DiskStation and RackStation devices run on an operating system called Synology DiskStation Manager (DSM), which is based on Linux. Below is how to install and provision a Connector on a Synology NAS that is running DSM version 6.x, 7.1 or earlier.
Prerequisites
If you do not have a Remote Network set up, you can add one on the Network page of the Twingate Admin Console.

- On the details page of the new Remote Network, pick one of the two pre-created Connectors and click
Deploy Connector. - Click on
DockerthenGenerate Tokens, then Authenticate when prompted. - Scroll down and click the toggle for any of the options you want to apply, such as custom DNS or local connection logging, then scroll to the bottom of the page and copy the deploy command - we will need it later.
- While connected to the same network your Synology NAS is on, sign into the DSM web admin interface with a new browser tab or window. This is typically found at
https://X.X.X.X:5001by default (whereX.X.X.Xis the IP address of your NAS).
DSM Instructions
To deploy a Connector, you can easily leverage DSM’s native Task Scheduler.
- Open Task Scheduler
- Create a new task (Scheduled Task → User-defined script)
- Under
General, set a name for your task (ex:Twingate Connector) and selectrootas the user: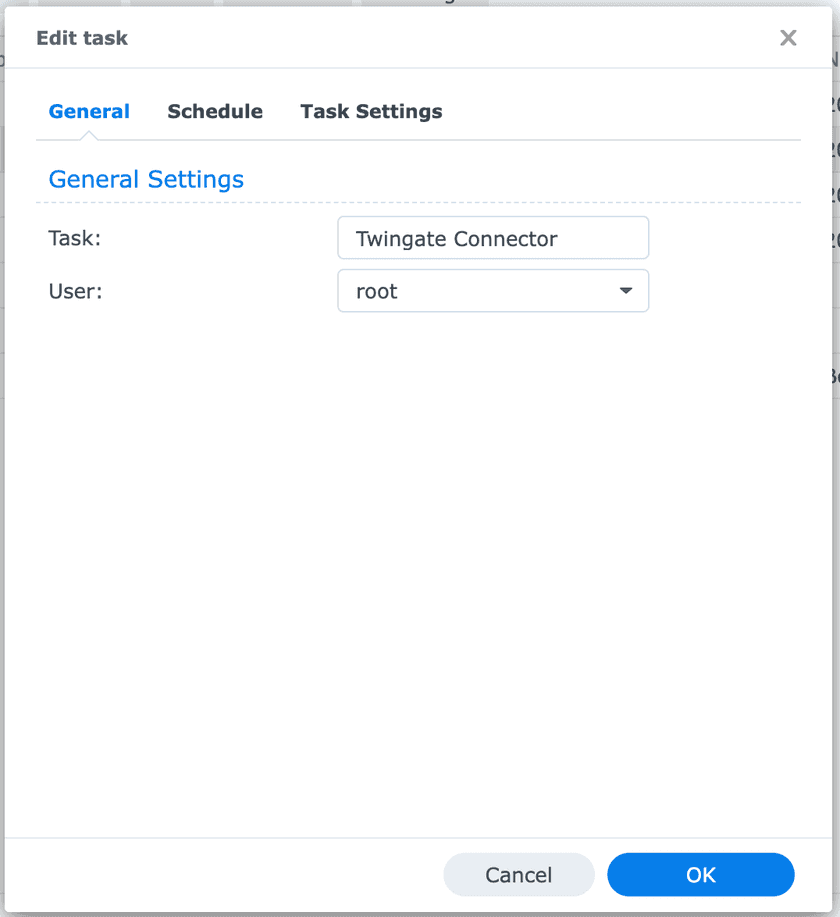
General Tab - Under
Schedule, review how often and when this task will run. By default, it will run daily at midnight but you should update it to something that works for your environment and to minimize disruption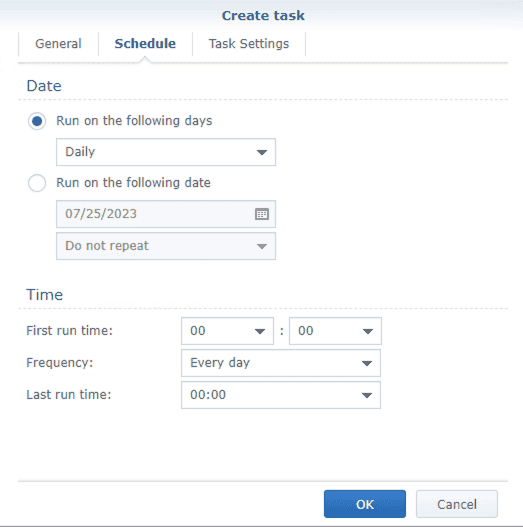
Schedule Tab - Under
Task Settings, paste the Connector deploy command (that you copied earlier) underUser-defined script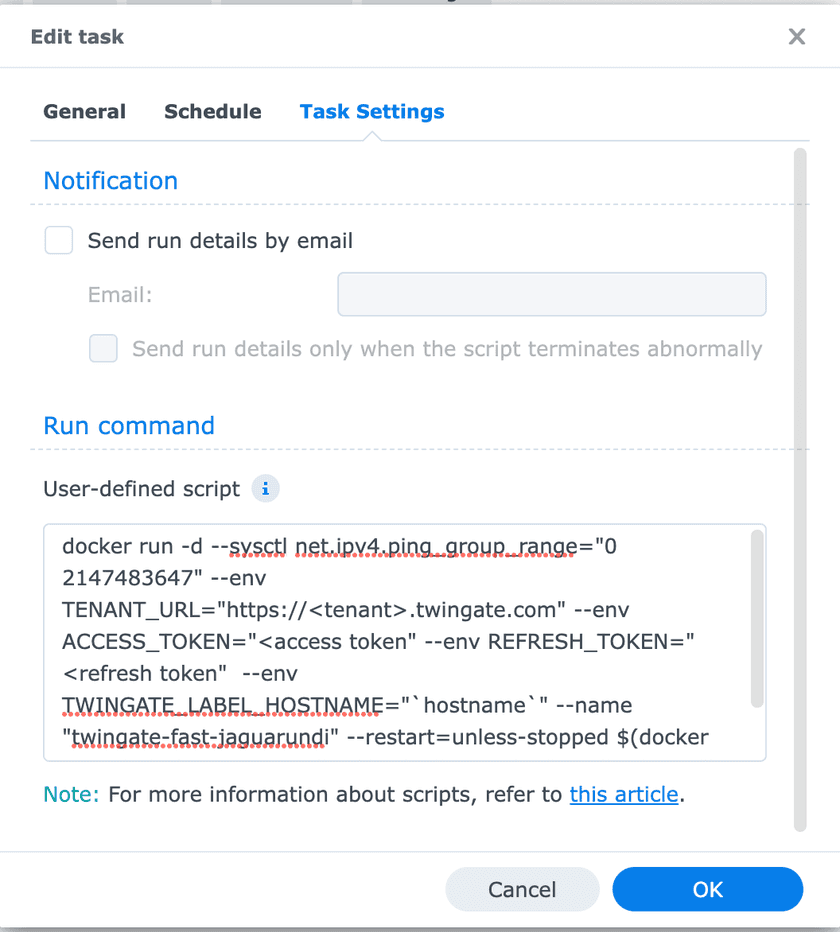
Task Tab - Save the task, select it and click
Run. When prompted, confirm you want to run the task: this will deploy your Connector and also run the upgrade command on whatever schedule you set.


To verify the Connector is working, view the Connector status in the applicable Remote Network page in your Twingate Admin Console. If its status is “Connected”, it’s working!

You can now access your network with a device that has a Twingate Client installed and is signed into your Twingate account. In order to access the NAS, you need to add it as a Resource in the Twingate Admin Console, using the IP address you would use to access it when you are directly connected to the local network it’s on. You can follow the Resources guide for more information on how to add Resources.
Last updated 3 months ago