Complete DIY VPN Setup Guide with Twingate and DigitalOcean
Build your own globally distributed VPN infrastructure using Twingate's zero-trust networking and DigitalOcean's cloud platform.
Overview
This comprehensive guide walks you through creating your own DIY VPN infrastructure using Twingate’s zero-trust networking technology and DigitalOcean’s cloud platform. You’ll learn essential DevOps skills while building a production-ready, globally distributed VPN solution.
Whether you’re a developer looking to learn infrastructure-as-code, a small business owner needing secure remote access, or an enterprise architect planning scalable solutions, this guide provides three deployment paths to match your needs and expertise level.
Important
Internal Use Only: This project can only be used for personal or internal use. Please do not use this project or Twingate to offer a commercial VPN service. Also note that bandwidth usage through Twingate infrastructure is subject to Twingate’s Fair Use Policy.
What You’ll Learn
By completing this guide, you’ll gain hands-on experience with:
- Zero-Trust Networking: Understanding modern security principles with Twingate
- Infrastructure as Code: Using Terraform to manage cloud resources
- Container Orchestration: Deploying applications with Kubernetes and Helm
- Cloud Computing: Working with DigitalOcean’s platform and APIs
- DevOps Practices: Automated deployment, monitoring, and troubleshooting
Prerequisites
Before you begin, ensure you have the following:
Required Accounts
- Twingate Account: You’ll need Twingate Home or another subscription plan that includes (Exit Networks are not available on the free Starter plan). Compare Twingate plans
- DigitalOcean Account: Sign up at digitalocean.com
- GitHub Account: For accessing this repository
Required Software
- Twingate Client: Install the Twingate Client on your device to connect to your VPN
- Windows/macOS: Download from Twingate
- iOS/Android: Search “Twingate” in the Apple App Store/Google Play
- Linux: Available via package managers or direct download
System Requirements (for local development)
- Operating System: macOS, Linux, or Windows with WSL2
- Memory: 4GB+ RAM (8GB+ recommended for Kubernetes)
- Storage: 10GB+ free disk space
- Network: Internet access for API calls and downloading dependencies
- Container Runtime: Docker Desktop (required for Minikube method)
Deployment Options Overview
This guide offers three deployment methods, each designed for different use cases and skill levels:
| Method | Best For | Cost | Complexity | Learning Value |
|---|---|---|---|---|
| Minikube | Learning, testing, development | Free | Low | High - Perfect for beginners |
| DigitalOcean Droplets | Personal VPN, small teams | Low | Medium | Medium - Production basics |
| DigitalOcean Kubernetes | Enterprise, auto-scaling | Medium-High | High | High - Advanced orchestration |
Which Method Should You Choose?
- Start with Minikube if you’re new to VPNs or want to learn the concepts risk-free
- Use Droplets for a simple, cost-effective production VPN
- Choose Kubernetes for enterprise features and advanced container orchestration
Generate Required API Keys
Both Twingate and DigitalOcean require API tokens for programmatic access. Follow these steps to generate them:
Generate Twingate API Token
- Log in to the Twingate Admin Console.
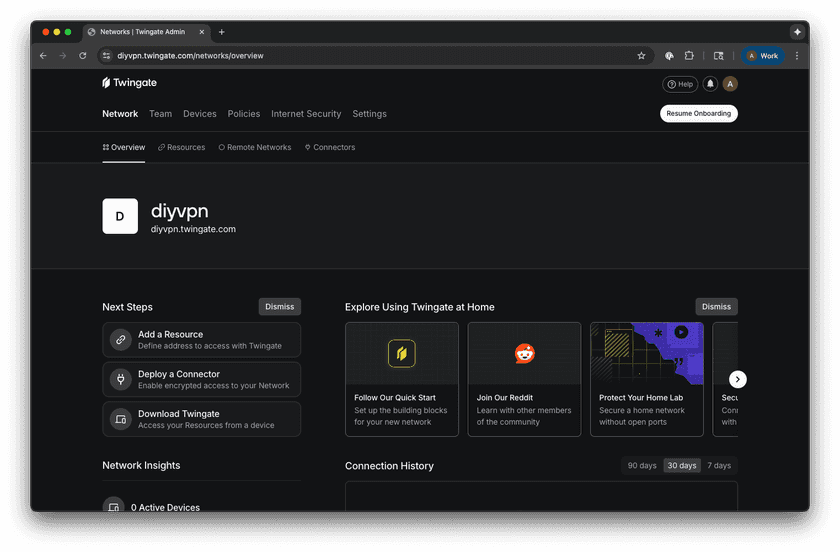
Twingate Admin Console Login - Navigate to Settings → API.
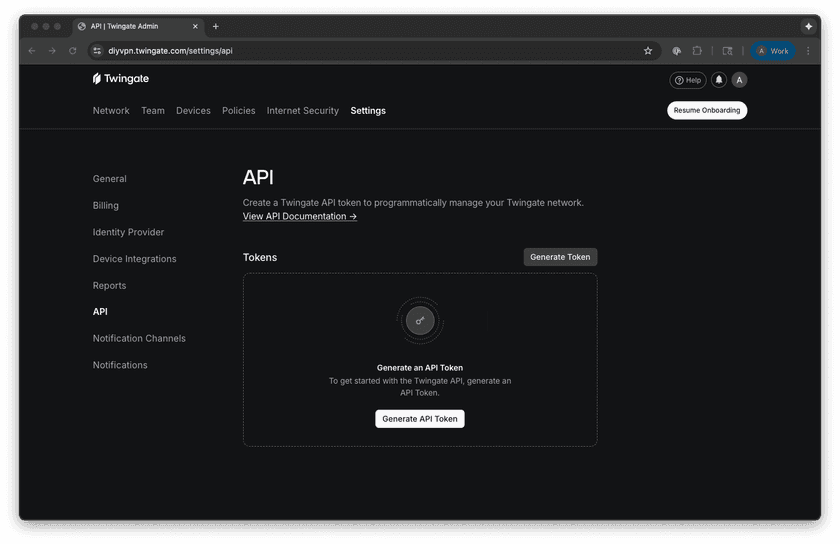
Navigate to API Settings - Click Generate API Token.
- Provide a descriptive name (e.g., “DIY VPN Deployment”).
- Give the key Read, Write, and Provision permissions.
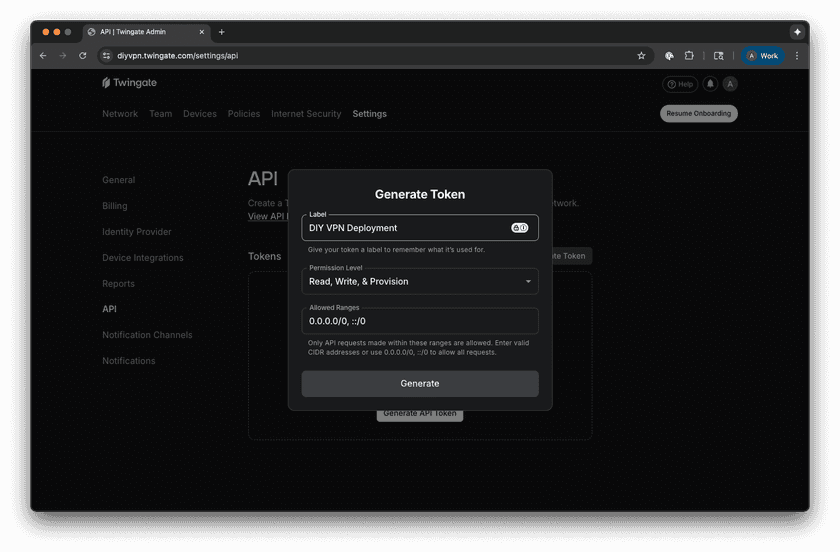
API Token Permissions - Click Generate and copy the generated token.


Important
Store your API token securely. It won’t be displayed again after creation, and you’ll need it for all deployment methods.
Generate DigitalOcean API Token
- Log in to the DigitalOcean Control Panel.
- Navigate to API in the left sidebar.
- Click Generate New Token.

Generate New Token Button - Provide a token name (e.g., “DIY VPN Infrastructure”).
- Choose an expiration period.
- Select Full Access for scopes.

- This can be customized based on your security requirements.
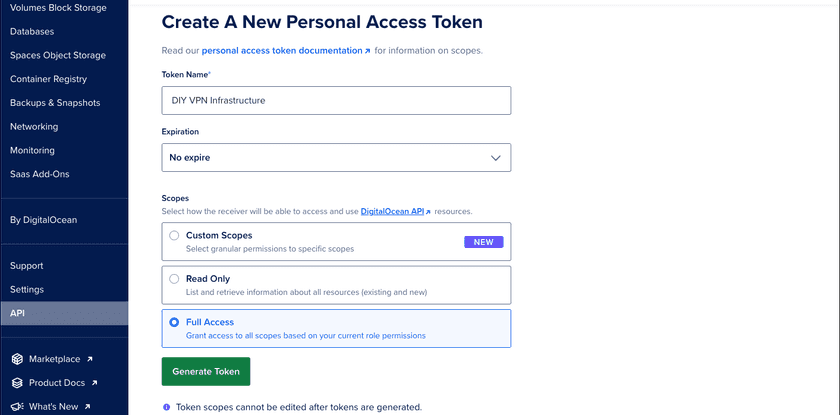
Token Configuration

- Click Generate Token and copy the generated token.
Identify Your Twingate Network Name
Your Twingate network name is the subdomain in your Twingate URL:
- If your Twingate URL is
https://mycompany.twingate.com - Your network name is
mycompany
Method 1: Minikube Deployment (Recommended for Beginners)
Perfect for learning Twingate concepts and testing configurations locally before committing to cloud resources.
Install Prerequisites
macOS (using Homebrew):
brew install minikube kubectl helmUbuntu/Debian:
# Install Minikubecurl -LO https://storage.googleapis.com/minikube/releases/latest/minikube-linux-amd64sudo install minikube-linux-amd64 /usr/local/bin/minikube
# Install kubectlcurl -LO "https://dl.k8s.io/release/$(curl -L -s https://dl.k8s.io/release/stable.txt)/bin/linux/amd64/kubectl"sudo install -o root -g root -m 0755 kubectl /usr/local/bin/kubectl
# Install Helmcurl https://raw.githubusercontent.com/helm/helm/main/scripts/get-helm-3 | bash
Setup and Deployment
-
Clone the repository:
git clone https://github.com/Twingate-Community/diy-vpn.gitcd diy-vpn/minikube -
Start Minikube:
minikube start --cpus=2 --memory=4096 --driver=docker -
Configure your deployment:
cp values-example.yaml values.yaml -
Edit the configuration file:
# Edit values.yaml with your credentialstwingate-operator:twingateOperator:network: "your-company" # Your Twingate network nameapiKey: "your_twingate_api_key_here" # Generated in Step 1remoteNetworkId: "" # https://{network}.twingate.com/exit-networks/{remoteNetworkId}logFormat: "json"logVerbosity: "debug" -
Deploy using the automated script:
./deploy.sh
Verification
-
Check deployment status:
kubectl get pods -n twingatekubectl get twingateconnectors -n twingate -
View logs:
kubectl logs -f -l app.kubernetes.io/name=twingate-operator -n twingate -
Verify in Twingate Admin Console:
- Navigate to Internet Security → Exit Networks.
- Look for the Exit Network used in your configuration. (
https://{network}.twingate.com/exit-networks/{remoteNetworkId}) - Verify the Connector shows as “Connected”

Twingate Console Verification

Method 2: DigitalOcean Droplets Deployment
Cost-effective solution for production VPN usage with simple, scalable architecture.
Install Prerequisites
macOS:
brew install terraformUbuntu/Debian:
wget -O- https://apt.releases.hashicorp.com/gpg | sudo gpg --dearmor -o /usr/share/keyrings/hashicorp-archive-keyring.gpgecho "deb [signed-by=/usr/share/keyrings/hashicorp-archive-keyring.gpg] https://apt.releases.hashicorp.com $(lsb_release -cs) main" | sudo tee /etc/apt/sources.list.d/hashicorp.listsudo apt update && sudo apt install terraformSetup and Deployment
-
Navigate to the droplet directory:
cd diy-vpn/digital_ocean/droplet -
Copy and configure the variables file:
cp terraform.tfvars.example terraform.tfvars -
Edit terraform.tfvars with your credentials:
# Required API credentialsdo_token = "dop_v1_your_digitalocean_api_token_here" # From Step 1tg_api_token = "your_twingate_api_token_here" # From Step 1tg_network = "your_twingate_network_name" # From Step 1# Configure droplets across regionsdroplets = {"toronto-vpn" = {region = "tor1"size = "s-1vcpu-1gb"count = 1image = "ubuntu-24-04-x64"}"newyork-vpn" = {region = "nyc1"size = "s-1vcpu-1gb"count = 1image = "ubuntu-24-04-x64"}}# Environment labelenvironment = "production" -
Deploy the infrastructure:
terraform initterraform planterraform apply
Regional Options
Deploy VPN exit points across DigitalOcean’s global regions:
North America:
tor1(Toronto)nyc1,nyc3(New York)sfo1,sfo3(San Francisco)
Europe:
ams3(Amsterdam)fra1(Frankfurt)lon1(London)
Asia Pacific:
sgp1(Singapore)blr1(Bangalore)syd1(Sydney)
📍 Region Selection: Choose regions closest to your users for optimal performance. See the complete list of DigitalOcean regions and availability zones for current options and features.
Verification
-
Check Terraform outputs:
terraform output -
Verify in DigitalOcean Console:
- Navigate to Droplets
- Confirm your VPN droplets are running
-
Verify in Twingate Admin Console:
- Check Remote Networks for region-specific networks (e.g.,
do_tor1,do_nyc1) - Confirm Connectors show as “Connected”
- Check Remote Networks for region-specific networks (e.g.,
-
Verify in Twingate Client:
- Install the Twingate Client on your device
- Connect and verify exit nodes show up under “Route all traffic through Twingate”
Method 3: DigitalOcean Kubernetes Deployment
Enterprise-grade solution with auto-scaling, high availability, and advanced orchestration features.
Install Prerequisites
macOS:
brew install terraform doctl kubectl helmUbuntu/Debian:
# Install Terraform (as shown in Method 2)
# Install doctlcd ~wget https://github.com/digitalocean/doctl/releases/download/v1.104.0/doctl-1.104.0-linux-amd64.tar.gztar xf doctl-1.104.0-linux-amd64.tar.gzsudo mv doctl /usr/local/bin
# Install kubectl and Helm (as shown in Method 1)
Setup and Deployment
-
Navigate to the kubernetes directory:
cd diy-vpn/digital_ocean/kubernetes -
Copy and configure the variables file:
cp terraform.tfvars.example terraform.tfvars -
Edit terraform.tfvars with your configuration:
# Required API credentialsdo_token = "your_digitalocean_api_token_here"tg_api_token = "your_twingate_api_token_here"tg_network = "your_twingate_network_name"# Define multiple clusters across different regionsclusters = {"tor-vpn-cluster" = {region = "tor1"node_size = "s-1vcpu-2gb"node_count = 1}"nyc-vpn-cluster" = {region = "nyc1"node_size = "s-2vcpu-4gb"min_count = 1max_count = 3auto_scale = true}} -
Deploy the infrastructure:
terraform initterraform planterraform apply
Advanced Features
Auto-scaling Configuration:
"production-cluster" = { region = "nyc1" node_size = "s-2vcpu-4gb" min_count = 2 # Minimum nodes max_count = 10 # Maximum nodes auto_scale = true # Enable auto-scaling}High-Availability Setup:
"ha-cluster" = { region = "fra1" node_size = "s-4vcpu-8gb" node_count = 3 # Fixed 3-node cluster}Verification
-
Check cluster status:
terraform output cluster_namesterraform output kubeconfig_commands -
Configure kubectl for a cluster:
doctl kubernetes cluster kubeconfig save tor-vpn-clusterkubectl get nodeskubectl get pods -n twingate -
Monitor Connector health:
kubectl get twingateconnectors -n twingatekubectl logs -f deployment/twingate-operator -n twingate -
Verify in Twingate Client:
- Install the Twingate Client on your device
- Connect and verify exit nodes show up under “Route all traffic through Twingate”
Cost Optimization Tips
For Droplet Deployments
- Start Small: Use
s-1vcpu-1gbdroplets for testing - Scale by Region: Add regions only where you need exit points
- Monitor Usage: Use DigitalOcean’s monitoring to track resource usage
For Kubernetes Deployments
- Right-size Nodes: Start with
s-1vcpu-2gbnodes - Use Auto-scaling: Let clusters scale based on demand
- Monitor Costs: Enable DigitalOcean cost alerts
General Tips
- Destroy Test Environments: Use
terraform destroyfor temporary deployments - Regional Strategy: Deploy exit points only in regions you actively use
- Resource Limits: Set appropriate CPU/memory limits in Kubernetes
Troubleshooting
Common Issues
Connector Not Appearing in Twingate Console:
- Verify API token has correct permissions
- Check that network name matches exactly
- Review Connector logs for authentication errors
Terraform Apply Fails:
- Confirm DigitalOcean API token has write permissions
- Check region availability for your account
- Verify Terraform state isn’t locked
Minikube Issues:
- Ensure Docker is running and accessible
- Increase Minikube resources:
minikube start --memory=8192 --cpus=4 - Reset cluster:
minikube delete && minikube start
Kubernetes Deployment Problems:
- Verify cluster credentials:
kubectl cluster-info - Check node resources:
kubectl top nodes - Review operator logs:
kubectl logs -n twingate deployment/twingate-operator
Getting Help
If you encounter issues not covered here:
Twingate Resources:
- Documentation: Twingate Official Docs - Complete product documentation
- Connector Troubleshooting: Connector Issues Guide - Specific Connector troubleshooting
- API Documentation: Twingate API Reference - API usage and authentication
- Community: r/twingate - Community discussion and support
DigitalOcean Resources:
- Documentation: DigitalOcean Docs - Platform documentation
- Terraform Provider: DigitalOcean Terraform Docs - Terraform resource reference
- Kubernetes: DigitalOcean Kubernetes Guide - DOKS documentation
- Support: DigitalOcean Community - Tutorials and Q&A
Development Tools:
- Terraform: Terraform Documentation - Infrastructure as code guide
- Kubernetes: Official Kubernetes Docs - Container orchestration
- Minikube: Minikube Documentation - Local Kubernetes clusters
Project Support:
- Issues: GitHub Issues - Report bugs or request features
Next Steps
Once your DIY VPN is operational, consider these advanced topics:
Security Enhancements
- Network Segmentation: Create separate networks for different user groups
- Device Trust: Configure device trust policies for additional security
Monitoring and Observability
- DigitalOcean Monitoring: Enable DO monitoring for droplets and clusters
- Kubernetes Monitoring: Prometheus + Grafana for container monitoring
- Twingate Analytics: Twingate Analytics for more information on how your network is being used
Learning Resources
- DevOps Roadmap: DevOps Learning Path - Comprehensive skill development guide
- Kubernetes Learning: Kubernetes Tutorials - Official learning resources
- Terraform Tutorials: HashiCorp Learn - Infrastructure as code education
Success!
Congratulations! You’ve successfully deployed your own DIY VPN infrastructure. You now have a globally distributed, zero-trust networking solution that you built and control entirely.
Continue exploring advanced features, or scale your deployment to additional regions as your needs grow. The skills you’ve learned here form the foundation of modern DevOps and cloud infrastructure management.
Last updated 2 months ago