How to Configure SaaS App Gating with Google Workspace
How to configure Google Workspace and Twingate to protect access to SaaS applications
SaaS app gating with Twingate and Google Workspace’s Context-Aware Access enables you to require an authorized connection to a Twingate Connector as a prerequisite for access to core Google Workspace applications and any other compatible SaaS applications. This is similar in concept to IP whitelisting inside a SaaS app, but the IP address check and approval/disapproval happens at the IdP level instead of being configured in the SaaS application directly.
In the case of Google Workspace’s Context-Aware Access, context is continuously checked for Google Workspace core applications, while it’s checked at the time of authentication for any supported third-party SAML-based applications.
Google Workspace’s Context-Aware Access service currently supports the core Google Workspace applications (i.e. Gmail, Drive, Calendar) as well as many SAML-based applications.
Twingate Admin Console Prerequisites
-
Add your IdP’s authentication FQDN as a Resource. This use case centers around the IP addresses associated with your Twingate Connectors, but the first step is to create a Twingate Resource that is associated with the domain or domains used by the SaaS application in question. In the case of Google Workspace core applications you could use
*.google.com. Doing this means that authorized users attempting to access these services will be coming from the exit IP address associated with the Twingate Remote Network used to enable connectivity to the new Resource. This is the IP address you’ll use as part of the Google Context-Aware Access policy configuration. -
Apply a Device-only Policy to Your IdP Resource. A Device-only Resource Policy, when applied to the IdP Resource (e.g.,
*.google.com), allows users to route traffic through the Connector to access the IdP login portal without authentication dependencies that can create access loops. This policy prevents the common “chicken-or-egg” scenario, where users can’t authenticate with the IdP because network access to the IdP portal requires prior authentication via Twingate. By allowing users to reach the IdP through a Device-only policy, they can meet sign-on requirements without encountering this authentication loop.
Create a Context-Aware Access Level
In order to apply Context-Aware Access to a supported application, you first need to create an access level.
- Log in to the Google Admin site by going to https://admin.google.com, and browse to Security → Access and data control → Context-Aware Access
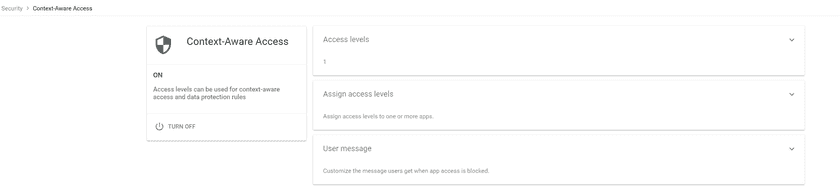
Context-Aware Access screen - Click on the access levels box and then click ‘CREATE ACCESS LEVEL’
- In the dialog flow that comes up you’ll need to fill out the following fields:
- Access level name - Give this access level a descriptive name such as “Twingate Application Control”
- Description - Fill out additional information here if desired
- Context conditions - Leave this on the ‘BASIC’ tab and make sure the radio button ‘Meets all attributes (AND)’ is selected, and in the Attribute drop-down select ‘IP subnet’, and enter all of the IP addresses or ranges that your hosted Twingate Connectors will be exiting your network through. For example, if you have setup a Twingate Connector in your AWS environment and it will exit to the public Internet through an Elastic IP
8.8.8.8, then in the IP Subnet field enter8.8.8.8/32. If there are multiple IP addresses, enter each one in the same format individually, and it becomes anORbased list. - Click the ‘CREATE’ button at the bottom to save the condition and go back to the main screen
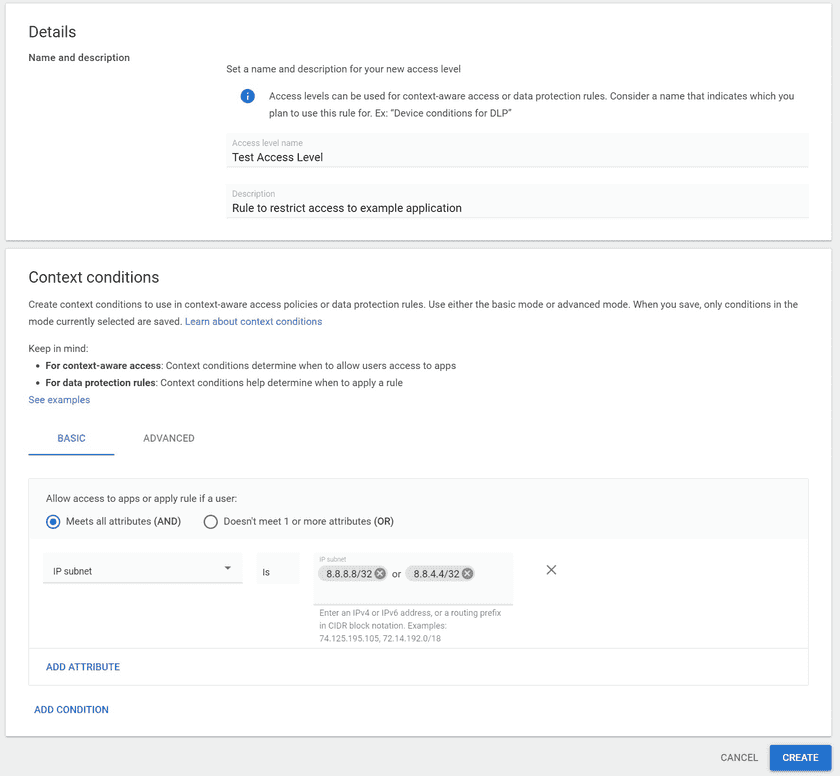
Creating an access level
- Click the collapse up arrow at the top of the box to back up one screen, and then click the Assign access levels box
- In this screen you will see a list of all of the applications that are eligible to have Context-Aware access levels assigned to them. Click the selection boxes next to all applications you wish to have your new access level assigned to
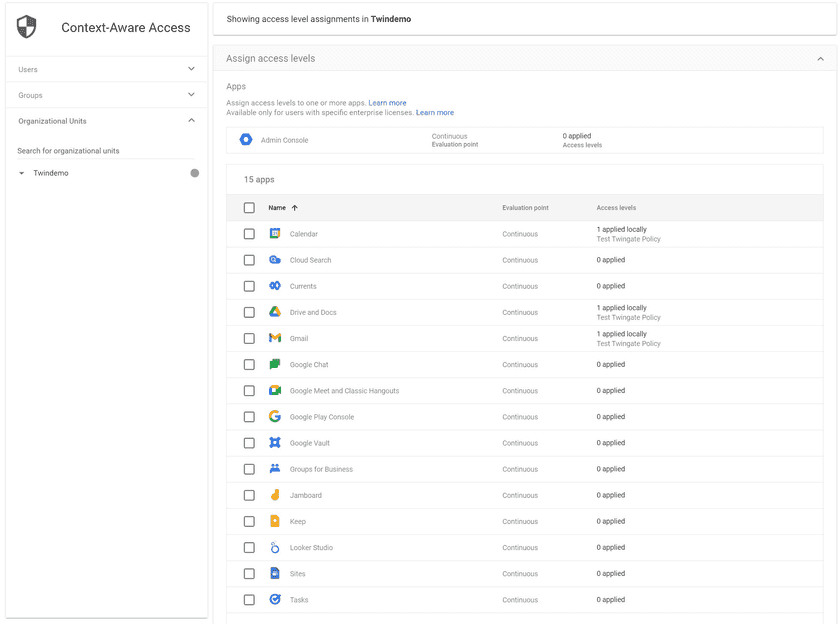
Choosing applications - At the top of the list where it says ‘Selected x of y’, click the ‘Assign’ link
- Review the selected applications, and in the access levels box click the selection box next to the access level you created. Next, hit the ‘CONTINUE’ button at the bottom
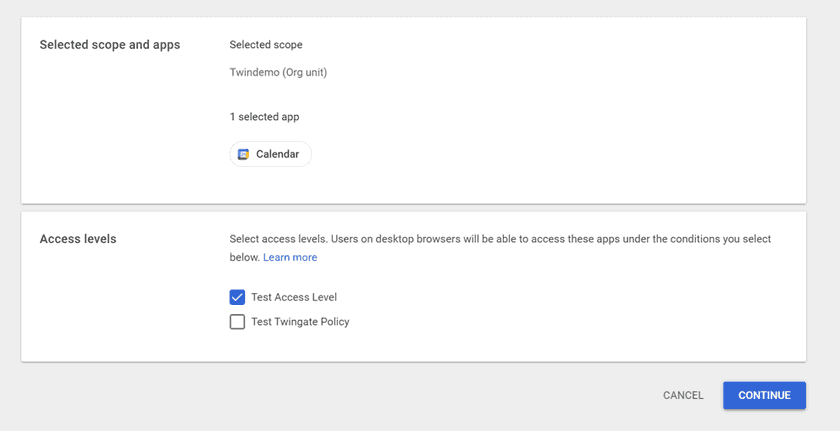
Assigning an access Level - On the next screen you have the option of blocking access based on whether users are accessing the desktop or mobile versions of these applications from desktop or mobile versions of these applications, as well as blocking API based access. It’s recommended to block access from desktop and mobile applications but not API-based applications, which should be the default settings. Scroll down and click ‘CONTINUE’ when ready
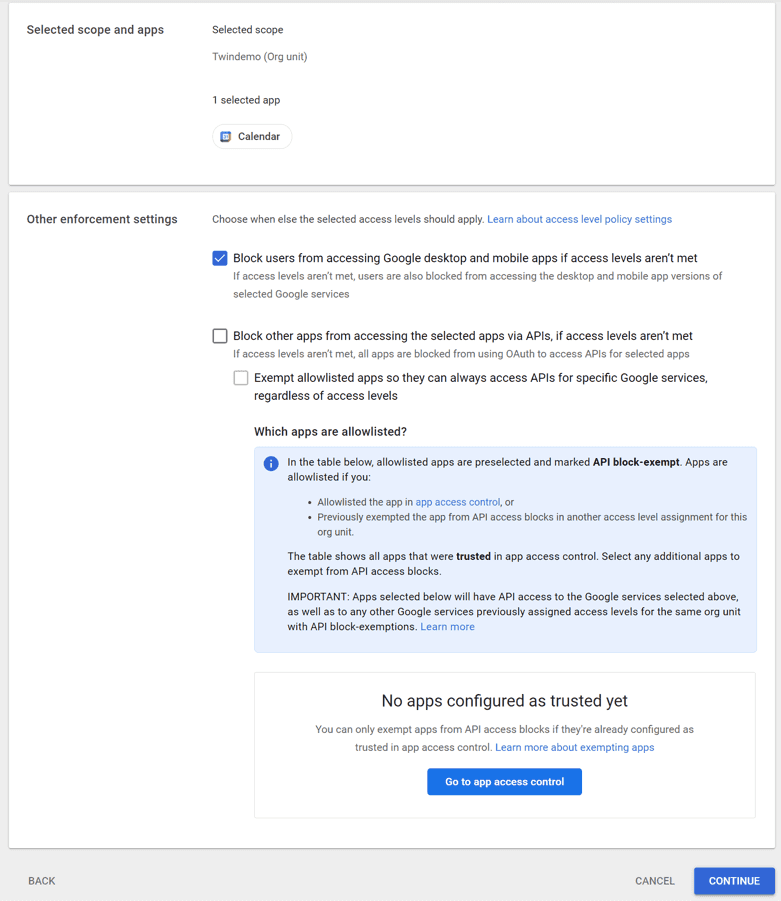
Other enforcement settings - On the final screen, review all of the settings and click the ‘ASSIGN’ button to complete assigning the access level to the desired applications
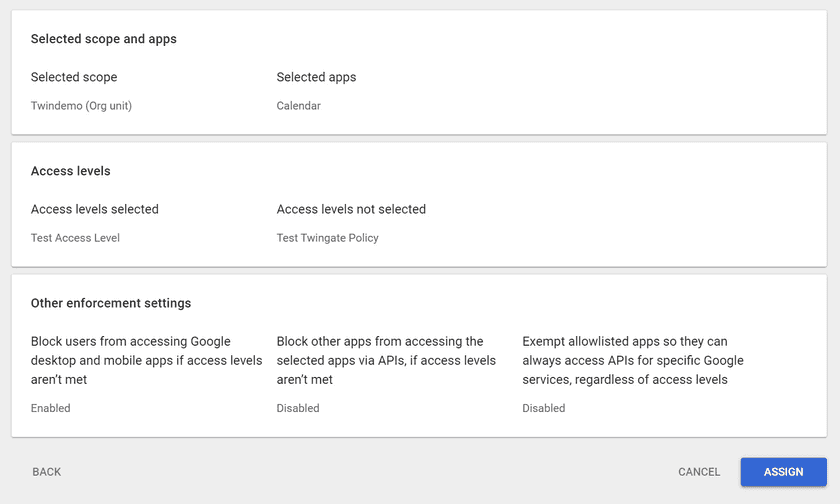
Final review


Testing
Once the Context-Aware access level is applied, you should be able to test access by attempting to log in to the selected applications without being logged into the Twingate Client, and you should see a message that you’ve been blocked.

Sign in to the Twingate Client and reload the screen to confirm that your access level is working correctly. If you are still being blocked, then you may need to review the Resource(s) that you created to ensure that traffic is being captured and routed through your Connectors correctly.
You will find more information on Google Workspace’s Context-Aware Access service on their help center.
Last updated 21 days ago