How to Deploy a Connector in a Proxmox Container
Deploying a Twingate Connector to a Proxmox Container
Proxmox VE is a hosted hypervisor that’s popular in the home lab space and is growing in popularity with corporate users. Deploying a Twingate Connector within a Proxmox setup is very quick and easy to do.
Proxmox uses Linux Containers (LXC), which is a lightweight technology for running single services, as opposed to a fully fleshed out virtual machine (VM) which contains its own kernel and requires more resources to be dedicated to it.
The minimum hardware requirements for an LXC-based container hosting a Twingate Connector are 1 vCPU and 512MB of RAM. Additional resources may be needed, depending on the volume of traffic that the Connector needs to manage.
Peer-to-peer connections help you to provide a better experience for your users and to stay within the Fair Use Policy for bandwidth consumption. Learn how to support peer-to-peer connections.
Pre-requisites
In order to install the Twingate Connector into a Proxmox container, you’ll need to have a container template image already downloaded. Make sure to pick one of the supported distros. You can use whichever you’re most comfortable with. For the rest of this guide, we’ll be using the Ubuntu 22.04 LTS template.
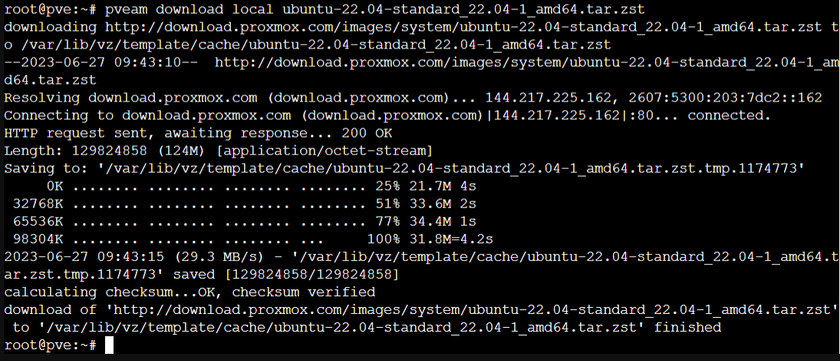
To download a container template, log in to your Proxmox host and click the Shell button in the top-right corner of the main window. Type the following commands:
pveam updatepveam listpveam download <storageLocation> <templateName>In the last command you need to specify two arguments. storageLocation is the storage ID you want to store the container template on, and it needs to allow container templates as a content type. templateName is the template name that you can copy and paste from the output of the pveam list command. Here’s what the download command looks like after running:
Creating the Proxmox Container
This testing was done on Proxmox 7.4-3 using an Ubuntu 22.04 template. The screens and instructions may differ depending on your environment.
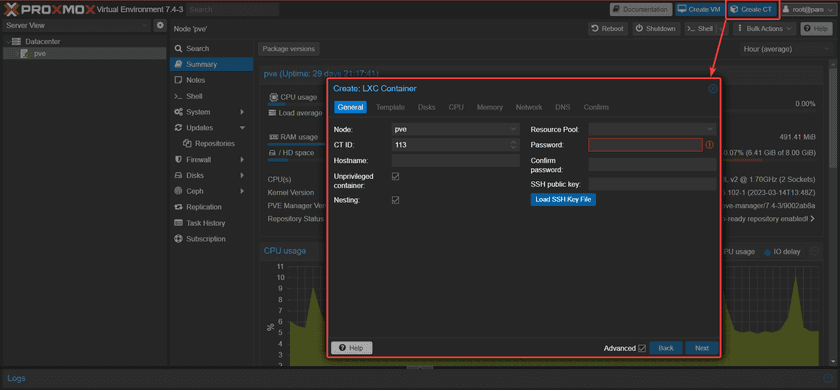
To get started, click the Create CT button in the top-right corner of the main screen for your Proxmox node. This will bring up the window to configure your new container:
- On the
Generaltab, fill out the hostname and password for the container, and load your SSH key if you want to log in using that (for this guide we’ll be using the Proxmox VNC console). LeaveNestingchecked, and uncheckUnprivileged containerif you want to allow pings to Resources from this Connector - On the
Templatetab, select the storage ID that you downloaded the template image onto and then the image itself - On the
Diskstab, select the storage ID for the location that you want to keep the disk for this container on - it doesn’t need to be very fast or large so the default 8GB size is sufficient - On the
CPUtab, you can leave the default setting of 1 vCPU - On the
Memorytab, leave the default settings of 512MB - On the
Networktab, you need to specify the main interface name for the container, as well as choose the network bridge to use for this container - for this guide we’re using DHCP
You can also decide if you want to use DHCP or assign a static IP address to the container. We recommend assigning a static IP address in case any of the services you�’re going to set up as Resources will need to permit the IP address of the Twingate Connector or if you want to perform any logging on your network, in which case having a static IP address will be beneficial.
- On the
DNStab, you can leave it defaulted to using host settings or you can specify something custom:
The last tab allows you to review your container configuration and then create it:
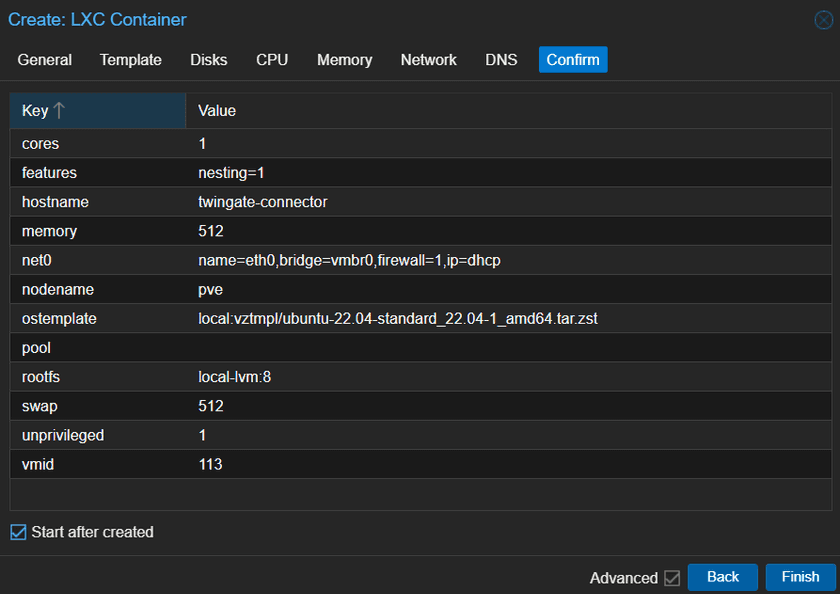
Once you click Finish, you’ll need to wait until the container is created and started, and then you’ll be able to log into it.
Installing the Twingate Connector
After you’ve created the container and started it, you’ll be able to click the Console tab in the container screen and log in:
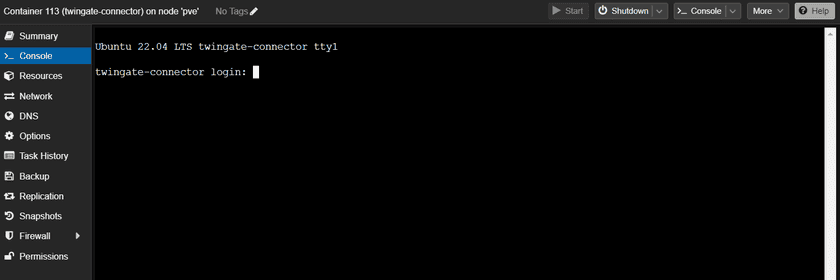
Use root as the username and the password that you specified during the configuration. The screen should then look like this:
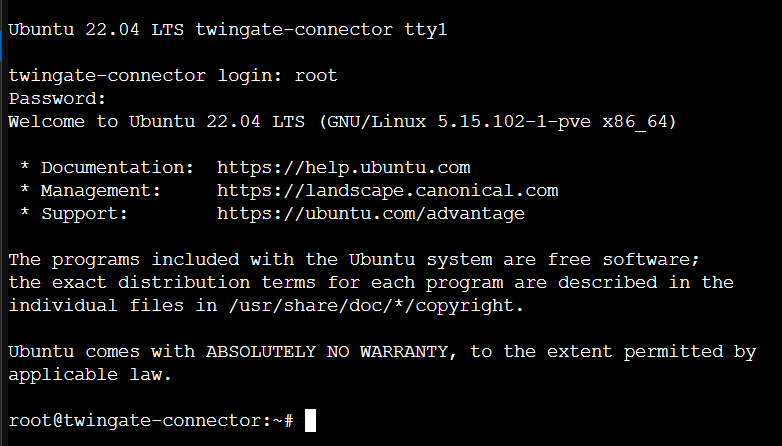
Before attempting to install the Twingate Connector, run the commands below:
apt updateapt upgrade -yapt install curl -yThis will ensure that the container is updated and has cURL, which is required for the Twingate Connector deployment script to operate properly.
Now, log in to your Twingate Admin Console and go to the Remote Network that you want to deploy a Connector for. Then, select the Linux deployment method:
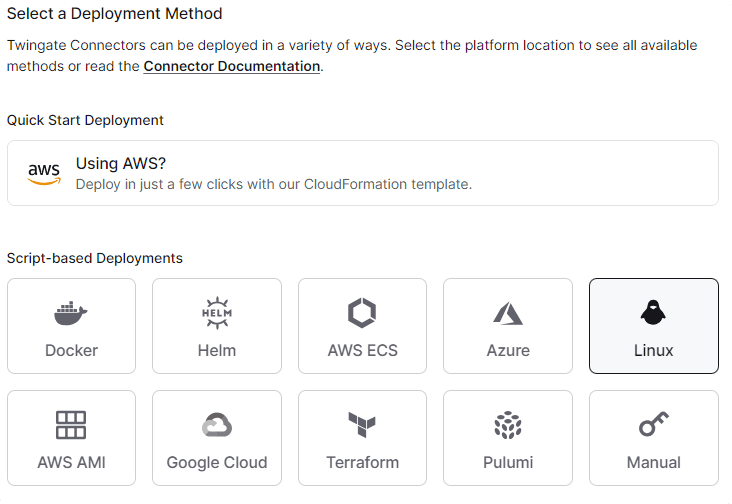
Scroll down and click Generate Tokens:
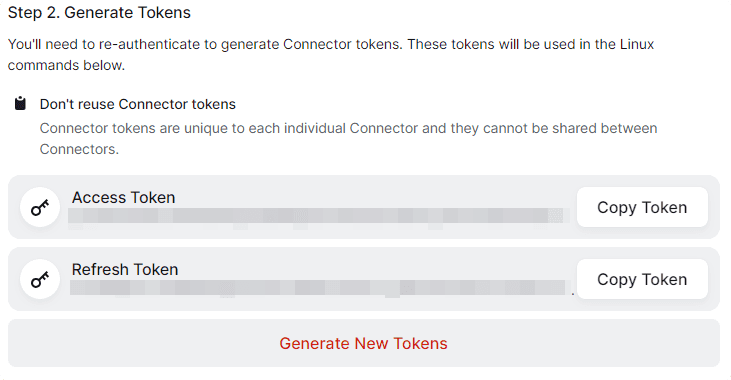
You do not need to copy the tokens - they will automatically be included in the deployment script.
If you need to pull the logs into a SIEM, decide if you want to enable local connection logs. Copy the deployment command at the bottom and paste it into your container console (as shown below) and run it:

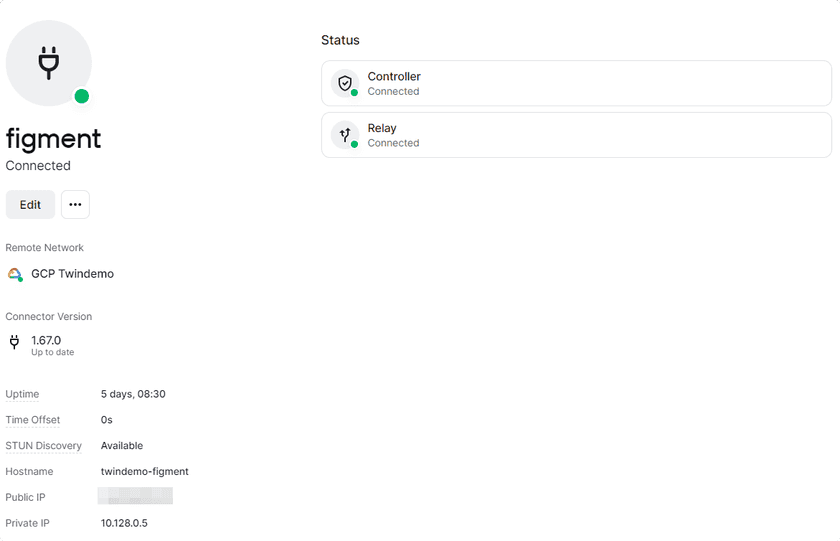
Once the deploy completes you should see the Connector window change to show that it’s been successfully set up and connected to the Twingate network.
Keeping Connectors Updated
Twingate Connectors will not update automatically. You will need to build them into your existing update strategy and stagger updates across multiple Connectors on the same Remote Network in order to avoid any interruption.
You can automate an update if you choose by using a cron job.
Last updated 1 year ago