Configure SCIM User & Group Sync
Before configuring SCIM, you must first set up the OneLogin Twingate application.
Supported Features
If you would like to sync users and groups from OneLogin to Twingate, you need to set up SCIM. To do this, you must first set up the Twingate application from OneLogin’s application catalog.
The following SCIM provisioning features are supported:
- Create users in Twingate from OneLogin
- Update user attributes in Twingate from OneLogin
- Deactivate users in Twingate that have been deactivated in OneLogin or removed from the OneLogin Twingate application
- Provision groups and group membership from OneLogin to Twingate
Requirements
OneLogin SCIM-based provisioning is supported for Twingate customers on the Business and Enterprise plans.
User Sync Configuration
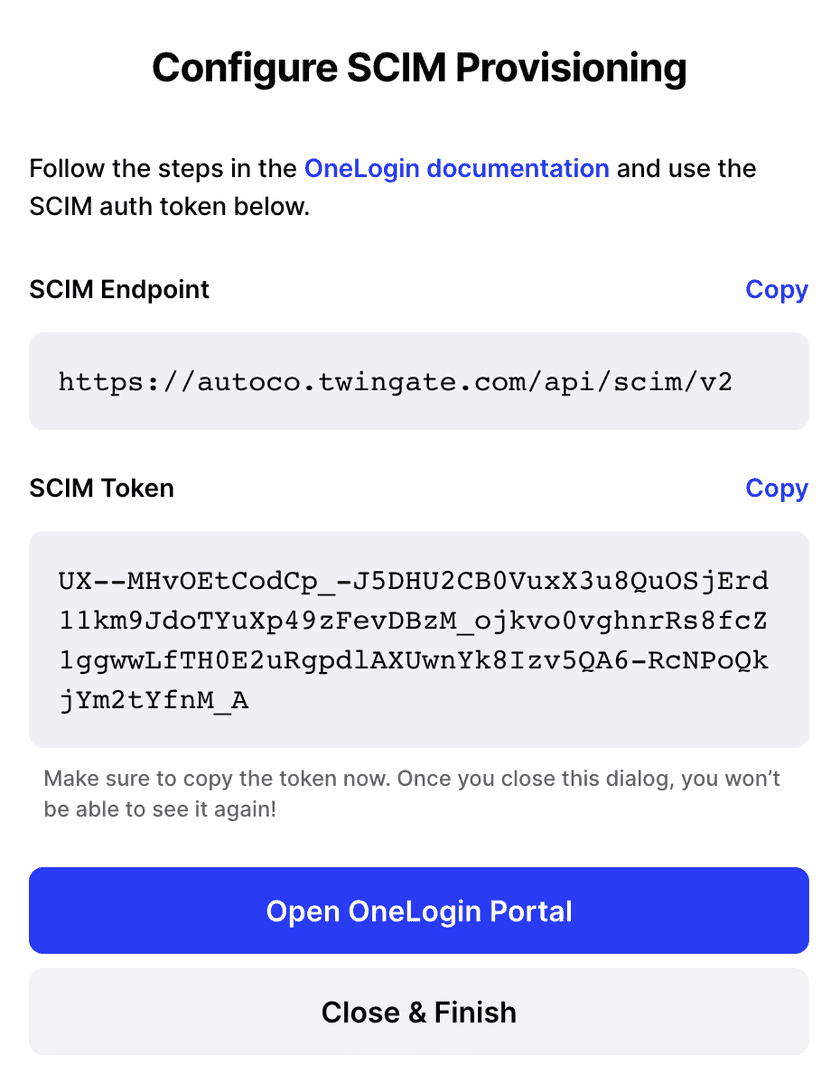
1. Copy the SCIM Endpoint and SCIM Token from the Twingate Admin Console.
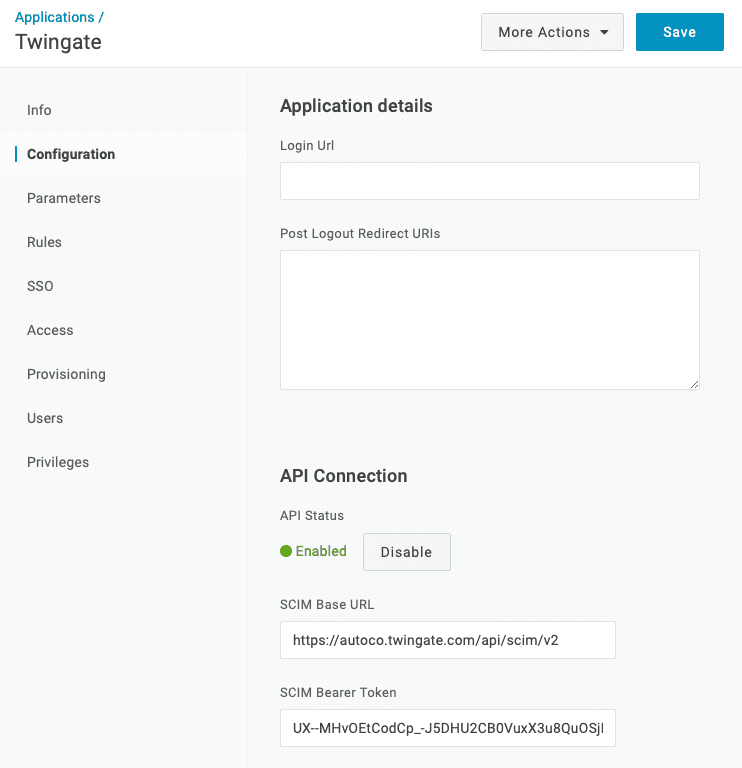
2. In the OneLogin Twingate app under the Configuration tab, paste in the endpoint and token to the SCIM Base URL and SCIM Bearer Token fields, respectively. Then click Enable.
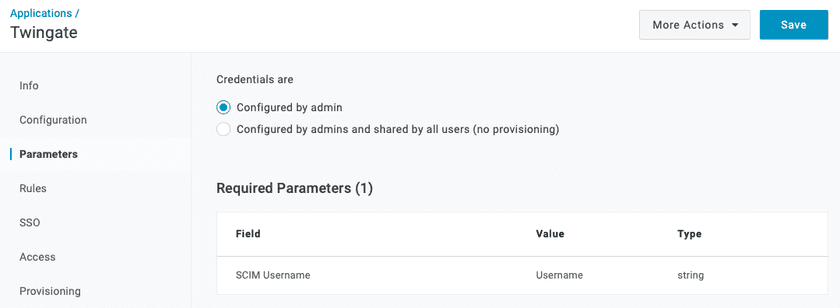
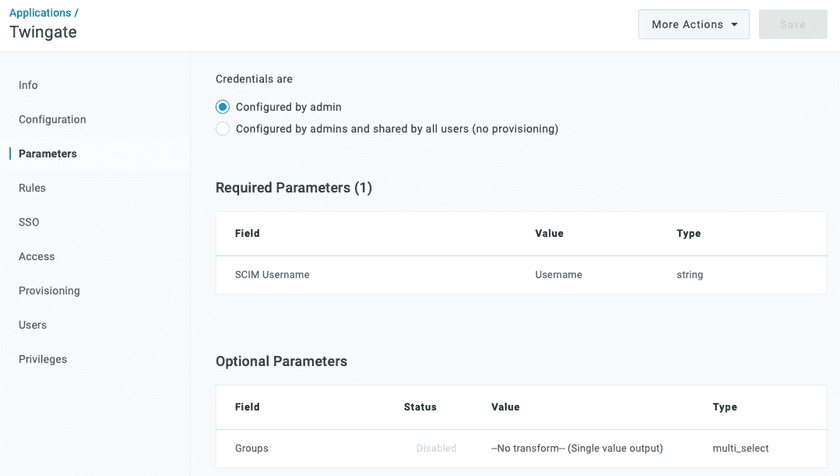
3. In the Parameters tab, check that the SCIM Username mapping is correctly configured.
The default configuration is shown below, which maps ”Username” to ”SCIM Username”. This is the field that Twingate uses to uniquely identify synchronized users. If your OneLogin configuration is not using the “Username” field for users, you should select “Email” for the mapping to “SCIM Username” instead.
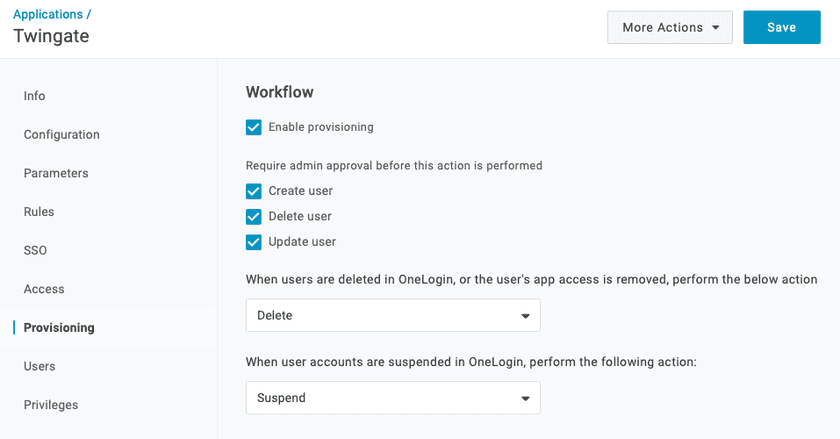
4. Under the Provisioning tab, ensure that Enable provisioning is checked.
Change the option for “When users are deleted in OneLogin…” to Delete.
Finally, click Save.
Suggestion
You may want to uncheck “Require admin approval” for all 3 actions (create, delete, and update). Otherwise, you will need to manually approve any changes in the Users tab before they will be synced to Twingate.
- Under the Users tab, click on the Apply to all dropdown at the top right corner and select Reapply Mappings.

If admin approval is not required (see step 4), users will be synced with Twingate immediately. Otherwise, users’ provisioning state will be “Pending” until each users is manually approved for synchronization.
Group Sync Configuration
Although OneLogin SCIM sync allows mapping any user attribute to “SCIM Group”, we recommend that you use the user’s Role attribute, which is the default mechanism in OneLogin for group-based assignments.
1. Enable SCIM group sync by navigating to the Parameters tab in the OneLogin Twingate application.
Under the Optional Parameters section, click Groups. Then select the ”Include in User Provisioning” checkbox and click Save.
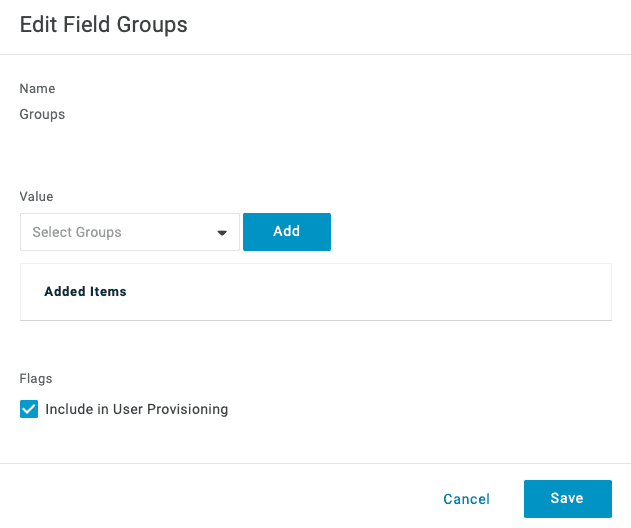
Groups status under Optional Parameters should now be Enabled under the Status column.

2. Add a rule to map OneLogin Roles to SCIM Groups by navigating to the Rules tab in the OneLogin Twingate application.

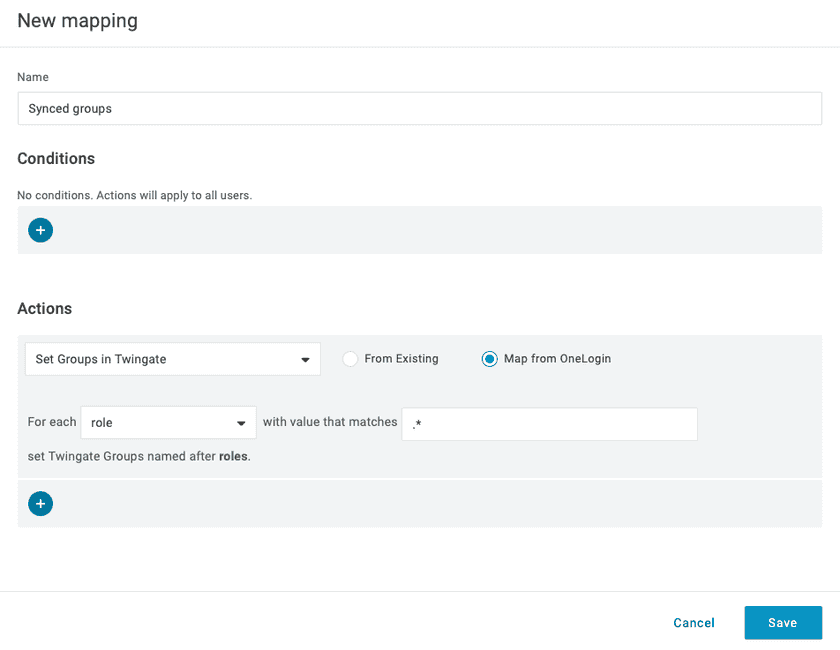
Click on Add Rule. In the modal form, give the rule a name, e.g. “Synced groups”.
In the Actions section, select Set Groups in Twingate. In the For each dropdown, select role. In the with value that matches text entry box, enter .* if you want to map all roles to SCIM Groups. Alternatively, you can enter a specific role you want to sync or use a regular expression pattern.
Finally, click Save.
3. Finally, you need to reapply the new mapping for SCIM Groups by navigating to the Users tab, clicking on the Apply to all dropdown at the top right corner, and selecting Reapply Mappings.

If admin approval is not required (see step 4 under User Sync Configuration, above), group mappings will be synced with Twingate immediately. Otherwise, users’ provisioning state will be “Pending” until each users is manually approved for synchronization.
Last updated 9 months ago