How to Protect Your Home Lab
Let's explore how to secure your home lab and make it accessible to your family & friends without opening any ports.
It’s not uncommon these days for technically inclined people to build and maintain fairly complex IT environments at home (that’s certainly the case for many of our own staff at Twingate!). Operating a home lab is a great way to learn, rely a bit less on cloud vendors, regain more control over your own data, and provide specialized services to family and friends. However, the more you expand access beyond yourself as the admin, the more complicated things become:
- How do you grant remote access to your less technical family members?
- Should you really open ports through your router to expose services or use a VPN?
- How do you make sure users don’t share their credentials with their friends?
- How do you make sure users can’t access what they shouldn’t, once they are connected to your network?
If you are wondering how to achieve all of this, read on! Twingate makes it all easy, quick, and secure.
Home lab example
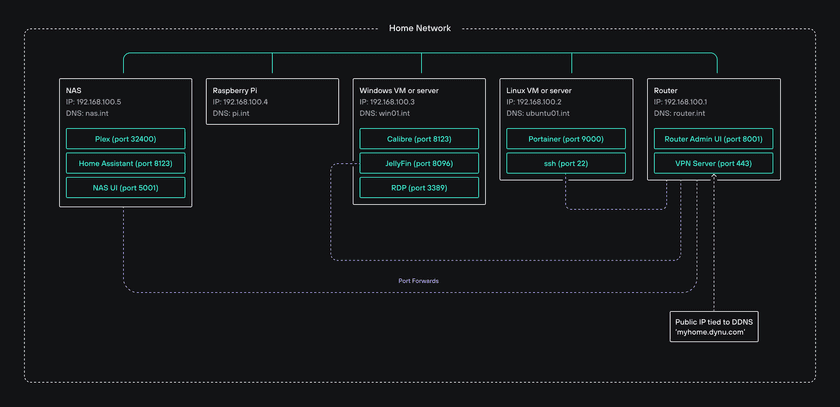
Let’s start with a typical example of a home lab, which contains a mix of hardware and operating systems in a home network:
- a NAS (for storage)
- a Linux machine
- a Windows machine
- a Raspberry Pi
- a router
Let’s say that these machines run various services (on different ports) that are typically used in home labs (e.g. Plex, Jellyfin, Calibre, Portainer, Home Assistant, Radarr, Sonarr, etc.).
Our example home lab is also using a private DNS with DNS entries for each machine on our network on a domain called *.int.
Finally, the router has a few port forwarding rules, along with a dynamic DNS configuration (to cope with changes in the public IP address that the ISP assigns). The router also acts as a VPN server so the admin can remotely access their home network while they are not at home.
Here is the complete environment:
Initial setup
- You’ll need to register for a free Twingate account, if you haven’t already done so.
- You’ll also need to download and install the Twingate Client on your own device.
The first step is to connect your home network to your Twingate account. This is done by installing at least one Connector on a device in your home lab. In Twingate, Connectors are associated with Remote Networks, so we will create a Remote Network first.
Remote Network & Connector setup
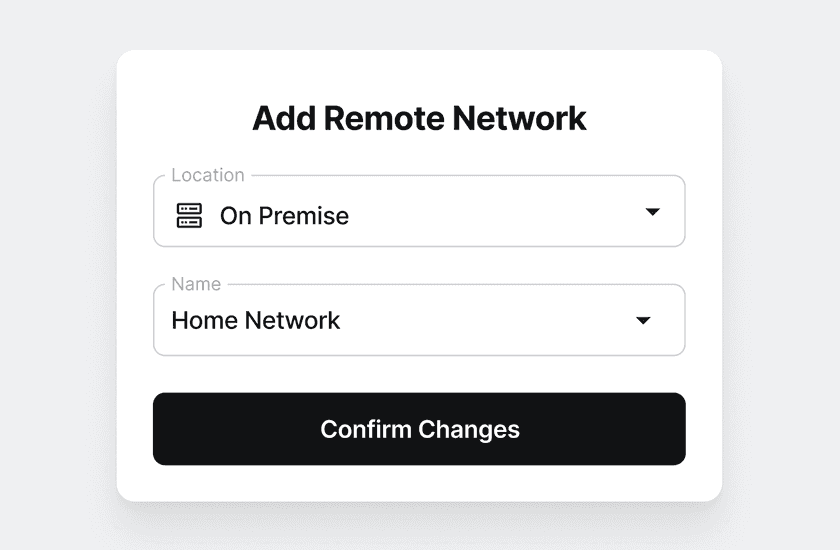
In the Admin Console, head over to the Network tab and under Remote Networks click + Remote Network. Select On Premise as the Location and give it a sensible name (for example, Lab or Home Lab).
Click on your newly created Remote Network. In your newly created Remote Network, you will notice undeployed Connectors on the left and the Resources section in the middle. (Note: You will need to deploy a Connector before connecting to Resources.)
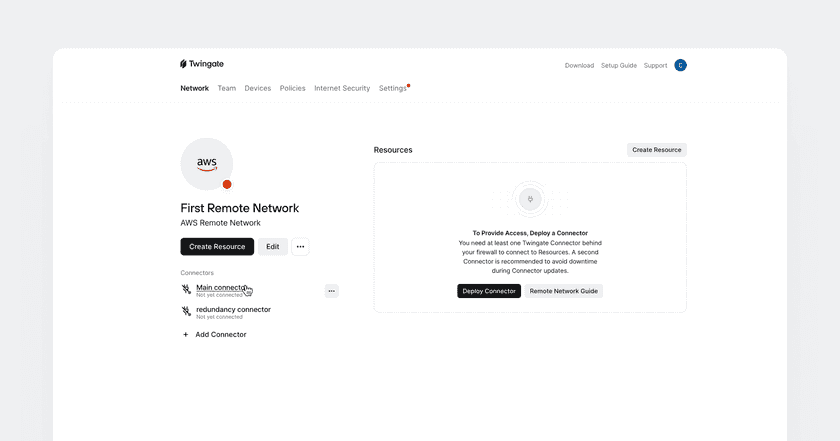
Simply put, Resources represent the servers and services to be made accessible to users, and Connectors allow users to access all of those Resources. Let’s start with deploying the Connectors.
Why does the Remote Network contain 2 Connectors by default?
This is because our recommendation is to deploy Connectors in pairs: 2 or more Connectors per Remote Network automatically provides high availability and load balancing with no additional work on your part.
Are two or more two separate Connectors required for a home lab environment? No.
Do we recommend it? Yes.
Every Remote Network comes with 2 pre-created Connectors. Click on the name of either one and you will be taken to the Connector page where you’ll be presented with multiple deployment options. Before you choose a specific deployment option, think about where you want to deploy your Connector.
Connectors have a small footprint (2Gb of RAM, 2 vCPUs) and can be installed as containers or in VMs so we have several options regarding where to install them in our example home lab:
- the NAS (depending on the make and model of the NAS, it could be deployed via systemd like on any VM, or it could be deployed as a Docker container)
- the Raspberry Pi (also via systemd like on any VM)
- the Linux machine or a Linux VM
- the Windows machine or a Windows VM (either via Docker or via a Hyper-V VM running Linux, but note that Docker on Windows is not always very stable)
(Take a look at our Connector deployment page if you are looking for more possibilities.)
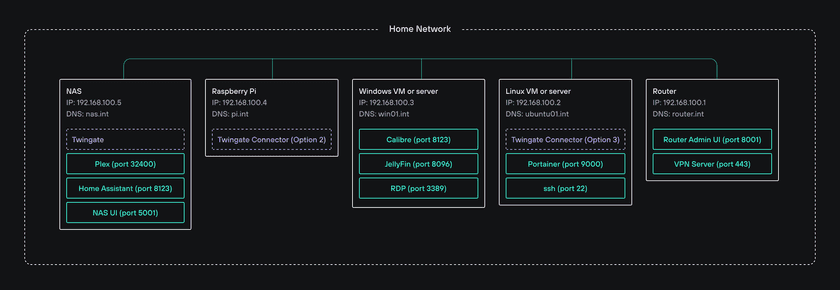
You do not need to deploy one Connector for every Resource (i.e. machine or service) you would like to access remotely.
Once you have picked a location and a deployment method, go ahead and follow the instructions in the Admin Console - it should not take more than a minute or so to complete. Once you’re done, make sure your Connector has successfully connected to Twingate’s Controller and Relay network:
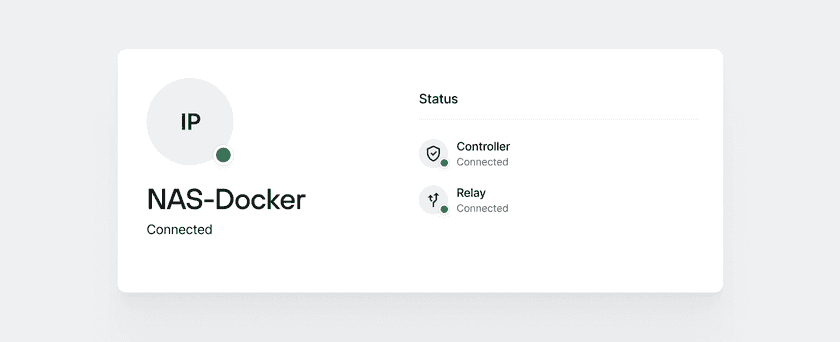
Now that your Twingate account is active and you have an active Connector, open up your Twingate Client on your device and sign in to connect. Then, click on the Twingate icon in your system tray or menu bar and you should see 0 accessible Resources there. This is expected because setting up Resources is the next step!
Resource creation and assignment
You can now connect to your Twingate environment but you cannot yet connect to any of your home’s servers or services. Twingate is designed around zero trust principles, therefore it grants no permissions by default.
Resources in Twingate represent the servers and services on your network (identified via their IP address or fully qualified domain name, and port numbers). In order to make Resources accessible to Users, those Resources must be assigned to Users via Groups (more on this later).
Resources can be defined several ways so let’s start with the simplest one.
In the Admin Console, head over to the Network tab and under Resources click Add Resource. Let’s ignore the fact that we have our own private DNS server and ignore individual ports and IP addresses for now. For the sake of illustration in this example, we will create a single Twingate Resource that grants access to all IP addresses and all ports within our home lab.
Give the Resource the label “Everything”. Since our router operates on a subnet with IP addresses ranging from 192.168.100.1 to 192.168.100.254, let’s select the CIDR option and enter the entire IP address range: 192.168.100.0/24:
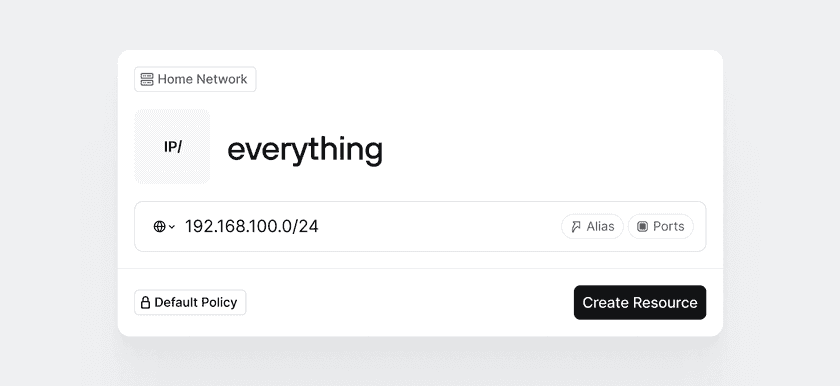
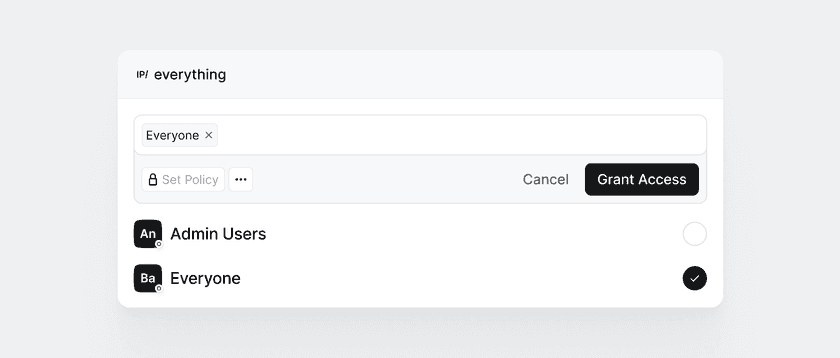
Click Create Resource. Next, Twingate will prompt you to select the Groups that should be given access to the Resource. Let’s select the only Group you should have in your environment at this point (the Everyone Group):
Now wait a few seconds (or sign back into the Twingate Client) and you should see a single visible Resource called Everything:
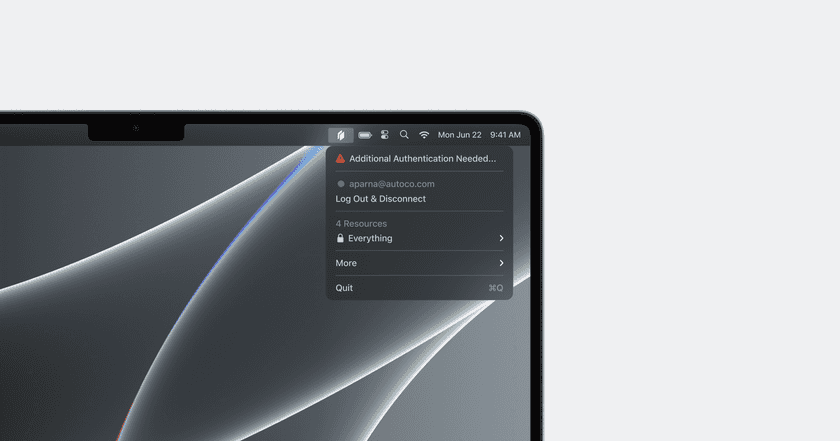
You should now be able to access all IP addresses within your network. You can test it by using a different internet connection if you are at home (e.g. by temporarily tethering to your mobile phone’s internet connection) and trying to reach one of your internal services. In our example home lab, we could validate this by connecting to our NAS via a browser on, for instance, http://192.168.100.5:5001.
By the way, since we use a private DNS in our example home lab with domain int, we could have created the Everything resource using a DNS pattern instead of using a CIDR range:
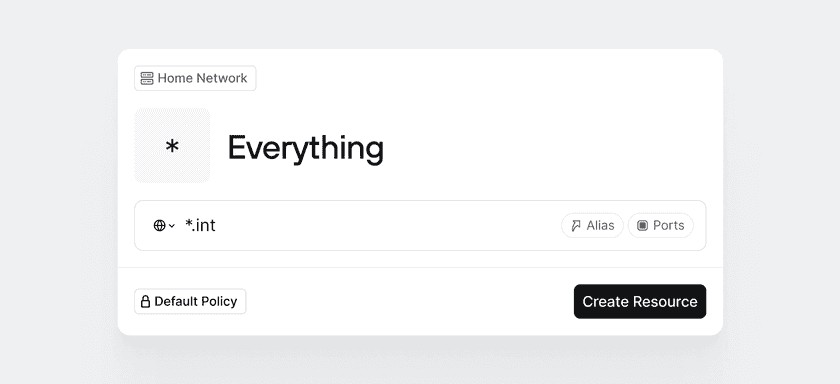
At this point, you may be asking yourself whether it is better to use IP style Resources or DNS style Resources. The answer depends on how your users typically connect to your servers and services. If they connect to private assets using IP addresses, use IP style Resources. If they use FQDNs like win01.int, use DNS style Resources. If they use both, use both. The Twingate Client uses your Resource definitions to figure out which traffic to intercept and send to Connectors.
Congratulations! If you have made it this far, you can now shut off your VPN server, close its open port, and remove all port forwarding rules from your router!
Setup access for multiple users
If you intend to provide remote access to just yourself, you do not need to read on. However, if you wish to provide remote access to your family and friends, start by inviting them to your Twingate environment.
Head over to the Team tab and click on Add User. Provide the email address of the user you wish to invite, and repeat this for all other users.
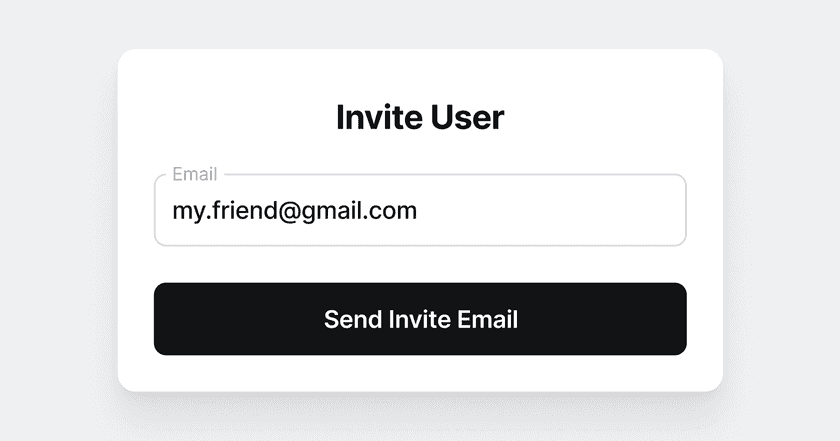
Once done, you will see all your users in the Users section of the Admin Console. Let’s organize our Users into Groups before we grant Users permissions. Head over to the Groups tab next to the Users tab.
For a home lab environment, we recommend thinking of Groups as roles. Here is a simple example you can use:
- Group 1: Standard Users (non-technical friends and family who need to access some of your services but will not (and should not!), for instance, ssh into your Linux server)
- Group 2: Power Users (non-admin users with some admin-like privileges, for instance a significant other who should be able to remotely access the home router for configuration)
- Group 3: Admin Users (you, the owner of the home lab)
Once you have decided what Twingate Groups to create, click on Add Group, give your Group a name, and add all applicable Twingate Users to it. Do the same for all Groups in your permissions scheme.
By now, you should have the following setup in your Twingate environment:
- all Users created
- all Groups created (with Users in them)
- at least one working Connector
- a single Resource (pointing to the entire CIDR range or internal domain)
Now is the right time to reconfigure our Resources. We don’t want everyone to have access to every part of our home lab, so let’s be a bit more granular and move away from our Everything Resource.
Map existing services
Start by listing all the services you want to be remotely accessible. (A service is defined as a host:port combination.) In our example home lab, the services we should consider include:
| Description | Type | Address | Port |
|---|---|---|---|
| NAS - UI | IP | 192.168.100.5 | 5001 |
| NAS - Plex | IP | 192.168.100.5 | 32400 |
| NAS - Home Assistant | IP | 192.168.100.5 | 8123 |
| Win - Calibre | IP | 192.168.100.3 | 8123 |
| Win - Jellyfin | IP | 192.168.100.3 | 8096 |
| Win - RDP | IP | 192.168.100.3 | 3389 |
| Win - RDP | DNS | win01.int | 3389 |
| Linux - Portainer | IP | 192.168.100.2 | 9000 |
| Linux - ssh | IP | 192.168.100.2 | 22 |
| Router - UI | IP | 192.168.100.1 | 8001 |
As you can see, there are two identical services (RDP) for the same Windows server - this is on purpose because some of our users use 192.168.100.3 when connecting to it, and others use the FQDN win01.int, so both options should be considered.
Map services to Groups
The final step is to map each service to the Standard Users Group, the Power Users Group, the Admin Users Group, or a combination of Groups:
| Description | Type | Address | Port | Groups |
|---|---|---|---|---|
| NAS - UI | IP | 192.168.100.5 | 5001 | Standard Users, Power Users, Admin Users |
| NAS - Plex | IP | 192.168.100.5 | 32400 | Standard Users, Power Users, Admin Users |
| NAS - Home Assistant | IP | 192.168.100.5 | 8123 | Standard Users, Power Users |
| Win - Calibre | IP | 192.168.100.3 | 8123 | Standard Users, Power Users, Admin Users |
| Win - Jellyfin | IP | 192.168.100.3 | 8096 | Standard Users, Power Users, Admin Users |
| Win - RDP | IP | 192.168.100.3 | 3389 | Admin Users |
| Win - RDP | DNS | win01.int | 3389 | Admin Users |
| Linux - Portainer | IP | 192.168.100.2 | 9000 | Admin Users |
| Linux - ssh | IP | 192.168.100.2 | 22 | Admin Users |
| Router - UI | IP | 192.168.100.1 | 8001 | Standard Users, Power Users |
Create Resources and map them to Twingate Groups
We are now ready to create Resources and map them to Twingate Groups. Let’s start by creating new Resources - one for each service identified above.
There is no strict requirement around the number of services defined in a single Resource. We could create a Resource for NAS - UI and a separate one for NAS - Plex. However, since both services are hosted on the same server and both services are available to the same Groups, let’s create a single resource for both services.

For each Resource you create, make sure to select the right Groups and most importantly, make sure not to check the Everyone Group.
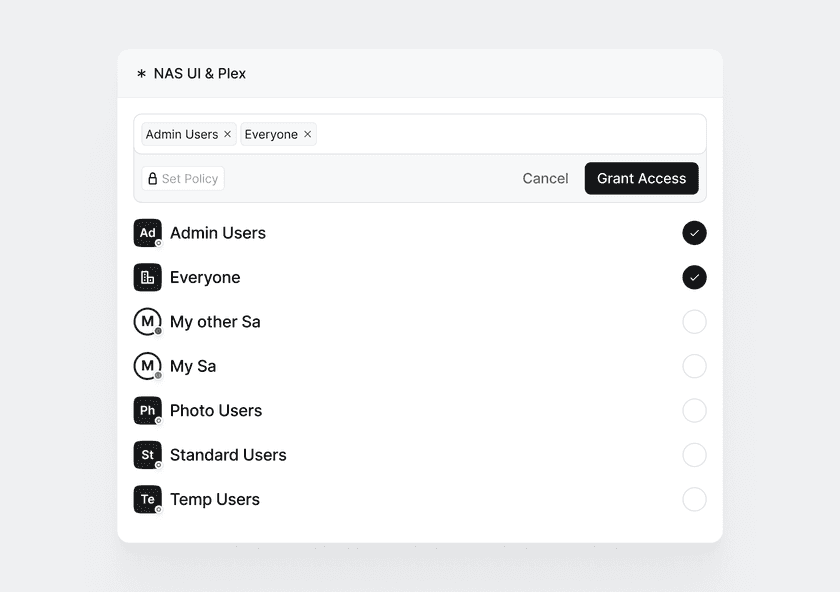
Finally, delete the Everything resource as you will no longer be needing it.
Security Policies
If you would like to control access further (for instance, to make sure you get to approve every new device that tries to connect to your network, or if you want your users to go through 2-factor authentication before being allowed to access certain Resources), check out Policies. Policies are assigned to Groups and protect Resources that all members of a Group have access to. By default, Twingate enforces a default policy that you will see has already assigned to all your Groups.
Twingate Policies are designed around three questions:
- How often should a User authenticate to gain access to a Resource? (e.g. every hour, every day, etc.)
- Should the user provide a second factor (e.g. 2FA code) to gain access to a Resource?
- What characteristics must a User’s device possess before it is permitted access to a Resource? (e.g. should the device be verified, have screen lock enabled, etc.)
If you wish to implement custom Policies and assign them to your Groups, check out our Security Policies page.
Last updated 1 year ago