How to Deploy a Connector on AWS
Overview
There are several options available for deploying Connectors on AWS depending on your particular environment and needs. In most cases, you can use the Connector deployment page in the Admin Console to configure and deploy your Connector.
Check your subnet configuration
The subnet in which you deploy a Connector in requires outbound Internet access, both to download the Connector container image and to connect to Twingate. Check our Best Practices for Connectors guide for more information.
Peer-to-peer connections help you to provide a better experience for your users and to stay within the Fair Use Policy for bandwidth consumption. Learn how to support peer-to-peer connections.
CloudFormation
The easiest way to deploy a connector on AWS is to use our CloudFormation template. Follow the steps below to deploy a connector through CloudFormation:
- Log in to your Twingate Admin Console, click on Remote Networks, then on the Remote Network on which you want to deploy a Connector. Then click on the Add Connector button on the left-hand side of the screen.
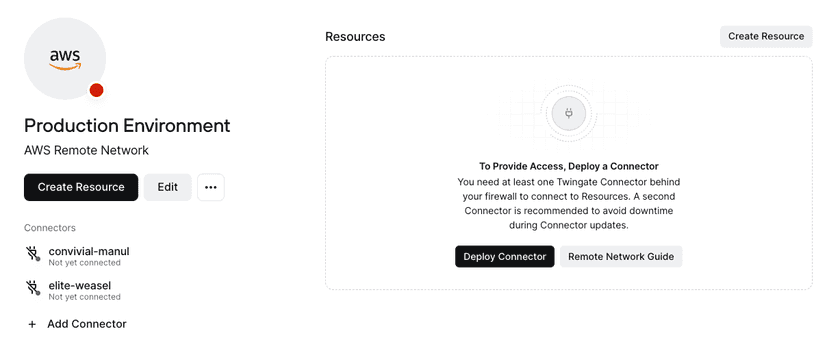
Add a Connector to a Remote Network - Click on the new Connector that was created. On the Connector deployment page, choose the AWS Quick Start deployment.

Choosing the CloudFormation Option - Select the region you want your Connector to be deployed on and click Open AWS. In most cases, this should be the same region your Resources are in.
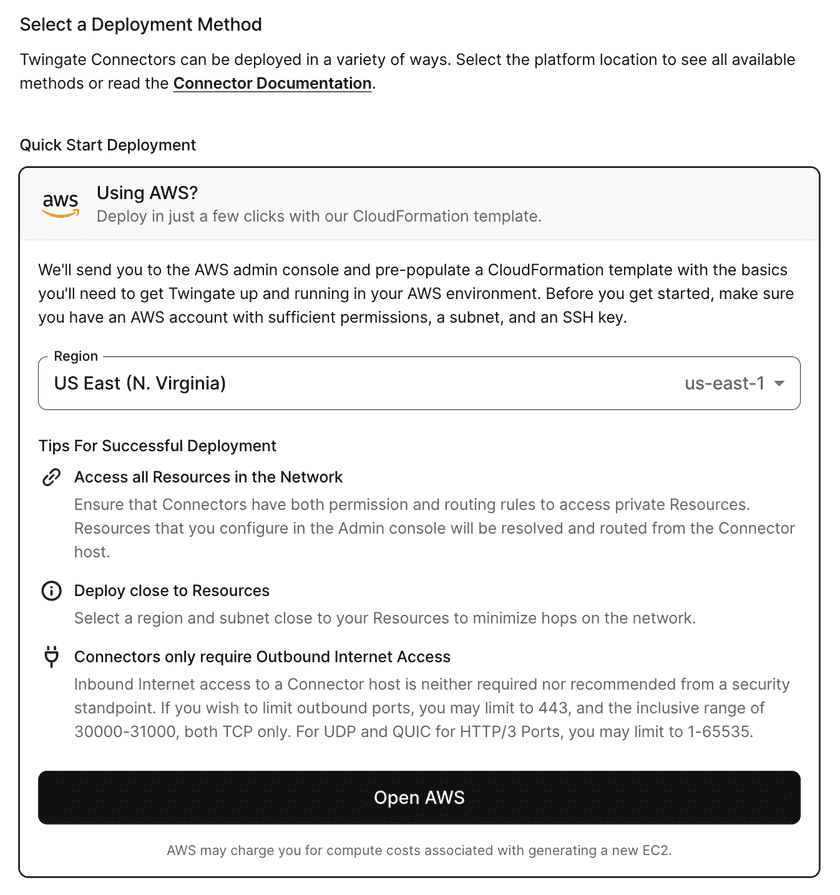
Choosing the CloudFormation Option - This will open a page in AWS that will allow you to select the parameters for your stack. Select your SSH key and Subnet ID, then click Create stack.
- Your connector should be live within a few minutes.
EC2 Deployment
If you are deploying on an EC2 instance, you can follow the general Linux Connector deployment instructions for full details.
In summary:
- Docker-based deployment is compatible with any 64-bit Linux distribution that Docker supports.
- The Connector
systemdservice is currently supported on Ubuntu, Fedora, Debian, and CentOS.
Please see our Connector Best Practices overview for general recommendations as well as hardware recommendations for EC2 instances.
AMI Deployment
We offer an AWS AMI that has the Connector systemd service pre-installed on a base Linux Ubuntu x86 image. Use the steps below to create and configure an EC2 instance with this AMI.
- Log in to your Twingate Admin Console, click on Remote Networks then on the Remote Network on which you want to deploy a Connector. From there, scroll down and click on the Add Connector button on the left-hand side of the screen
- Click on the new Connector that was created. On the deployment page click the AMI option at the top of the screen
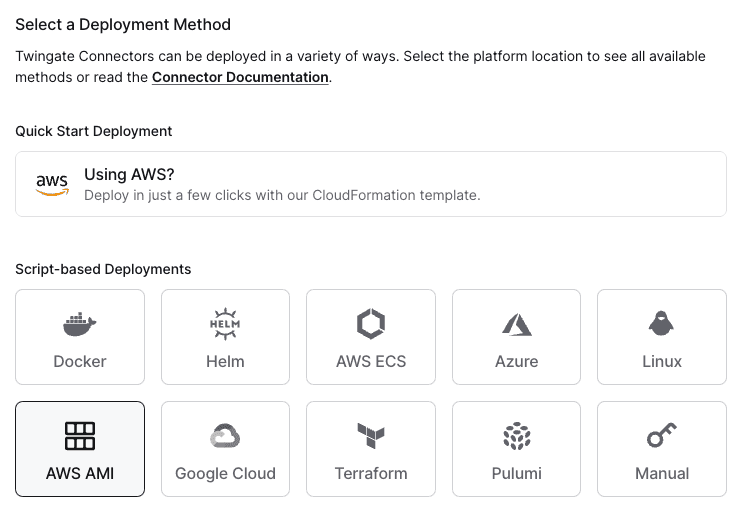
Choosing the AMI Option - Scroll down to step 2 and click the button to generate tokens. It will have you re-authenticate and then bring you back to this page
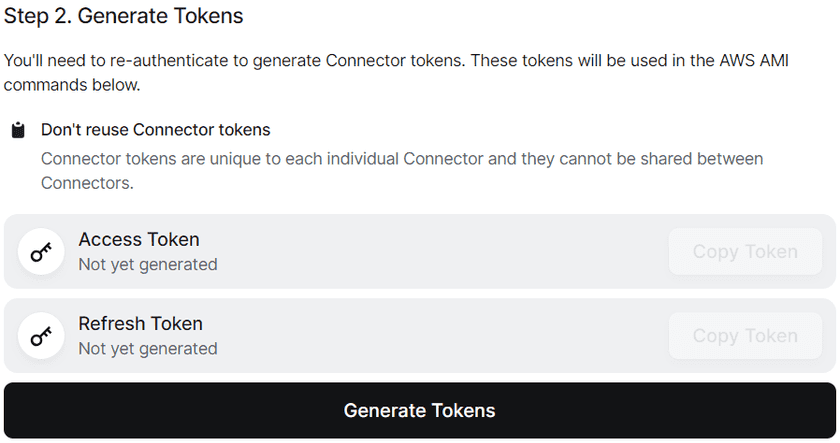
Generate Tokens - Scroll down to step 3 and fill out the required information about your AWS environment, as well as enable and configure the optional features
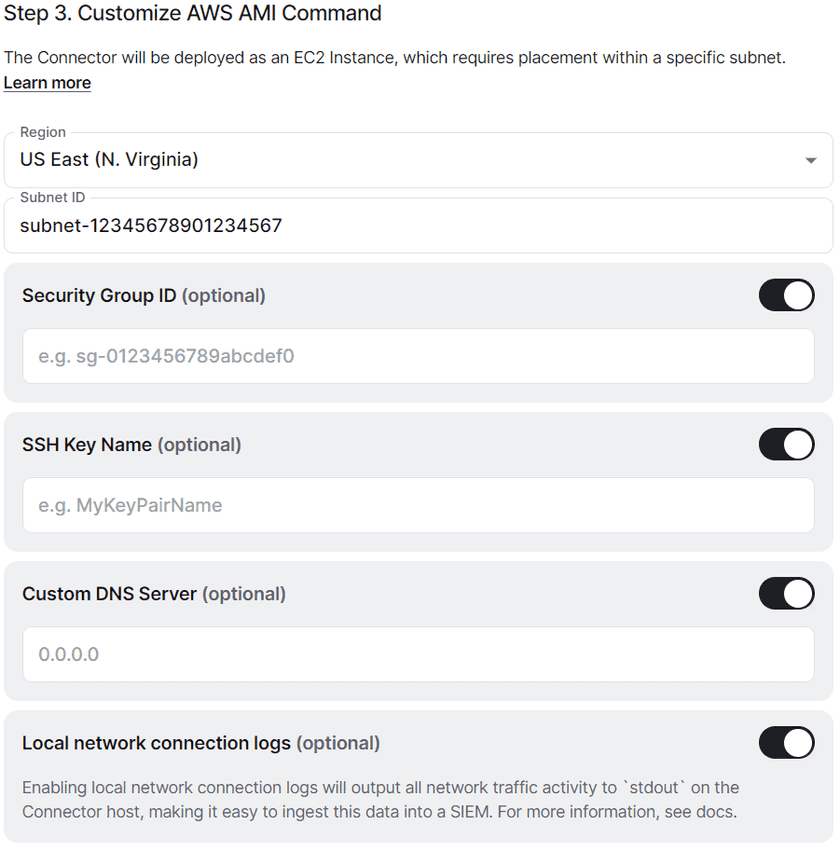
Fill out the AMI Configuration - Scroll down to step 4 and pick which CLI environment you’re using from the drop-down. Copy the completed command and run it in your CLI
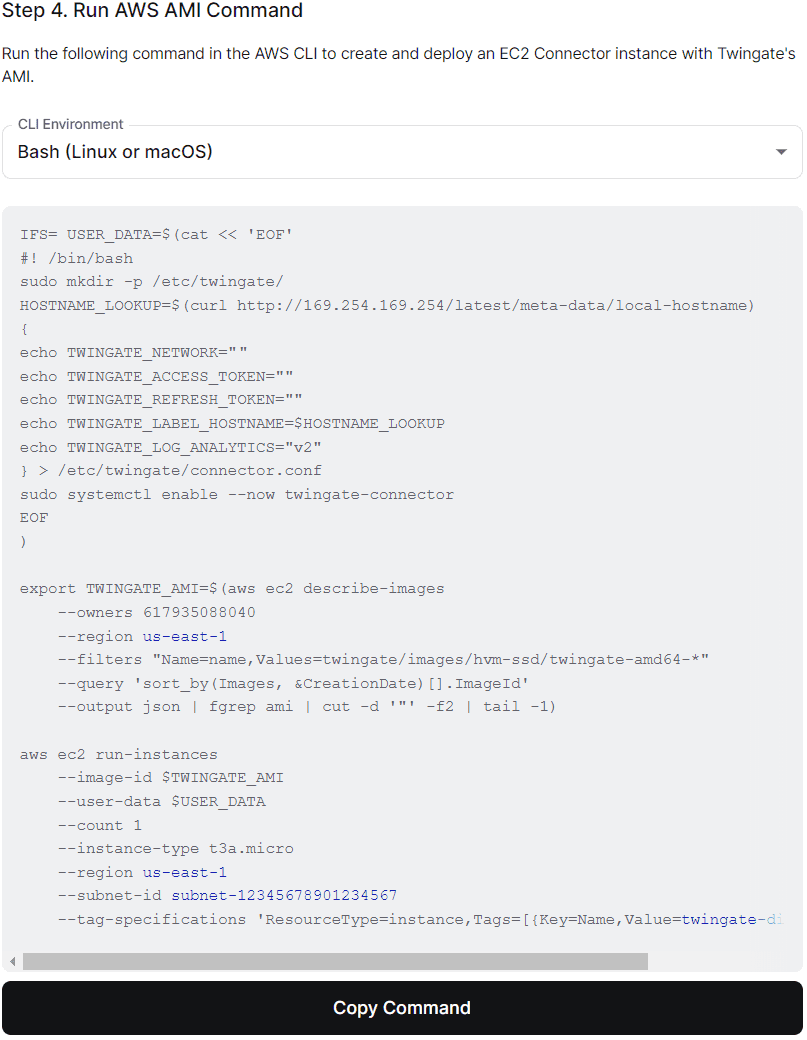
Completed Deploy Command
Remote shell for AMI image
Twingate AMIs come pre-installed with Amazon AWS SSM Agent, allowing you to remotely manage and access the Connector host instance. For more information on how to setup AWS Systems Manager, including assigning IAM roles, please refer to the System Manager user guide.
ECS Fargate Deployment
We offer an ECS Fargate container that has the Connector service pre-installed. Use the steps below to create and configure an ECS container.
-
Log in to your Twingate Admin Console, click on Remote Networks then on the Remote Network on which you want to deploy a Connector. From there, scroll down and click on the Add Connector button on the left-hand side of the screen
-
Click on the new Connector that was created. On the deployment page click the ECS option at the top of the screen
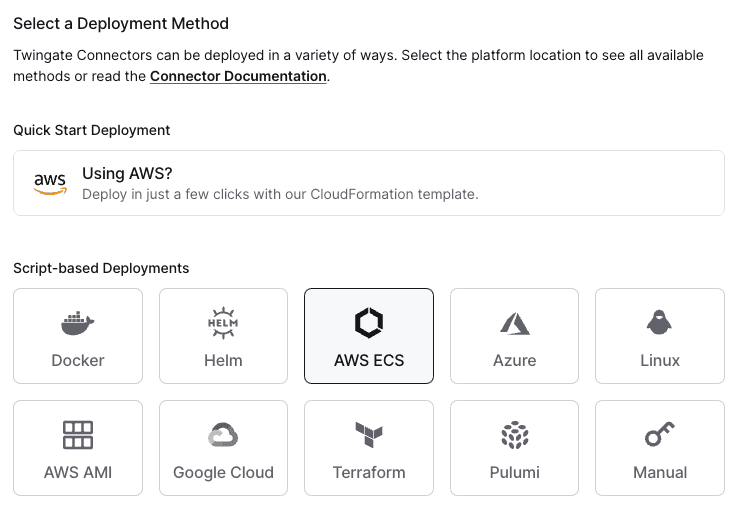
Choosing the ECS Option -
Scroll down to step 2 and click the button to generate tokens. It will have you re-authenticate and then bring you back to this page

Generate Tokens -
Scroll down to step 3 and fill out the required information about your AWS environment, as well as enable and configure the optional features
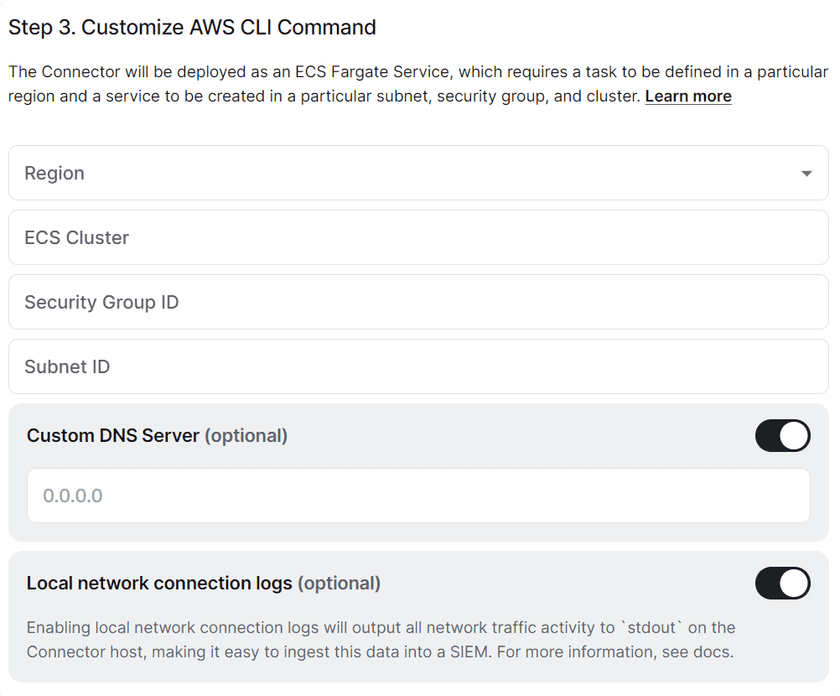
Fill out the ECS Configuration -
Scroll down to step 4 and copy the command to create the task definition. Run it in the AWS CLI
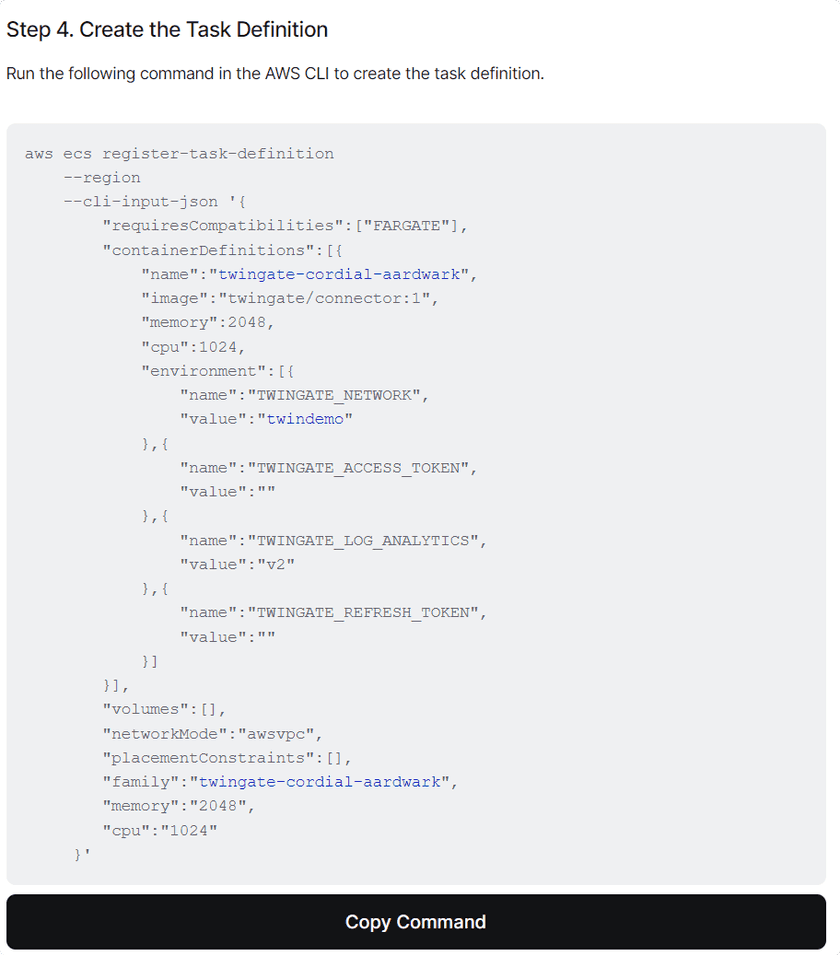
Create the Task Definition Command ECS Fargate Task Definition
If you need to be able to ping Resources within this Remote Network, you will need to add a
systemControlssection to thecontainerDefinitionssection of the task definition. This will allow the Connector to set thenet.ipv4.ping_group_rangesysctl value. It will look like this:"systemControls": [{"namespace": "net.ipv4.ping_group_range","value": "0 2147483647"}For more information, see the AWS documentation.
-
Scroll down to step 5 and copy the command to launch the Connector. Run it in the AWS CLI
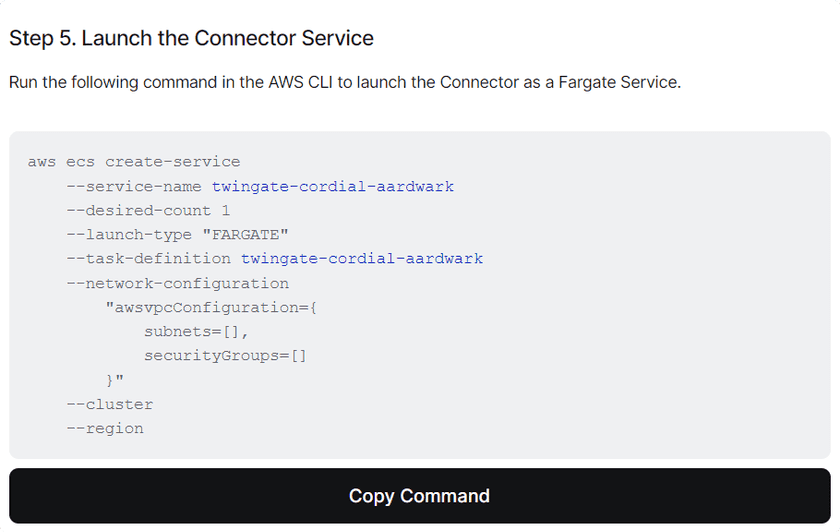
Launch the Connector
Amazon Elastic Kuberenetes Service (EKS) Deployment
Connectors can also be deployed on a EKS cluster using the official Twingate Helm chart. If you intend use Twingate for K8s, you may also want to look at our Kubernetes Best Practices Guide.
Infrastructure as Code Deployment
Deployment automation is available using Terraform, Pulumi, or the Twingate API.
Don't re-use Connector tokens
Because tokens are specific to each running Connector, we recommend creating separate task definitions for each Connector instance you plan to run.
Updating the Connector
Updating Connectors running as a systemd service in either an EC2 instance or using the Twingate AMI can be done manually by using the Linux package manager, or automatically by setting up a scheduled task to check for updates. We recommend staggering updates across multiple Connectors to avoid downtime. For more details check our Systemd Connector Update Guide.
Connectors that are running in an ECS Fargate container can be upgraded through the AWS management console or CLI. For more details check our ECS Connector Update Guide.
Last updated 9 months ago