Okta SCIM User & Group Sync Configuration
For an overview of the Okta configuration process, see this article.
Supported Features
If you would like to sync users and groups from Okta to Twingate, you need to set up SCIM. To do this, you must first set up the Twingate application from Okta’s Integration Catalog.
The following SCIM provisioning features are supported
- Create users in Twingate from Okta
- Update user attributes in Twingate from Okta
- Deactivate users in Twingate that have been deactivated in Okta or removed from the Okta Twingate app
- Group push from Okta to Twingate
Requirements
Okta SCIM-based provisioning is supported for Twingate customers on the Business and Enterprise plans.
Configuration Steps
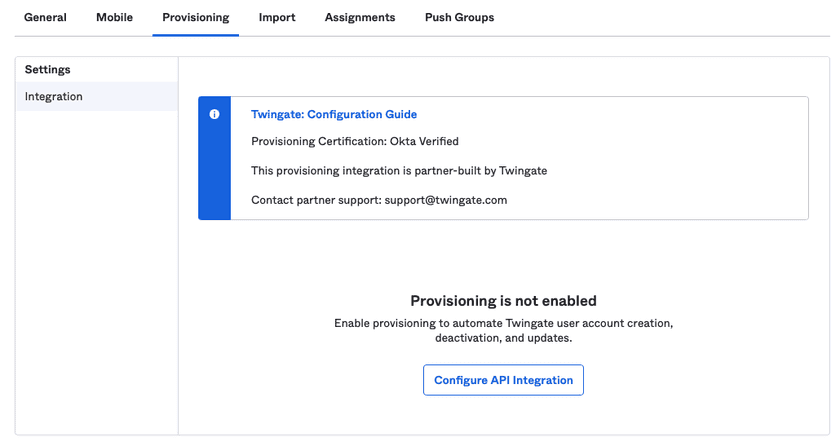
1. In your existing Twingate app under the Provisioning tab, click Configure API Integration
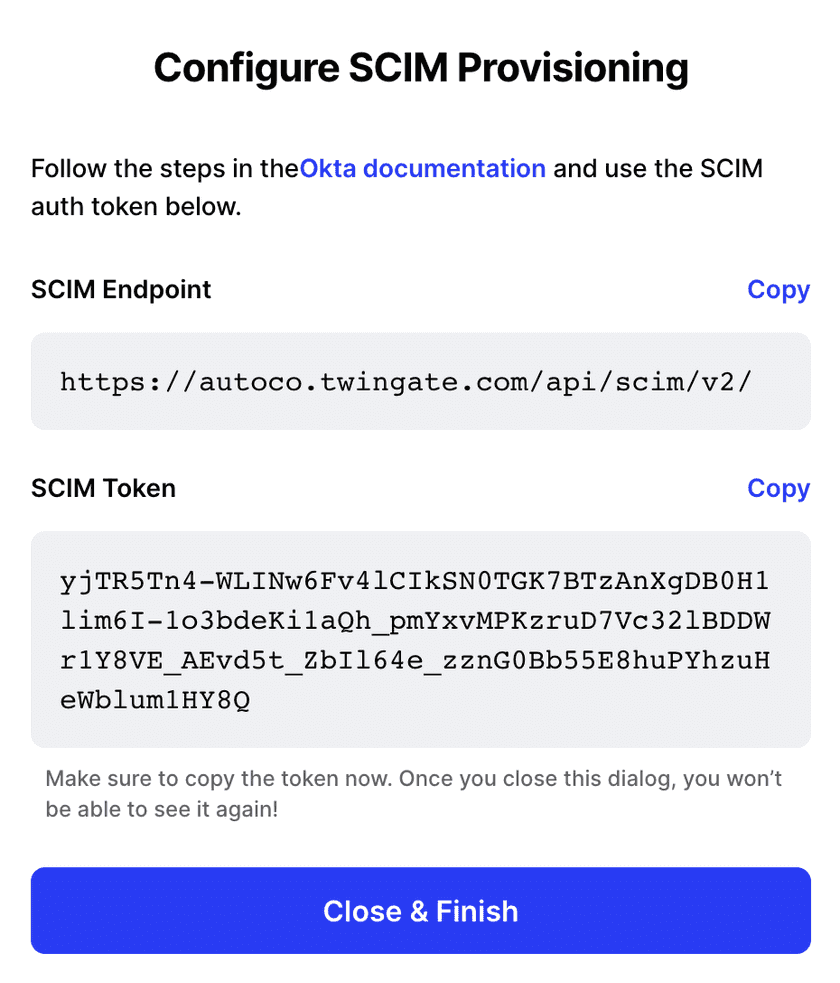
2. Copy the SCIM Token from the Admin Console
Note that you don’t need to specify the SCIM endpoint in the Twingate Okta app as this was configured when you first installed the application.
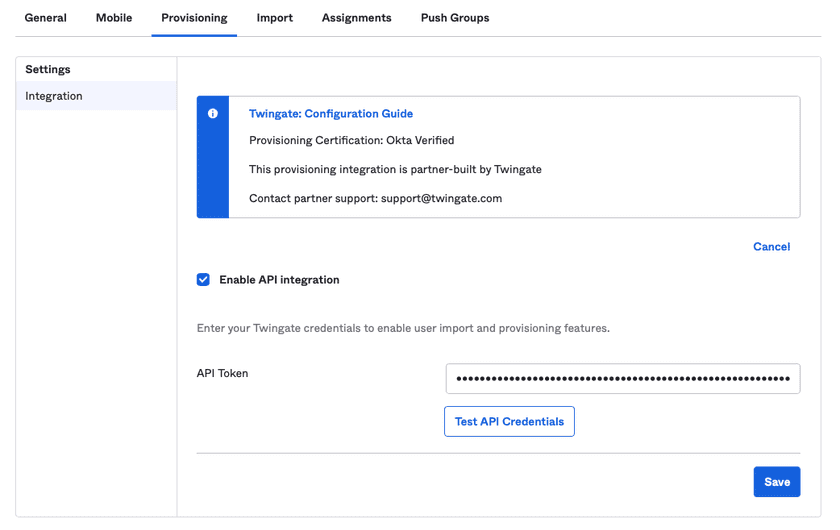
3. Enable API Integration and paste in the SCIM Token from Twingate
“Test API Credentials” will succeed if the token is entered correctly.
4. Under the Provisioning tab, enable all 3 options shown below, then click Save
Do not change SCIM Attribute Mappings.
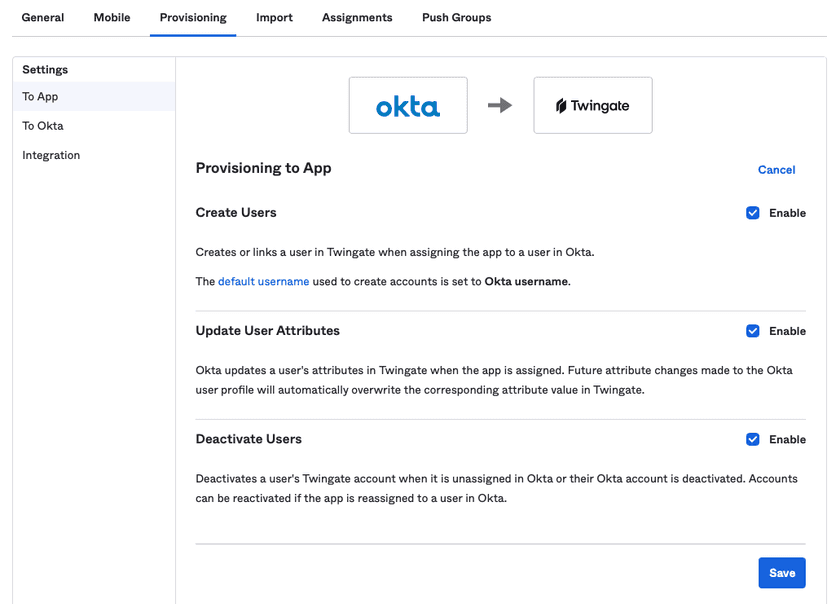
Users who were previously assigned to the Okta Twingate app will immediately be synced to Twingate.
Provision groups and group memberships
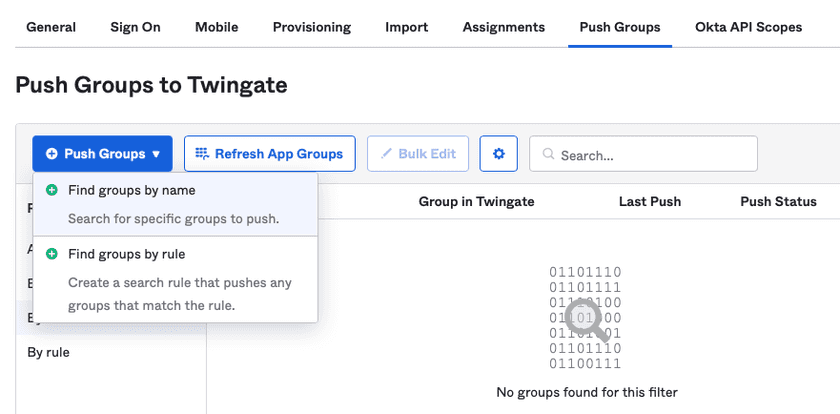
1. Under the Push Groups tab, click Push Groups button, then select Find groups by name
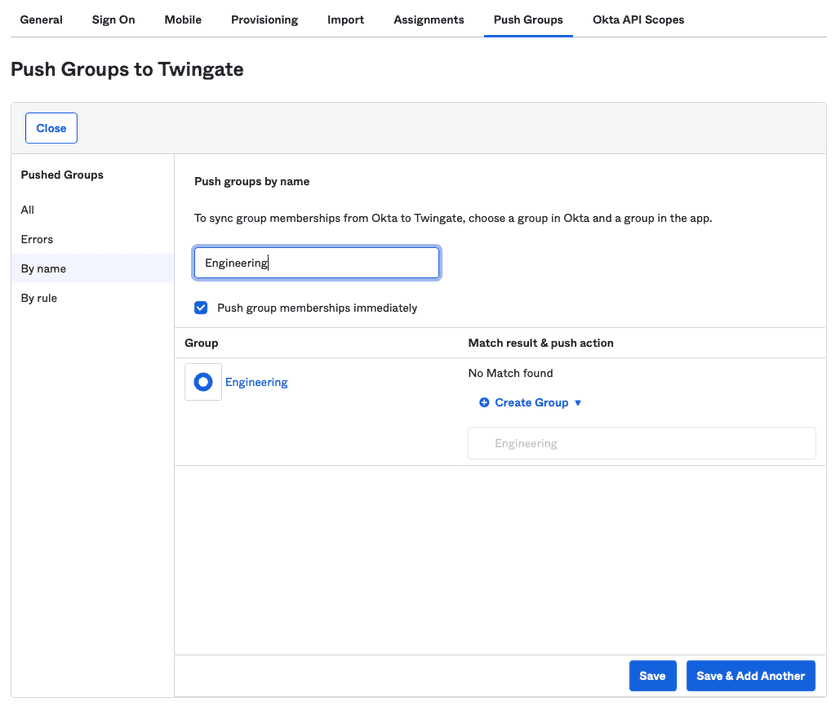
2. Search for the group name, select it and then click Save
Suggestion
Only users that have already been assigned to the app, and thus provisioned to Twingate, will be added to the Group membership correctly. To guarantee that all users from the Group will sync correctly, you should assign the group to the app as described in the Okta app configuration article.
Troubleshooting
I have groups that are set up to push to Twingate, but the users are not syncing
Check to make sure that you have correctly assigned the users or the group itself to the Twingate app in Okta. Even if you setup the group to push to Twingate, the group members will not sync unless they are assigned to the app.
I’ve removed a user from a group in Okta, but they are still showing up in Twingate
If you have assigned the user to the Twingate app in Okta, they will still show up in Twingate even if they are removed from the group. You will need to remove the user from the Twingate app in Okta to remove them from Twingate. Alternatively, if you assign only groups to the app in Okta, removing the user from the group will remove them from Twingate, as long as they aren’t members of any other push groups.
Last updated 1 year ago