How to Deploy a Connector on TrueNAS SCALE
Introduction
TrueNAS SCALE is a popular hyperconverged infrastructure (HCI) solution that supports running Linux containers and virtual machines. You can leverage to run a Twingate Connector.
You will need to have access to your Twingate Admin Console, as well as to your TrueNAS SCALE server, in order to generate the necessary tokens and to set up the container.
Peer-to-peer connections help you to provide a better experience for your users and to stay within the Fair Use Policy for bandwidth consumption. Learn how to support peer-to-peer connections.
Create a Connector and Generate Tokens
The first step is to create a Connector and copy some information about it to use in the creation of the TrueNAS application.
- Log in to your Twingate Admin Console
- On the Network tab, click the Remote Network on the right-hand side to which you want to deploy your TrueNAS-hosted Connector
- Just above the list of Connectors on the right-hand side of the page, click the Add button
On this screen you’ll see a number of options for deploying a new Connector. While the TrueNAS application is technically a Docker container, we will use the Linux method as we only need to copy the tokens in order to setup the application.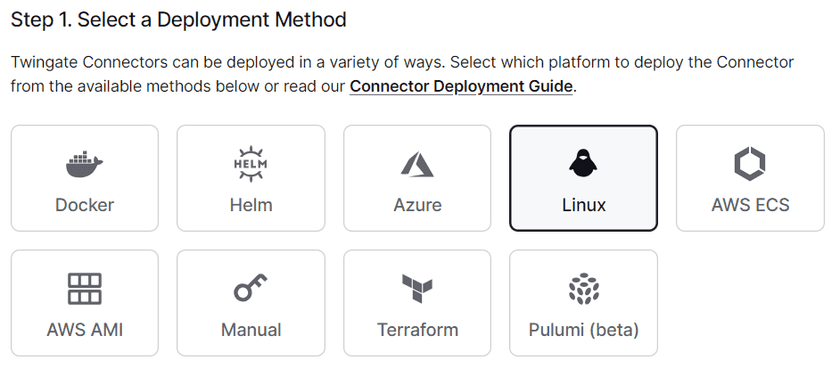
Linux Deployment Method - Scroll down and click the
Generate New Tokensbutton, and go through the authentication steps. Once the tokens are both generated, copy and paste them into Notepad (or whatever text editor you use).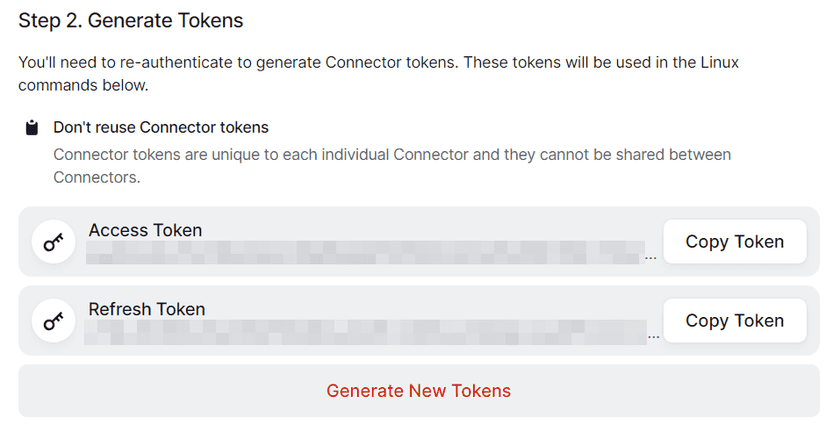
Generated Tokens


Make sure to note which token is the Access token and which one is the Refresh token - this is important. Also, you should take note of your Network name, which is the value you use to log in to Twingate in the Client (ie yournetworkname.twingate.com). This is used later on in the process.
You don’t need to do anything else on this page. Once you set up the application inside of TrueNAS SCALE with the correct environment variables (including the tokens), it will refresh automatically to show that the Connector is up and running.
Creating the TrueNAS SCALE Application
Standard Setup
When you log in to the TrueNAS SCALE web UI and click on the Apps option on the left-hand menu, the screen will look something like this:

Click the Launch Docker Image button in the top-right corner of the page. In the modal window that comes up you’ll need to fill out the following fields:
Application Name= Something to describe the application, such astwingate-connectorImage repository=twingate/connectorImage tag=latest
Leave the other fields set to their defaults. It will look something like this:

Next, scroll down until you see the section Container Environment Variables and click the Add button four times. This is where you need to enter the two tokens you copied out of the Twingate Admin Console Connector page, as well as some additional information.
For each Environment Variable there’s a name and a value. Fill them out as follows:
Name: TWINGATE_NETWORKValue: <your Twingate network name>
Name: TWINGATE_ACCESS_TOKENValue: <the access token you copied out of the Admin Console>
Name: TWINGATE_REFRESH_TOKENValue: <the refresh token you copied out of the Admin Console>
Name: TWINGATE_LABEL_HOSTNAMEValue: <some descriptive name>
It will look something like this:

Additional Options
There are a few additional options you can choose to add at this point.
Custom DNS Server
If you don’t want the Connector container to inherit its DNS settings from your TrueNAS SCALE host and instead want to use a custom DNS server, add another Environment Variable named TWINGATE_DNS and set the value to that DNS server’s IP address, like this:

Local Connection Logging
If you want detailed logging at the Connector level (which you can then pull into a SIEM), add another Environment Variable named TWINGATE_LOG_ANALYTICS and set it to v2. This will enable additional local logging which will be output to stdout in a single-line JSON format. See this guide for more details.

Local Network Visibility
If you are in a situation where there will be Clients running on the same local network that this Connector will be on, then you can set this option in order to make the container use the host network driver. Scroll down to the Networking section of the configuration and set the Host Interface to the one used by the host (usually there is only one option), and you can choose if you want to set IPAM Type to DHCP or Static.

Launching the Application
For the purposes of this example, you don’t need to set any other specific configuration options for the application. Scroll down to the very bottom of the configuration window and click the Save button, which will pull the latest image of the Twingate Connector and create the application.
If it’s successful, you should see it in the application window, like this:

It should have a green Active tag on it, and if you go back to your Twingate Admin Console, it should show that the Connector is now active and connected.
Keeping Connectors Updated
Twingate Connectors will not update automatically. You will need to build them into your existing update strategy and stagger updates across multiple Connectors on the same Remote Network in order to avoid any interruption.
Updating a connector inside of a TrueNAS SCALE application only requires you to select the application and use the Upgrade option.
Troubleshooting Pings
If you want to support ICMP traffic through this Connector, then you need to add a sysctl parameter to the host, which the container will inherit.
- Click
System Settings - Click
Advanced - Scroll down to
Sysctland click theAddbutton - In the
Variablebox enternet.ipv4.ping_group_range - In the
Valuebox enter0 2147483647 - Make sure the
Enabledbox is checked and then click theSavebutton
It should look like this:

You may need to reboot your TrueNAS SCALE server for this change to take effect.
Last updated 3 months ago