Best Practices for Configuring Private DNS with Twingate
While it is not a requirement, Twingate recommends that your network be configured so that Resources are accessible via private DNS exclusively because it offers several advantages over using IP addresses or public DNS:
- Public DNS entries for private Resources (on the private network) creates a potential leak of information that could be leveraged by attackers and is unnecessary.
- Accessing Resources by IP address can be error-prone and not user-friendly for end users.
- It is possible to encounter IP overlap (e.g. 10.0.1.34 being used for 2 separate Resources on 2 separate Networks). Using DNS names instead of IP addresses removes the ambiguity and allows you to connect to both Resources, even if they have been assigned the same private IP address.
Setup and Structure
Setting up a private DNS zone is easier now than it's ever been!
Services like AWS Route 53 and Azure DNS eliminate the need to deploy a dedicated DNS server yourself.
For on premises networks, you will usually want to deploy a DNS server on a host on the internal network.
Thinking about your DNS structure before deploying will pay off in the end.
For example, it can be very useful to define DNS zones that map to permissions or roles you’d like to configure in Twingate.
To do this, let’s define the following DNS zone: .engineering.yourcompany.com with all engineering systems under it:
![host1, host2 and host3 are all part of the DNS zone and can be resolved at host[n].engineering.yourcompany.com](/docs-assets/bcec235/docs/static/f3522972c47d8d56fdbdac4fb279e1f8/5e02b/57796d8-Screen_Shot_2022-06-13_at_12.33.18_PM.png)
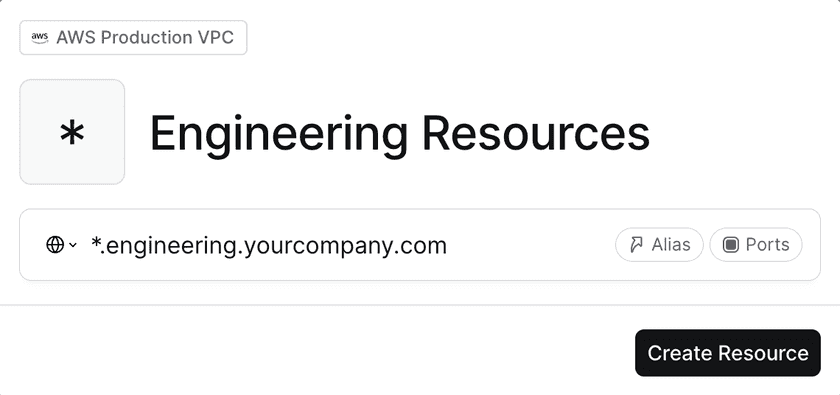
With this in mind, you can simply create a single Twingate Resource pointing to the DNS Zone:

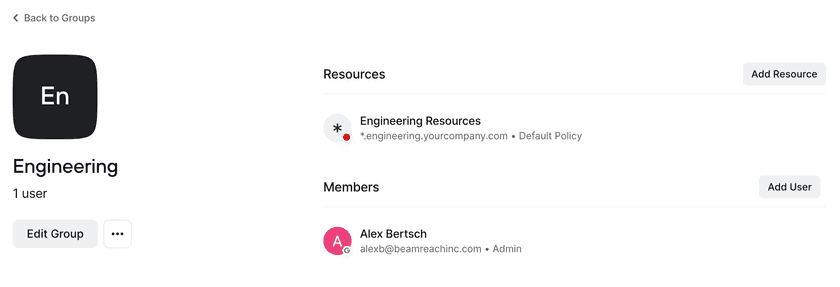
And we can now map this Resource to a Twingate Group for Engineering:

Great! With this setup, any new systems added underneath .engineering.yourcompany.com will automatically
be accessible to the engineering team, saving you from needing to configure these Resources manually.
What You Need To Know About Resource and Connector Placement
Who's In Charge of Domain Name Resolution?
In Twingate, the resolution of FQDNs is done by the Connector (in the same way any host on the same subnet as the Connector would).
If you want to confirm that a Connector will be able to resolve hostX.Y.mycompany.com, simply log into the Connector host and run the following command:
nslookup hostX.Y.mycompany.com
Alternatively, there is an option to use a custom DNS server for the Connector, but it can make configuration a bit more difficult, therefore we recommend leveraging whatever DNS servers are configured on the Connector host.
Last updated 2 years ago